
Take one feature all the way through Firehose: plan it, build it in its own worktree, review it two ways, test it, and hand it off as a pull request. You can start from an idea and shape the plan inside Firehose, or start from a GitHub issue.
This article describes Firehose 1.2.3. It links to the tool guides for detail; read Find your way around Firehose first if the layout is new to you.
The flow at a glance
Section titled “The flow at a glance”- Start the work. Either plan it yourself in a new session, or create a session from a GitHub issue.
- Clarify it. Use Ask me questions so the agent asks the questions that change the design before it writes code.
- Shape the plan. Have the agent write the plan to a Markdown file, then improve it with Refine Plan until it is right.
- Build it. Tell the agent to implement the plan, and answer its questions and approvals as it works.
- Review it with Smart Review. Get findings from a reviewing agent, choose what to do with each, and send them back with Act.
- Read it yourself with X-Ray. Walk the changed files in dependency order and look for untested code.
- Test it. Run a final testing round: a test-focused review, the test suite, and a hands-on check in the browser.
- Hand it off. Commit, open a pull request, and close the session.
Steps 2 to 8 are the same whichever way you start.
Before you begin
Section titled “Before you begin”- Firehose is installed, activated, and connected, and an agent tool such as Claude Code or Codex is signed in.
- Your project is in a configured project directory and has at least one commit. See Prepare a project for an agent.
- To start from GitHub issues: the GitHub CLI (
gh) is installed and signed in on the Firehose computer, and the project’soriginremote is on GitHub.
The examples use a fictional hello-firehose project and a feature called “Greet blank names as guest”. Replace them with your own project and feature.
Start from an idea: plan inside Firehose
Section titled “Start from an idea: plan inside Firehose”Use this route when the feature is not written down yet, or when you want to agree on the plan before any code changes.
1. Start a session in its own worktree
Section titled “1. Start a session in its own worktree”Select New session (the + at the top of the Sessions sidebar), pick the project, select Next: Choose a workspace, and choose New worktree. Name it after the feature, such as greet-blank-names, and start the session. A worktree keeps the feature’s files and branch separate from everything else; see Choose a workspace.
Smart Review only runs on a branch other than main or master, so a new worktree also makes the later review steps available.
2. Clarify the feature with Ask me questions
Section titled “2. Clarify the feature with Ask me questions”Before asking for a plan, let the agent find the decisions you have not made yet.
- On the prompt bar above the message box, select tools, then Ask me questions.
- In Ask me clarifying questions, describe the feature, for example:
Greet blank names as guest: fallback text, trimming, tests. - Choose an Interview depth: Quick (3 questions), Standard (5), or Thorough (10). Use Thorough for a feature with many open decisions.
- Select Ask questions.
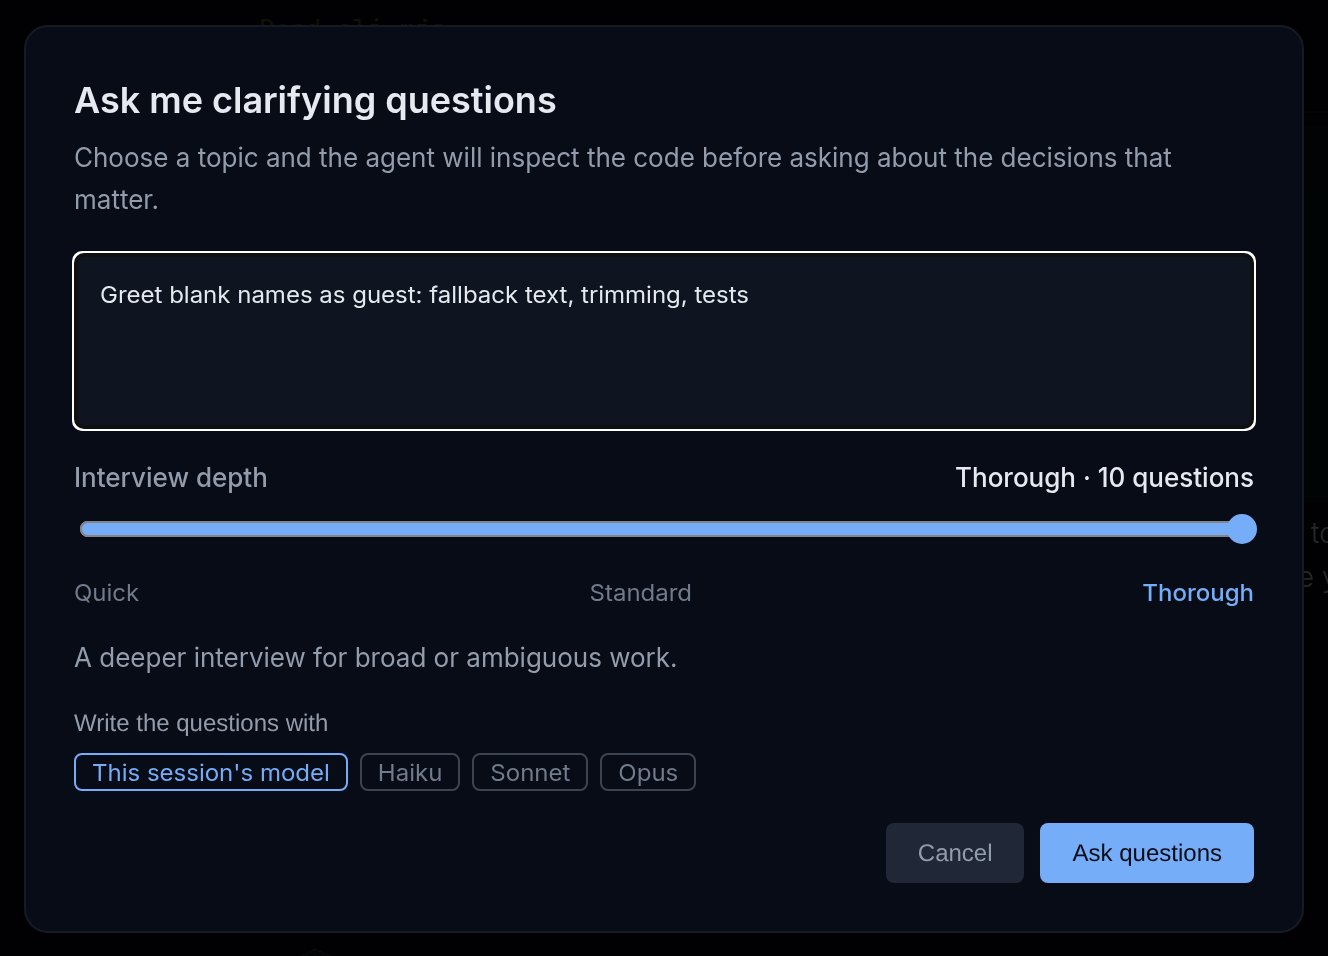
The agent reads the project first and writes only questions whose answers would change the work. It does not edit files while it prepares them.
When the questions are ready, the Ask me tab at the top of the session shows Ask me (N) and the set says Your turn. Answer each question. A question marks a recommended option only when the agent has a real reason, and many also have a field for your own words.
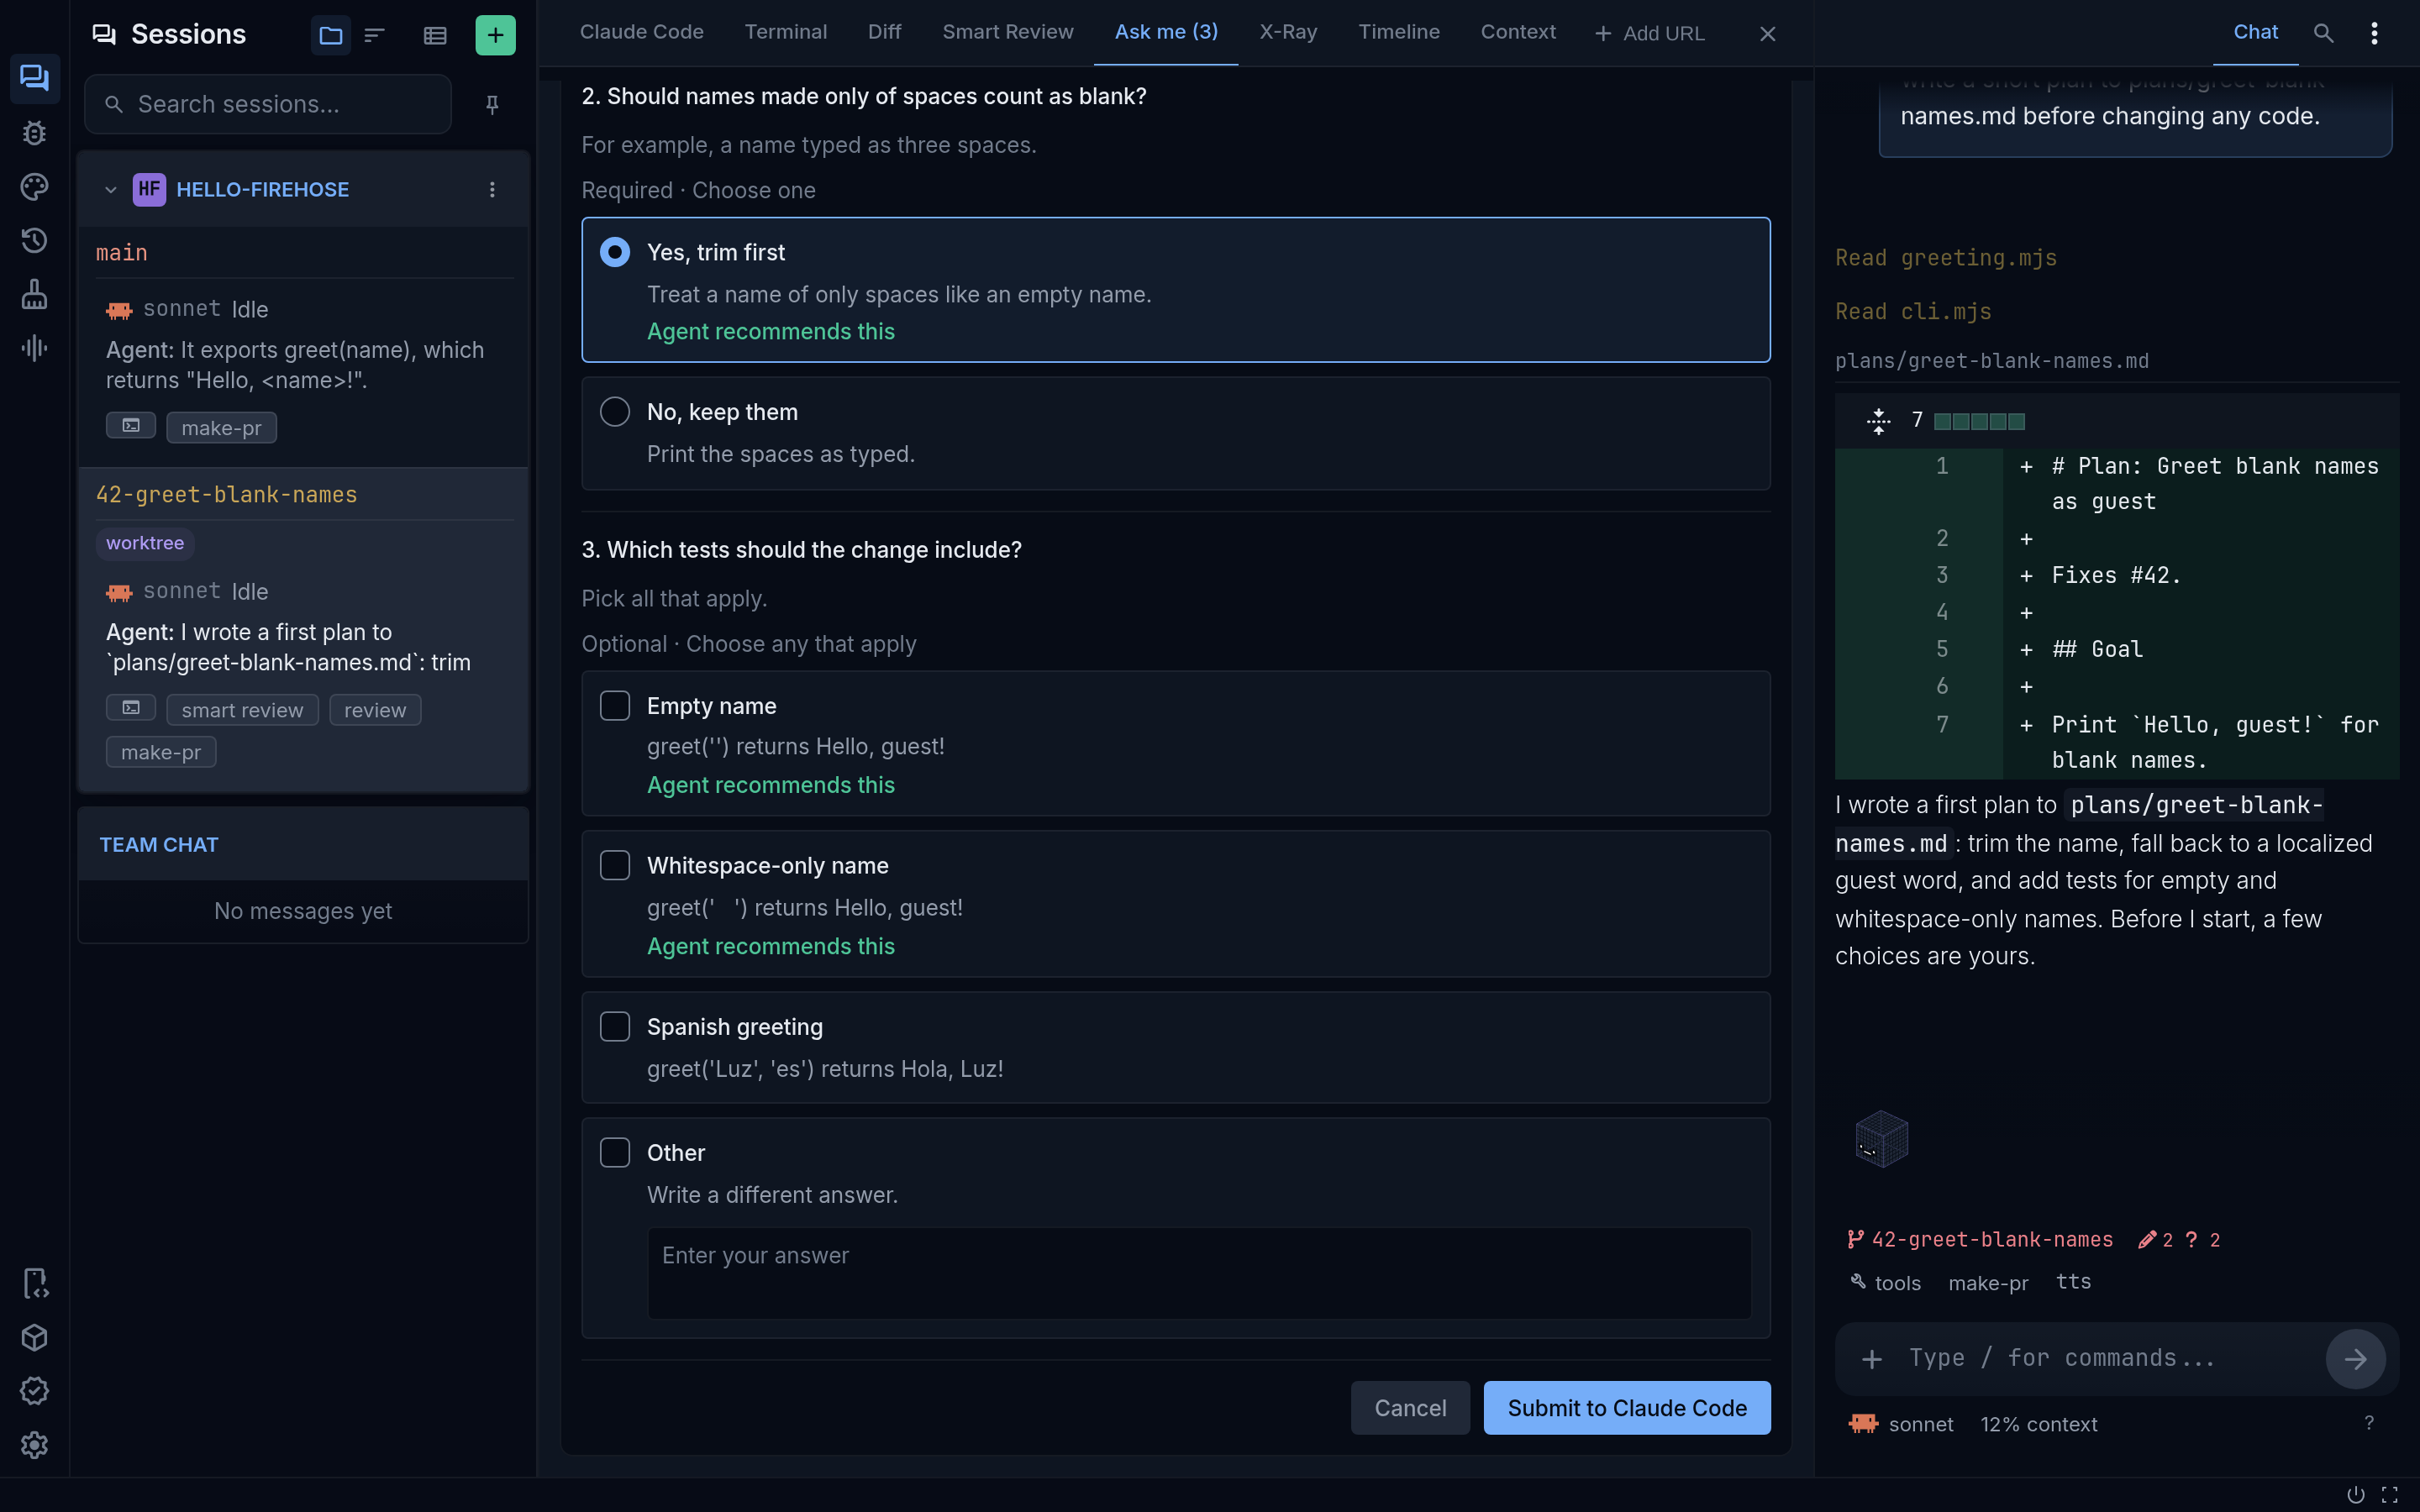
Select Submit to and the provider’s name, such as Submit to Claude Code. Submitting tells the agent to summarize what it understood and start the work immediately. To get a plan first rather than code, say so in your answers, for example: “Write a plan to plans/greet-blank-names.md and stop. Do not change any code yet.” See Ask clarifying questions for the full tool.
3. Have the agent write the plan to a file
Section titled “3. Have the agent write the plan to a file”If you skipped the questions, ask for the plan directly in the message box:
Write a plan for greeting blank names as guest to plans/greet-blank-names.md.Cover the goal, the steps, the files you will change, and the tests you will add.Do not change any code yet.A plan in a file is easy to read, edit, refine, and keep. Open it from the agent’s reply or with Ctrl+P (Quick Open) and its name.
4. Refine the plan until it is right
Section titled “4. Refine the plan until it is right”With the plan open in the file viewer, select Writing in the viewer’s header (on a phone, the writing-tools icon), then Refine Plan.
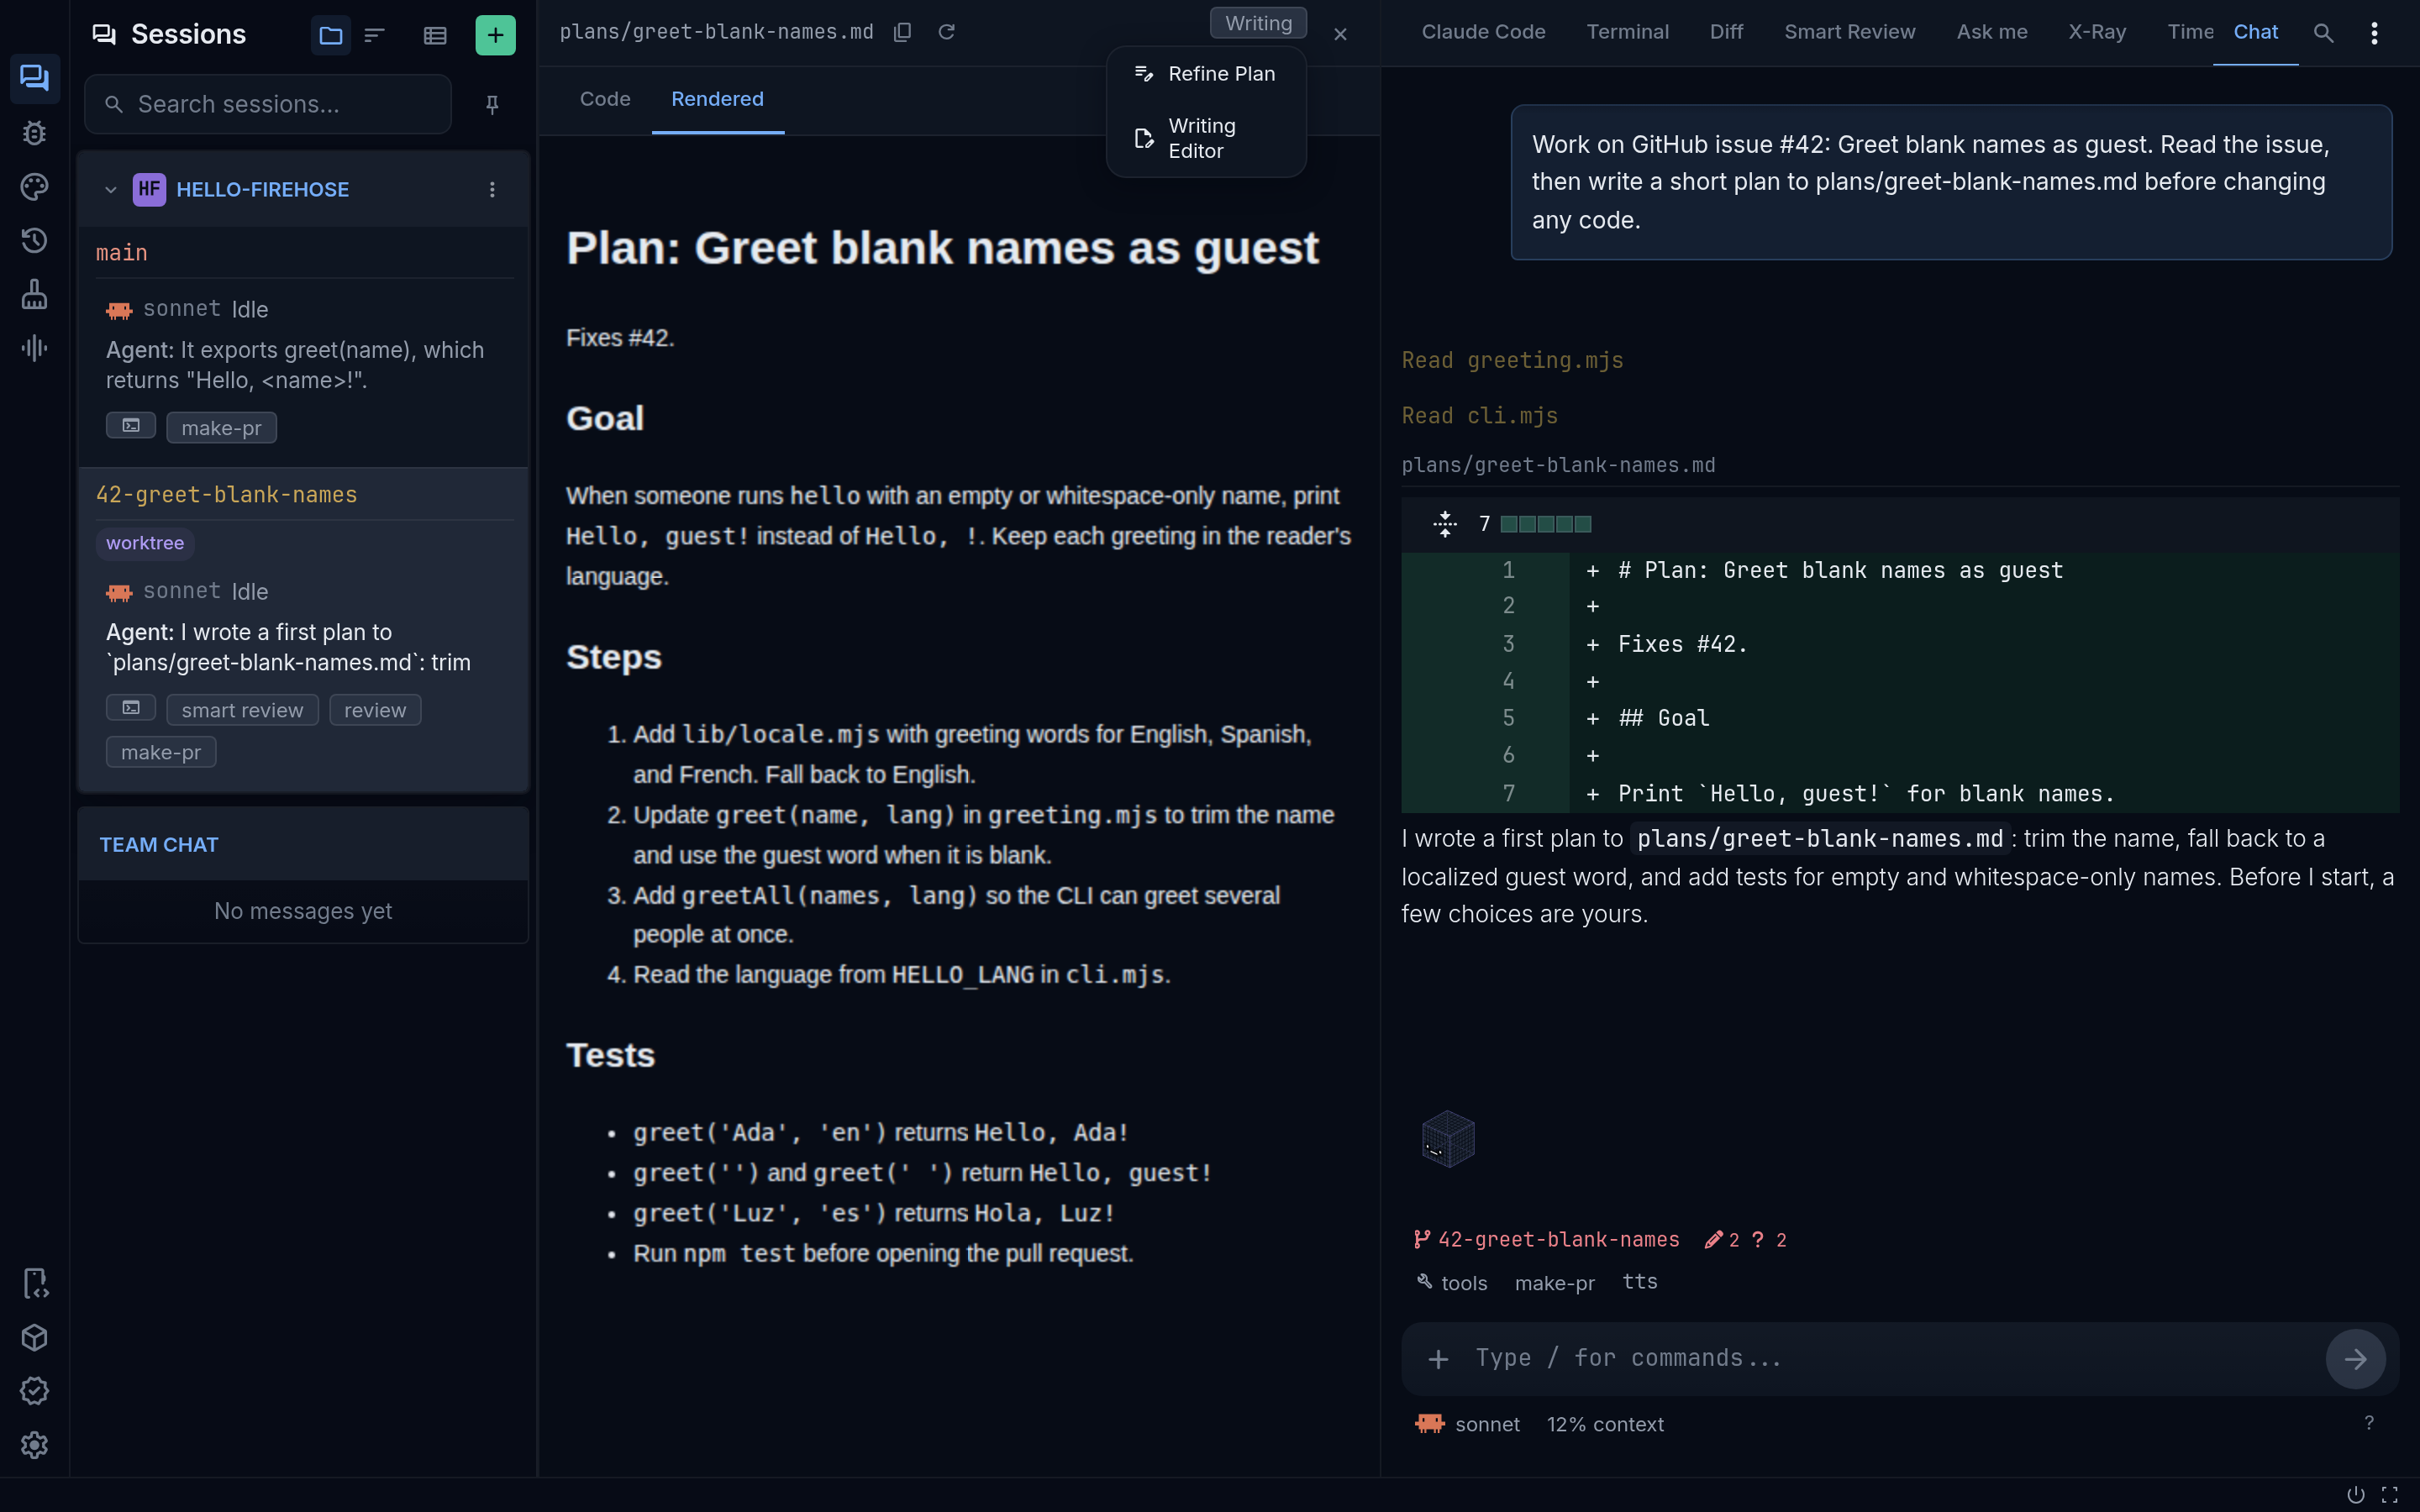
Refine Plan sends the plan to the agent with instructions to check it against the actual code: fix stale paths and vague steps, and keep the summary consistent with the details. It does not change any code and does not start the work. The agent reports what it changed, so you can run Refine Plan again and each pass builds on the last.
Between passes, edit the file yourself or tell the agent what to change in the message box, for example “Use the existing formatName helper instead of adding a new one.” Writing Editor, in the same menu, helps with the prose itself.
Refine Plan needs a Markdown file and a provider that supports writing tools, such as Claude Code.
If the agent proposes a plan in plan mode
Section titled “If the agent proposes a plan in plan mode”Claude Code can also present a plan in its own plan mode. When it does, a Plan review card appears in the conversation, with the plan in the messages above it.
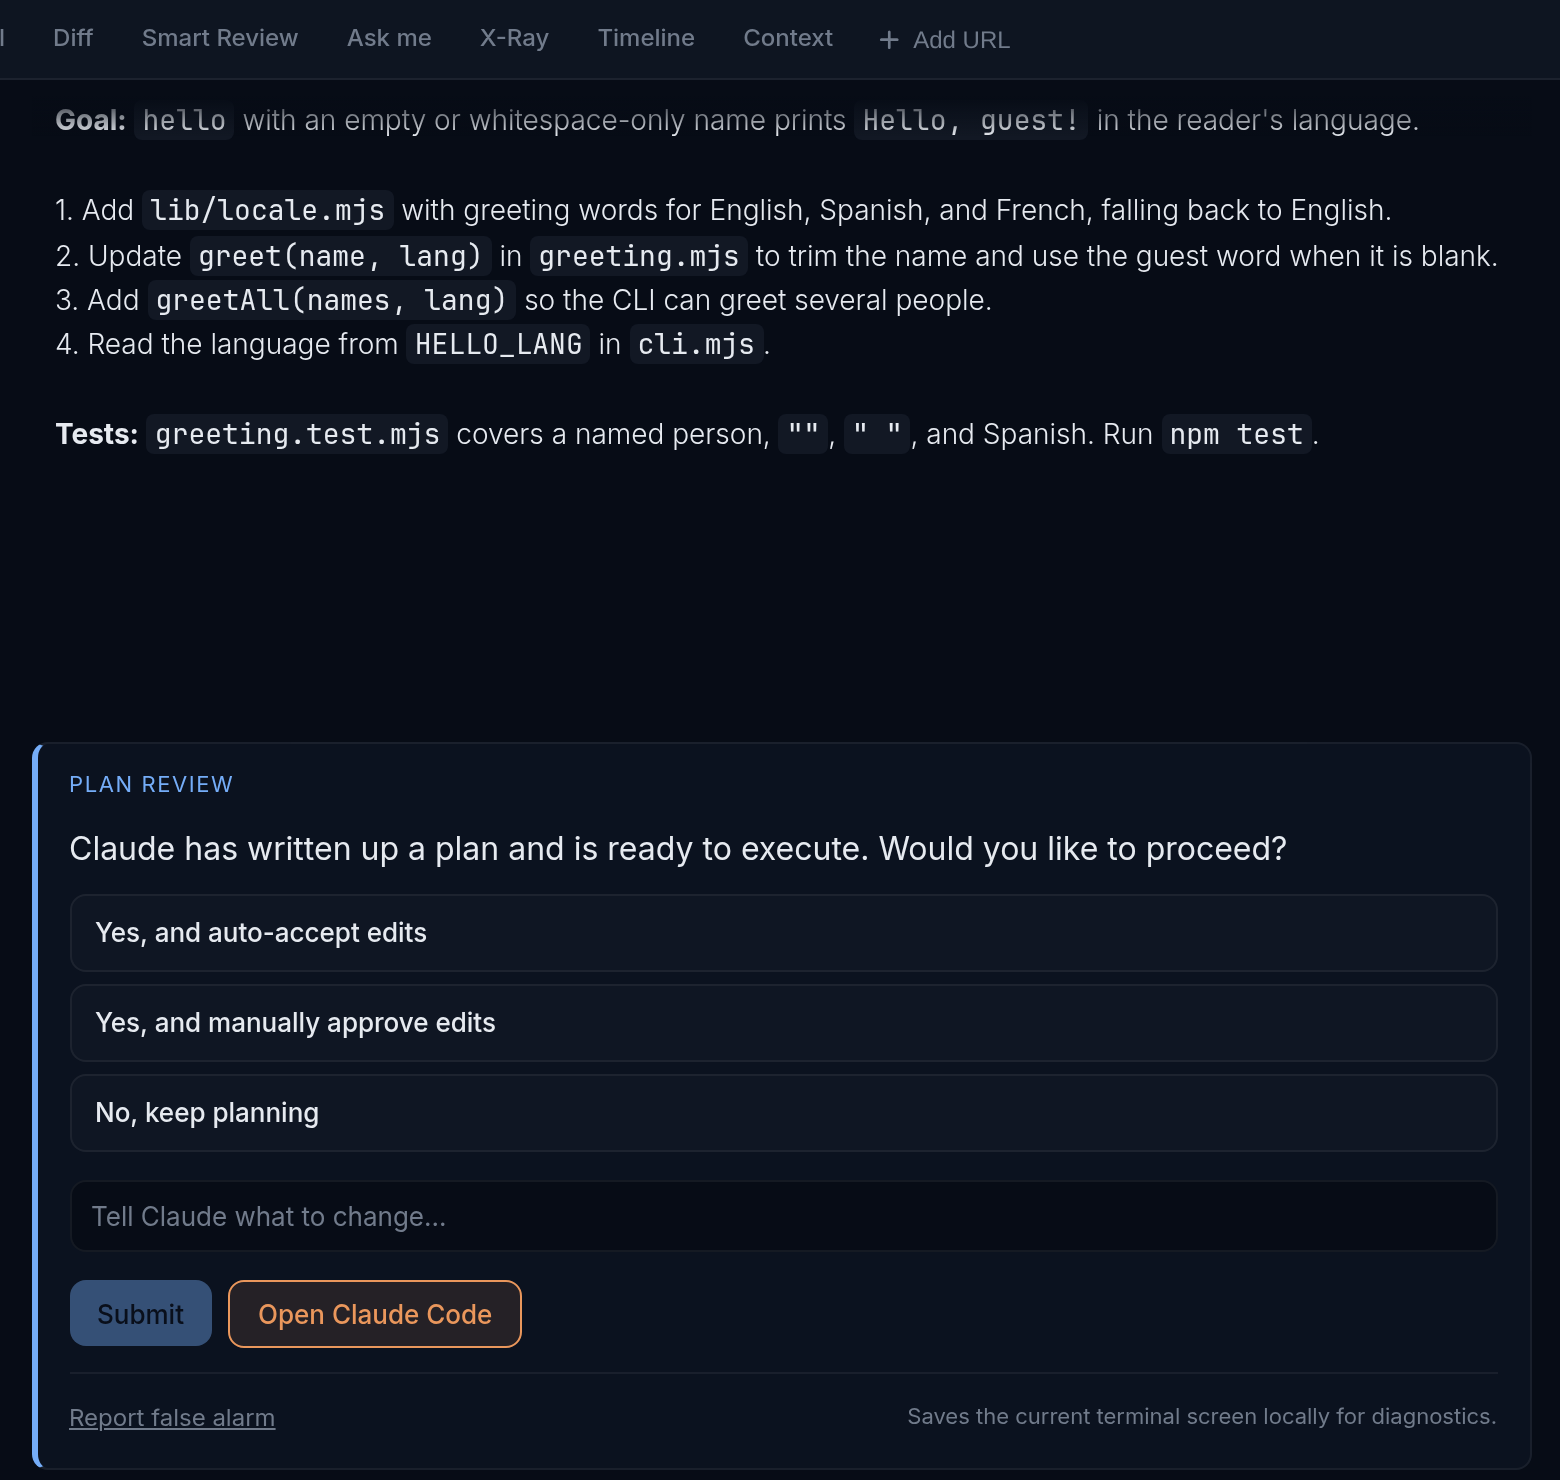
- Select one of the card’s options to approve the plan and let Claude continue.
- To ask for changes instead, type them in Tell Claude what to change… and select Submit.
- If the card says the plan can only be approved in the terminal, open the terminal it offers and answer there.
Firehose does not have its own switch that puts Claude into plan mode. Antigravity has one: when you start an Antigravity session, its mode can be set to Plan only, which prevents edits.
5. Build from the plan
Section titled “5. Build from the plan”When the plan is right, ask for the work:
Implement plans/greet-blank-names.md. Add the tests it lists and run them.Commit when the tests pass. Do not push.Follow the work in the conversation and answer what it asks:
- Questions and choices appear in the conversation; answer them in the message box. See Chat and follow-ups.
- Approval requests appear as cards above the message box. See Choose agent permissions.
- To stop the agent, press Escape in the message box, or select the red Stop (interrupt) button above it.
For long work, tools → Auto prompt can re-send a prompt such as /keep-going on a schedule: you set Interval minutes (30 by default) and Runs (8 by default). It is available for Claude Code and Codex.
Start from a GitHub issue
Section titled “Start from a GitHub issue”Use this route when the feature is already a GitHub issue. Firehose creates the worktree and starts the agent for you.
1. Find the issue
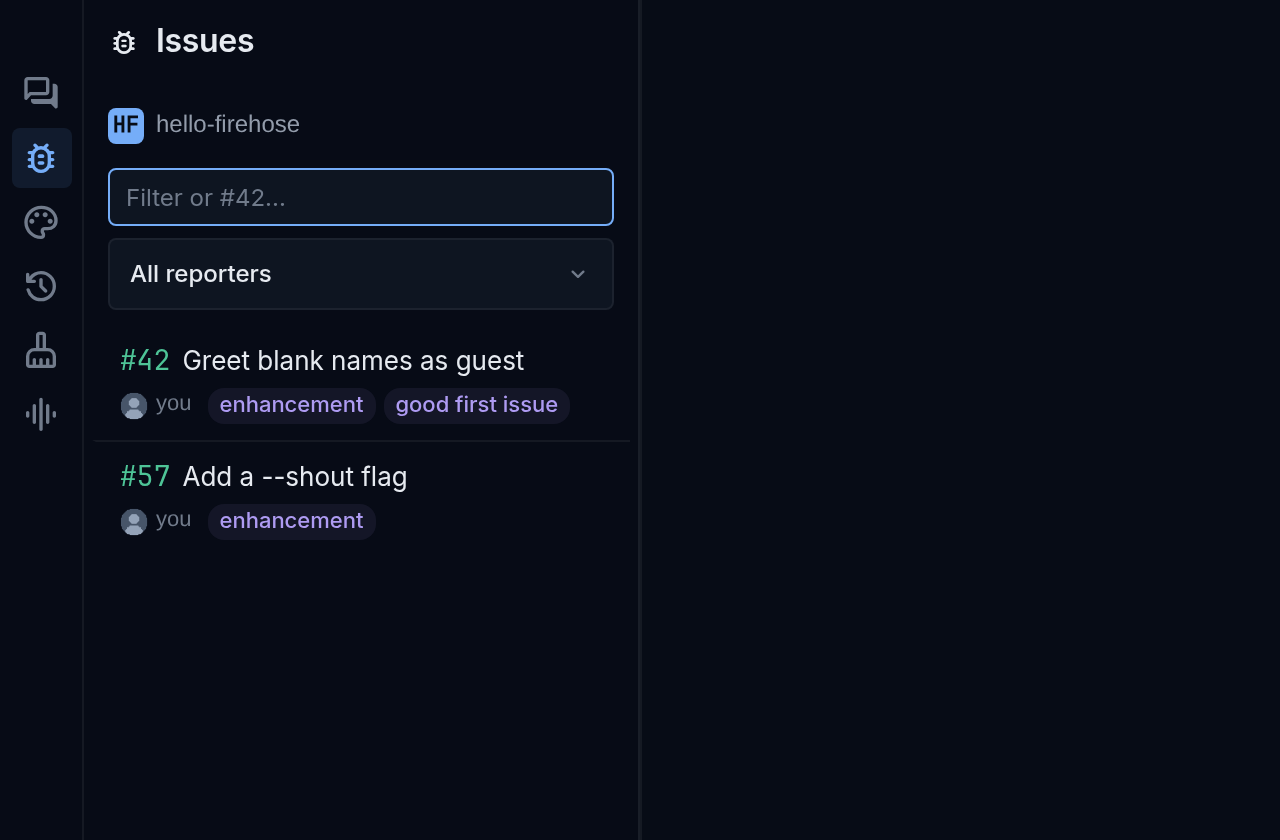
Section titled “1. Find the issue”Select the bug icon labeled GitHub Issues on the icon rail on the far left. Choose the project, then filter the list by title, number, label, or author, or type #42 to jump to one issue. Firehose lists open issues. An issue that already has a session shows Working.
2. Create a session to fix it
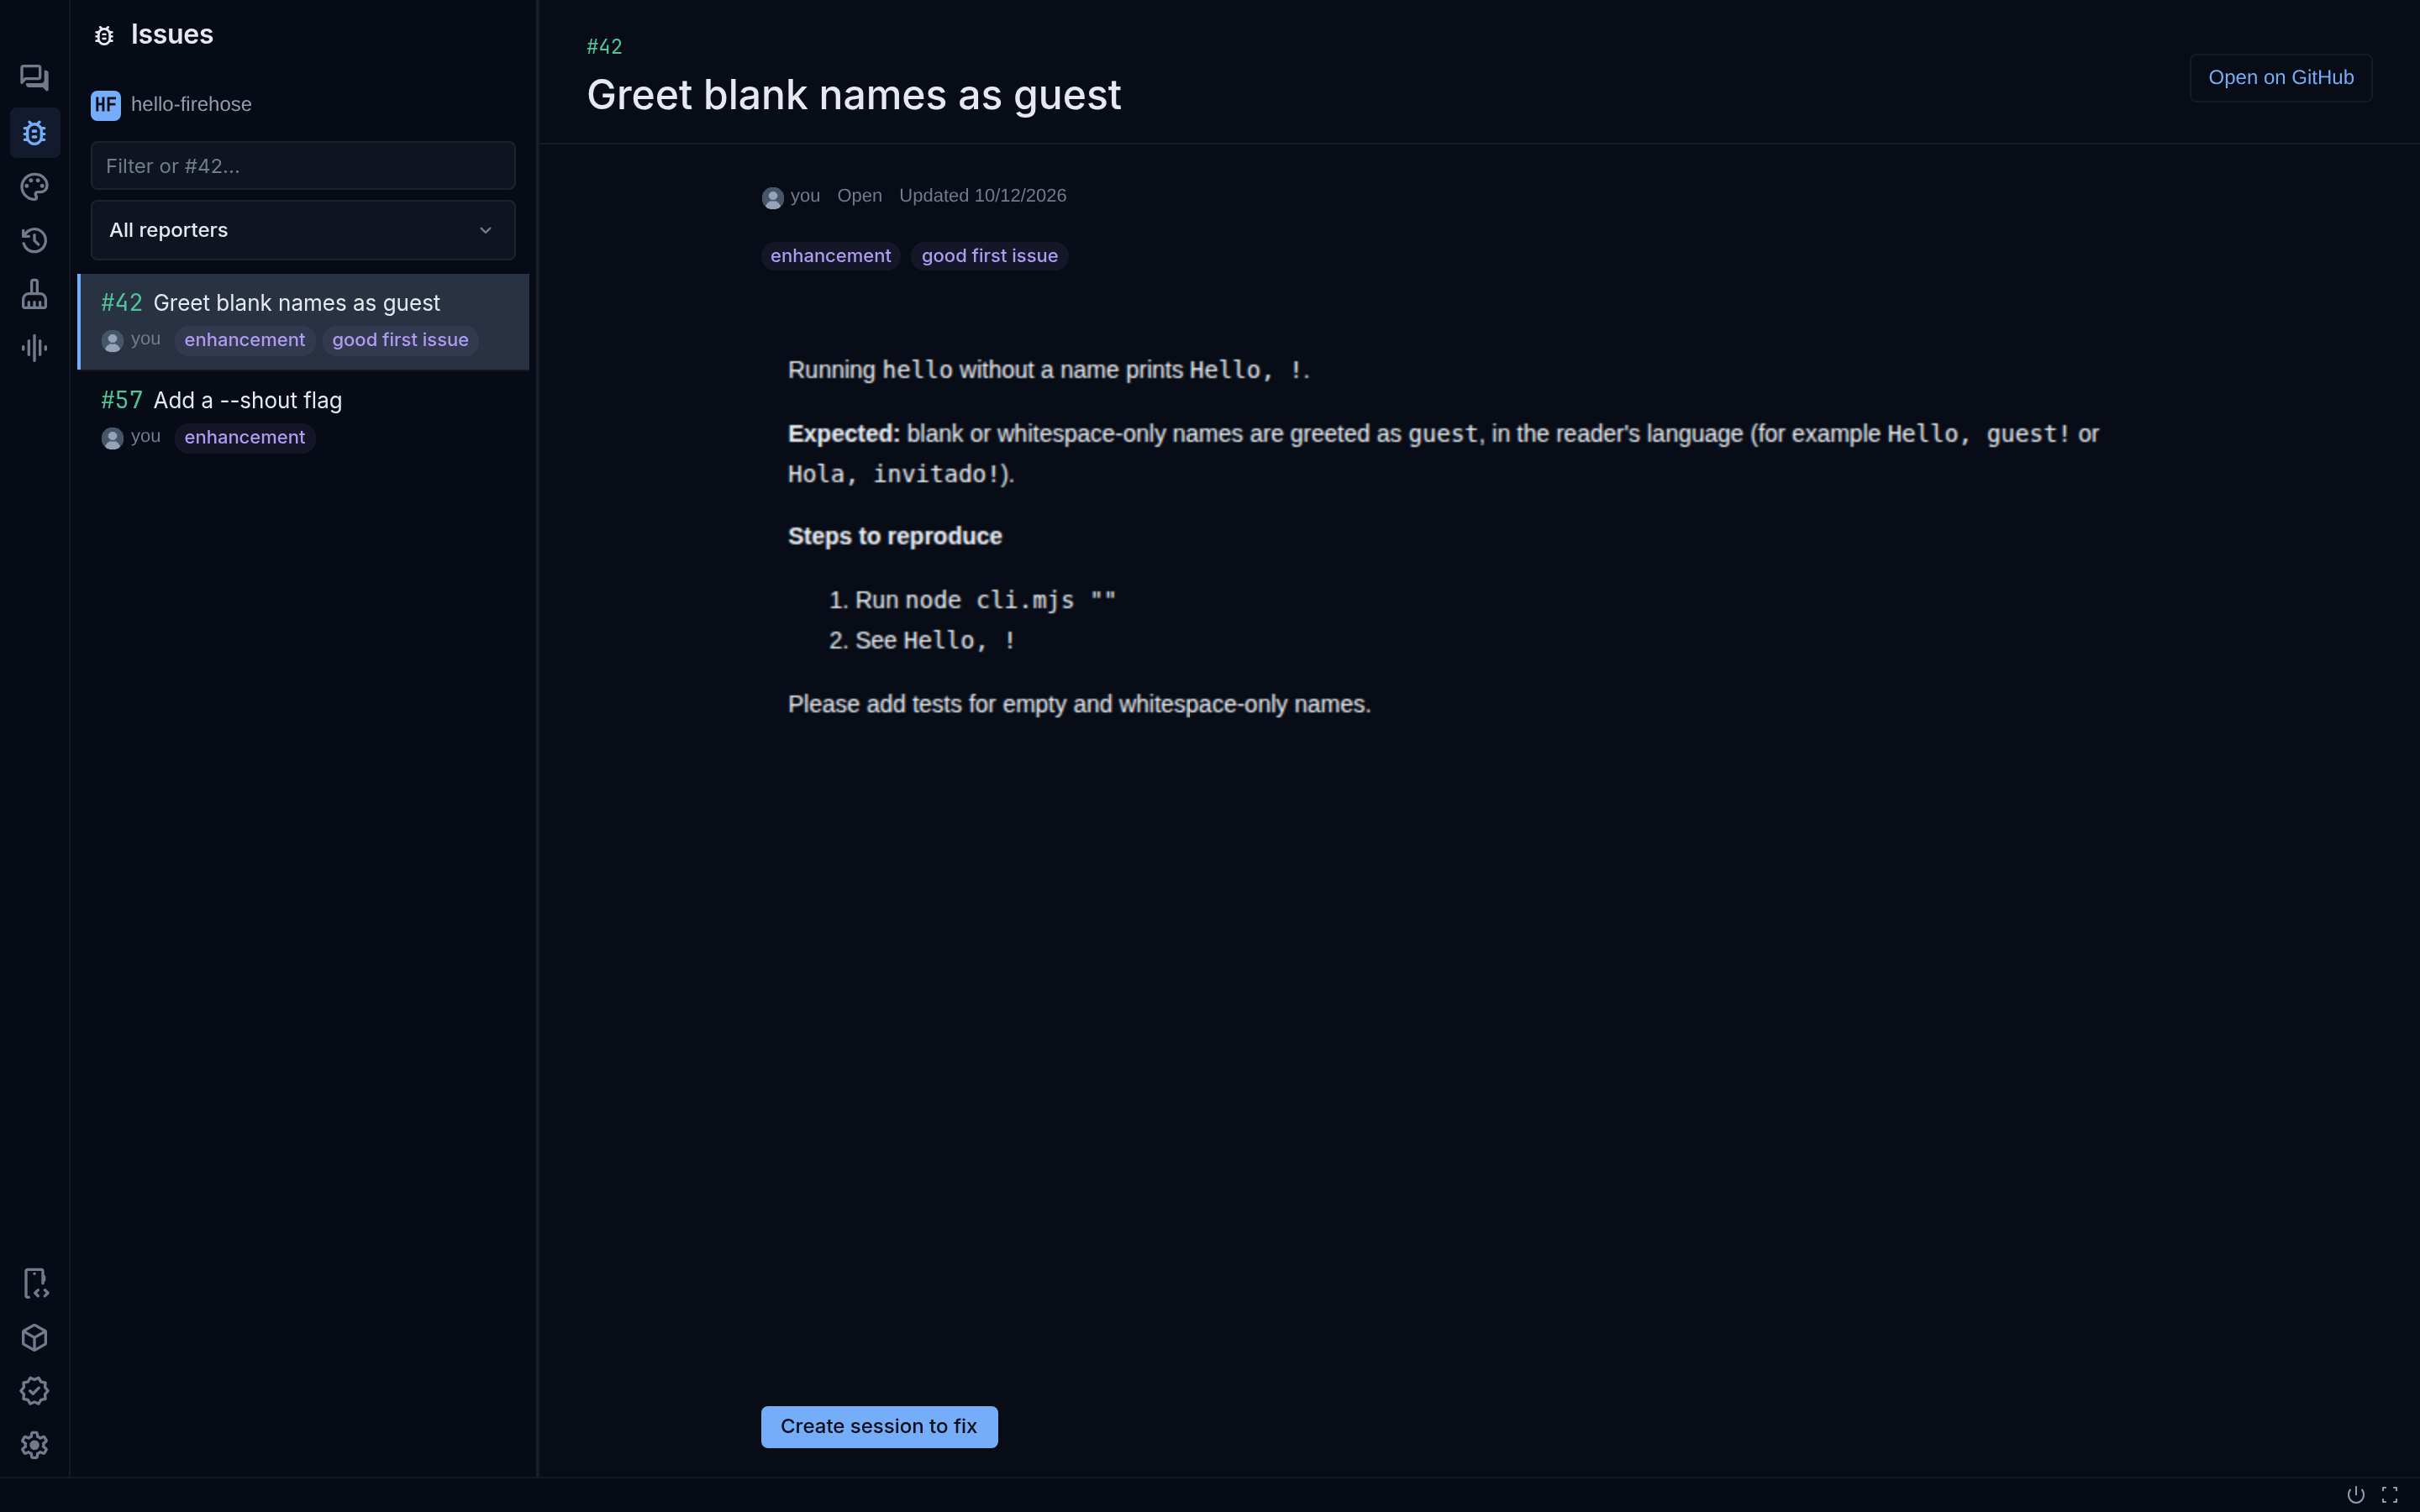
Section titled “2. Create a session to fix it”Select the issue to open its details: labels, body, and Open on GitHub. Then select Create session to fix.
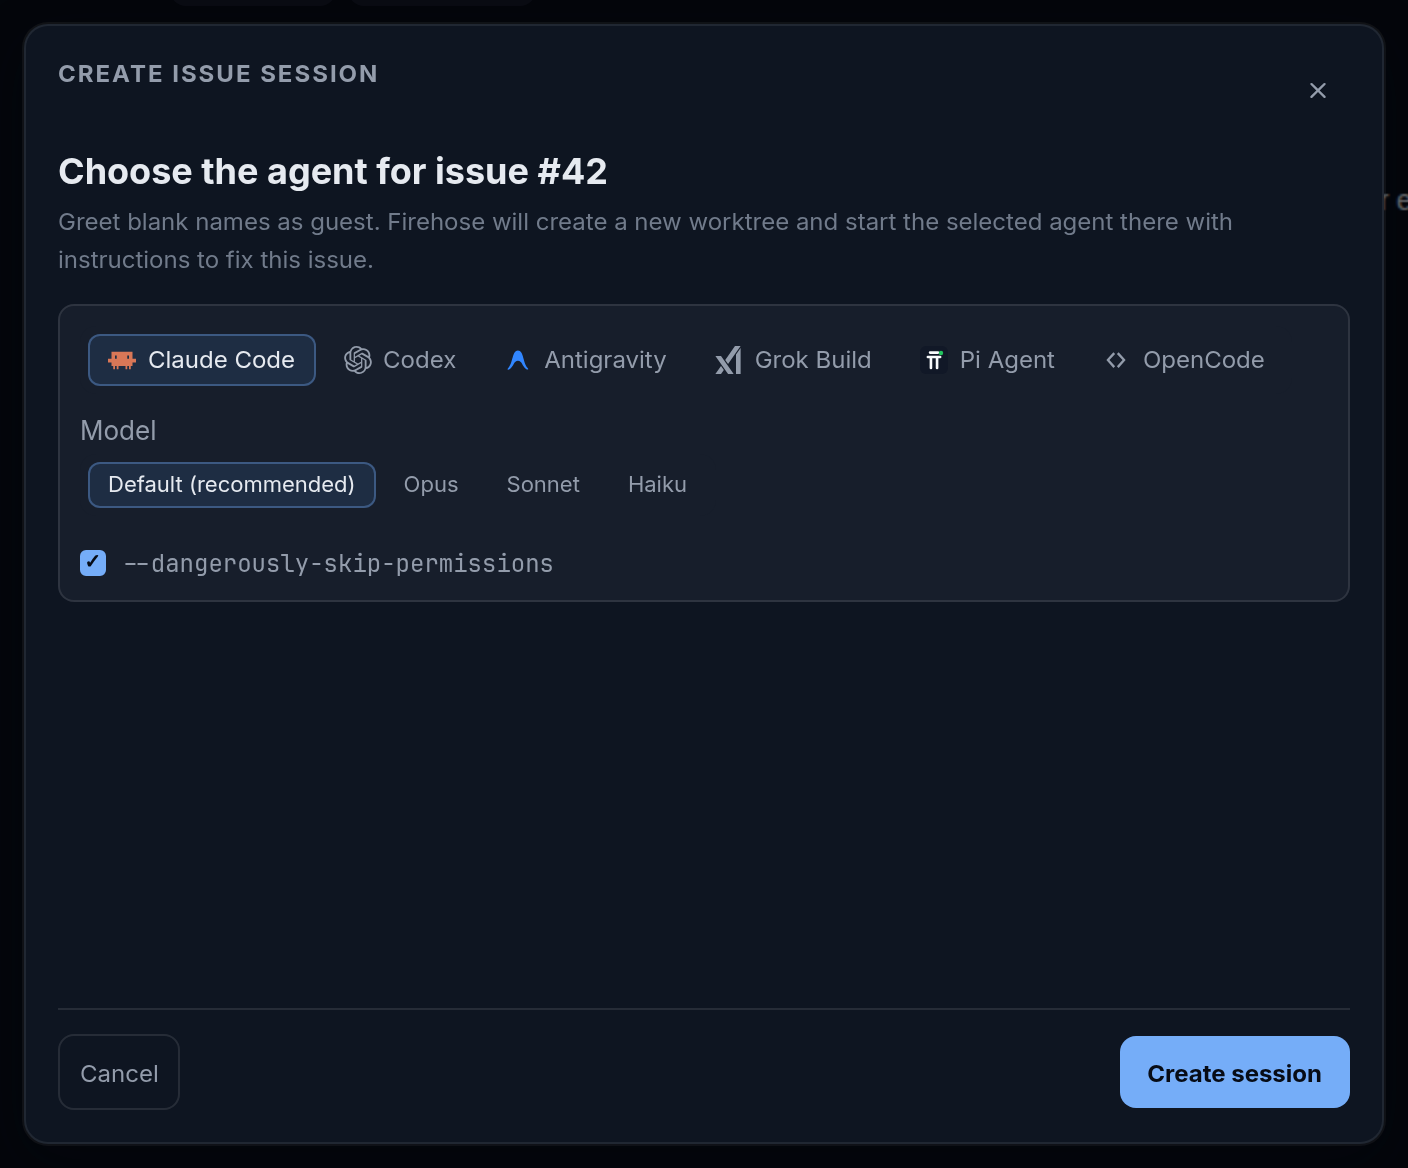
In Choose the agent for issue #42, pick the provider, model, and permission settings, then select Create session. Firehose creates a new worktree on a branch that starts with the issue number, such as 42-greet-blank-names, and starts the agent there.
3. Know what the agent does next
Section titled “3. Know what the agent does next”The agent starts at once, and what it is told depends on the provider:
- Claude Code writes its own
issue-plan.mdin the worktree and follows it: it treats the issue as a hypothesis, reproduces the problem, makes the change, runs the checks, commits with the issue number, pushes, and opens a pull request that saysFixes #42. You do not get to review that plan before work starts. - Other providers investigate, make the change, run the checks, and stop for your review. They do not open a pull request.
If the issue needs design decisions, stop the agent as soon as it starts (Escape in the message box), then continue with Clarify the feature and the plan steps in the same session. The worktree and branch are already set up.
If the session is created but the first message is not delivered, the issue shows a message such as Session created, but kickoff delivery failed. Select View session to check it, or Retry kickoff.
Review it with Smart Review
Section titled “Review it with Smart Review”Smart Review asks a reviewing agent to read the whole change and report findings you can act on. It runs on the session’s branch, so it is available on any branch other than main or master.
1. Start a review
Section titled “1. Start a review”- On the prompt bar, select tools, then Smart review, then run review.
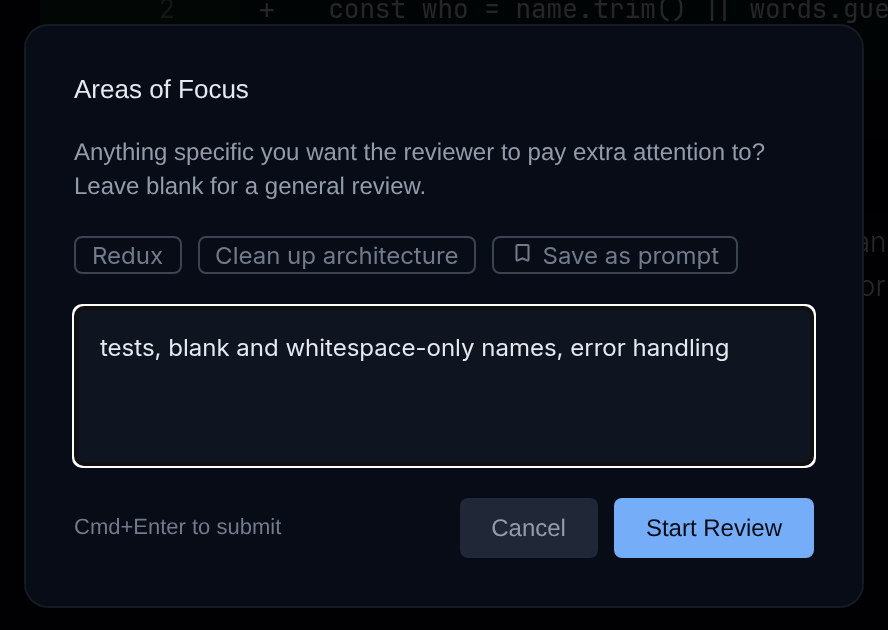
- In Areas of Focus, describe what to look at hardest, such as
tests, blank and whitespace-only names, error handling, or leave it blank for a general review. Save as prompt keeps a focus you reuse; manage saved ones in Settings → Smart Review prompts. - Select Start Review.
The reviewer compares the branch with its base, reads the changed files in full, traces their callers, and reports each finding with a concrete scenario. A review usually has 5 to 15 findings. The tools menu shows the review’s progress, such as Smart review · reviewing (3).
2. Triage the findings
Section titled “2. Triage the findings”Open the Smart Review tab at the top of the session. Filter by severity with critical, warning, and nit. Select a finding to read its What, In practice, Impact, and Fix sections, then choose what should happen to it:
| Choice | Use it when |
|---|---|
| Fix | The finding is right and the code should change. |
| Explain | You want the agent to explain the code or the finding first. |
| Refine or Rewrite | The finding is unclear and should be sharpened or restated. |
| Issue | It is worth doing later: the agent opens a GitHub issue labeled from-review. |
| Won’t fix | You have decided to leave it. |
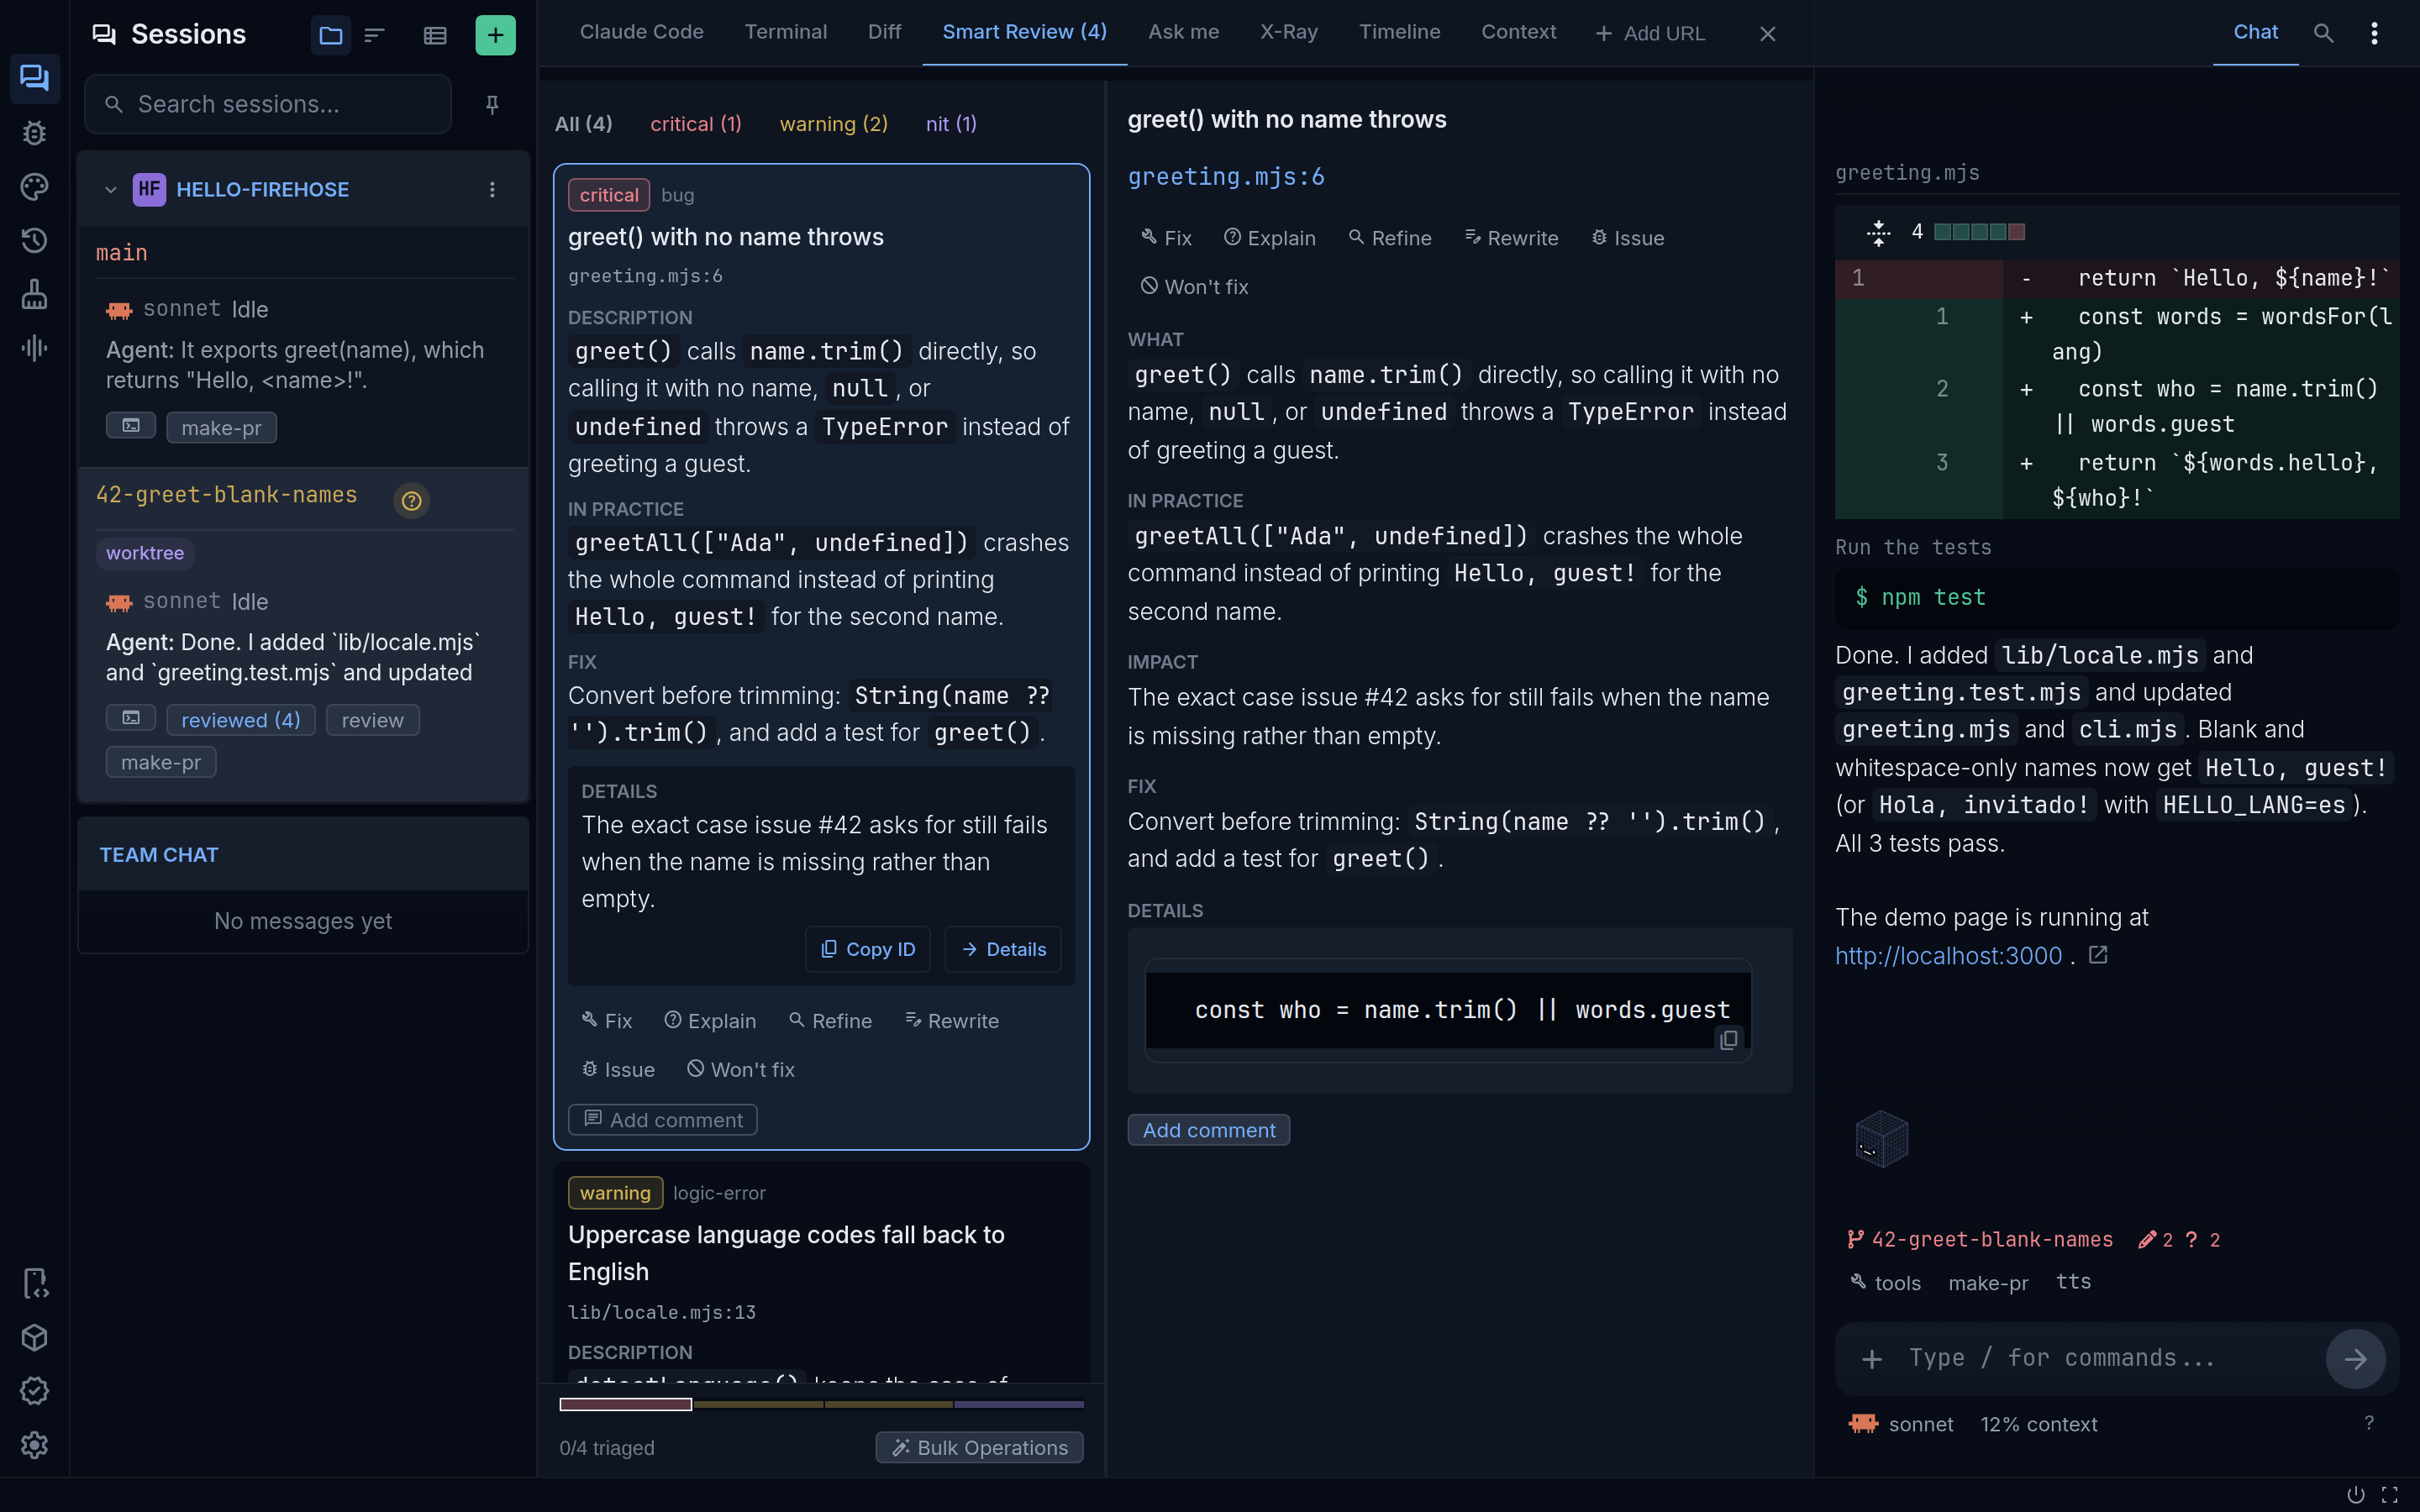
Add comment attaches your own note to a finding.
3. Send your choices back with Act
Section titled “3. Send your choices back with Act”When findings have a choice, Act appears at the bottom of the review panel with a count, such as Act (2 fix, 1 explain), beside the triage progress. Select it, then choose Act on items, or Clear context and act to start the agent with a fresh context first. While findings are still waiting for a choice, the same menu also offers Fix all critical, Fix all warnings, and Won’t fix all nits, which set the choice for a whole severity at once. Bulk Operations applies one action to every finding.
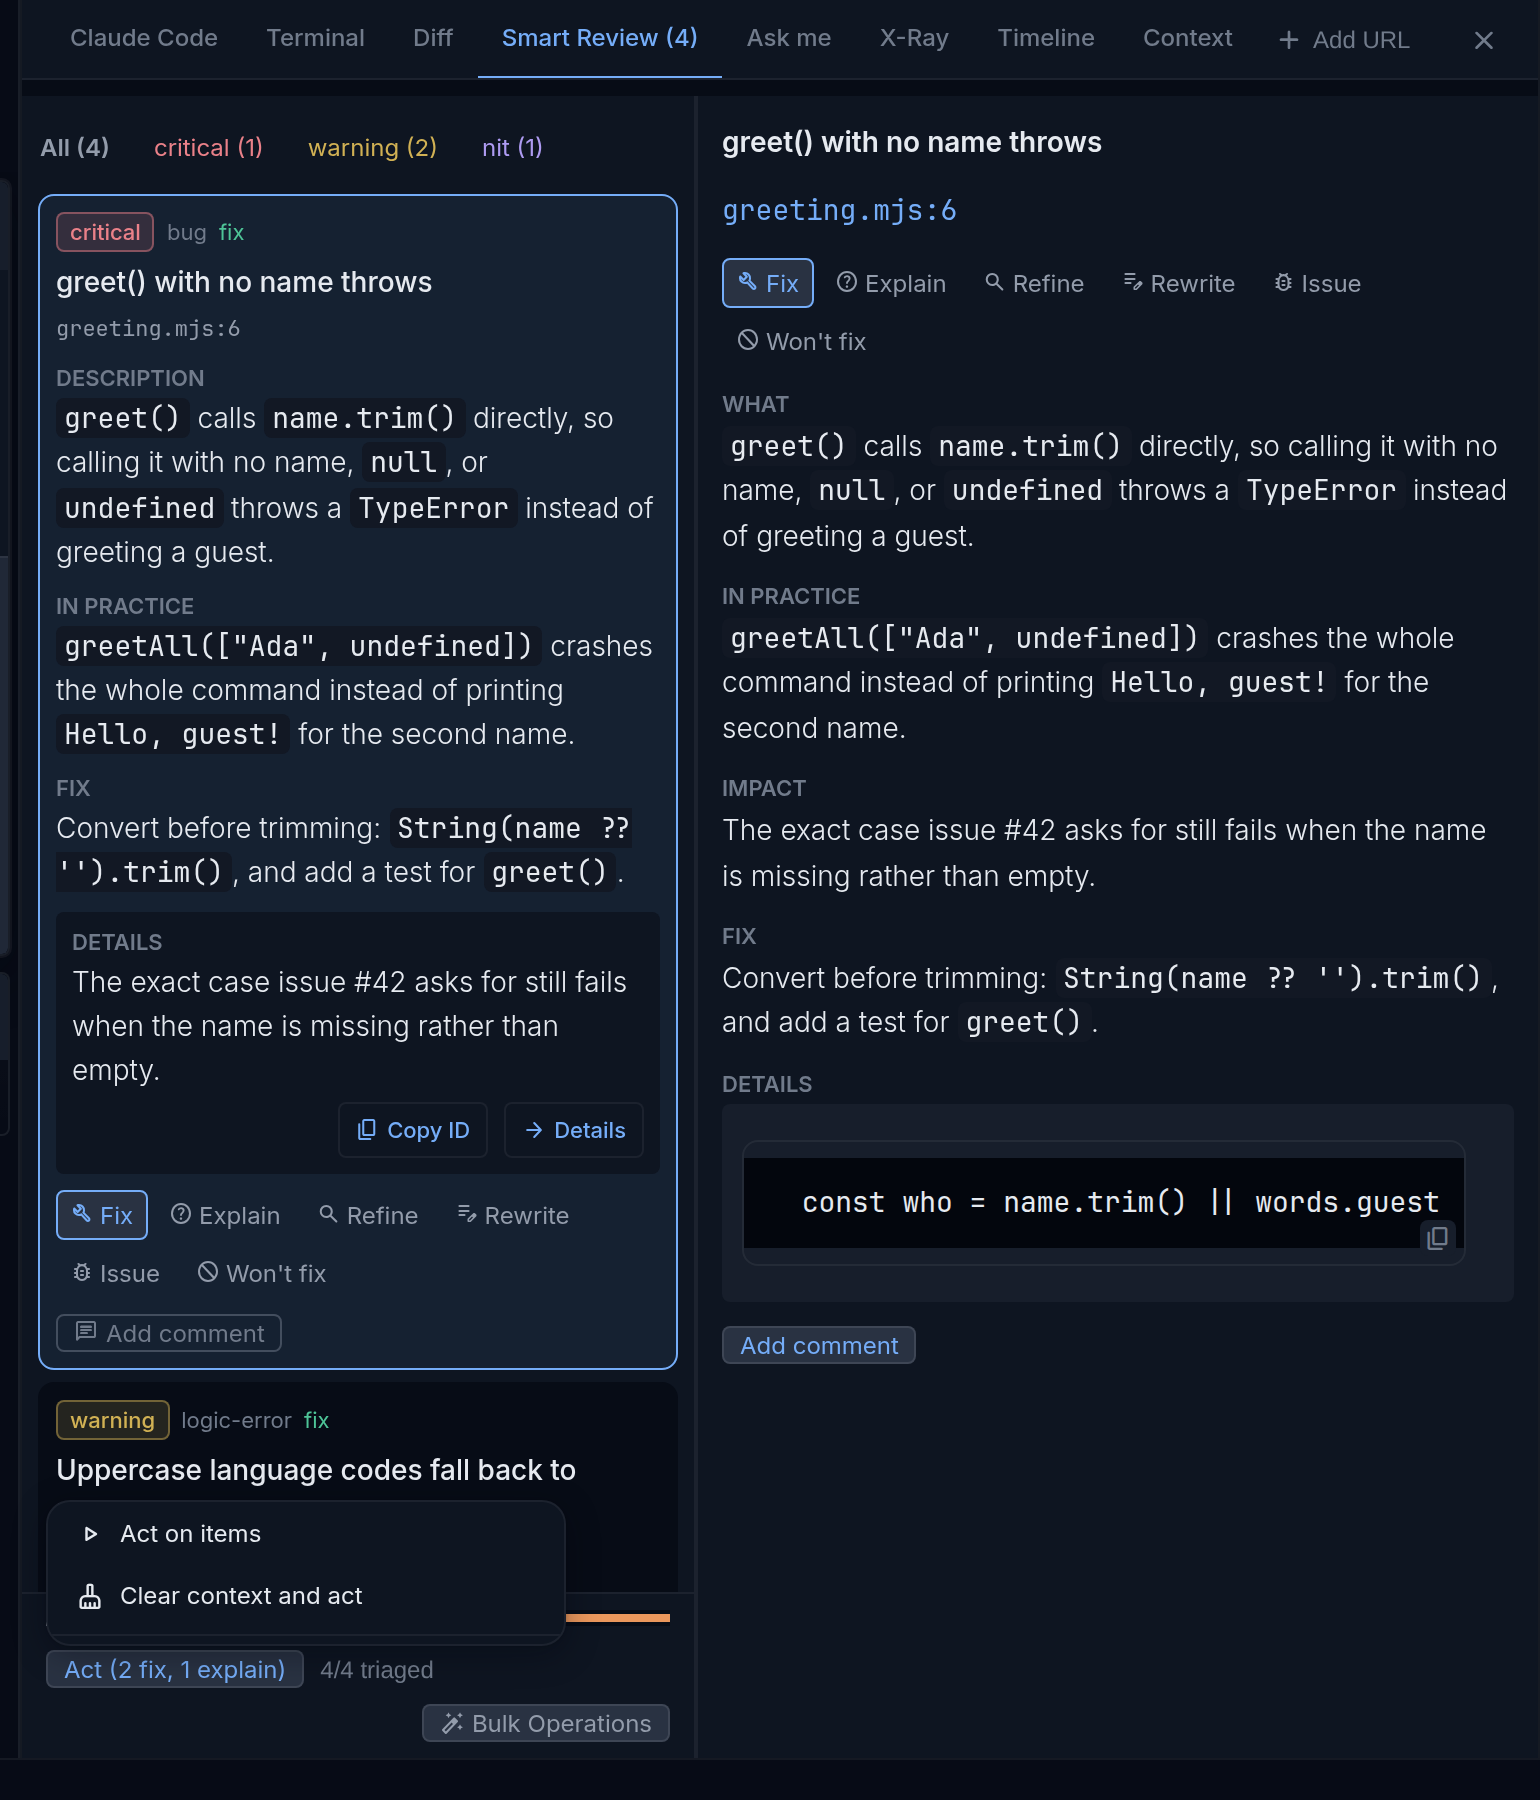
The agent groups the work into coherent packages, makes the changes, runs focused tests and the type-check, and commits before it marks each finding done. Use Check status on a queued or in-progress finding to have the agent re-check it. To review again after the fixes, use review more or fresh review from the same Smart review menu. See Use Smart Review for every control.
Read it yourself with X-Ray
Section titled “Read it yourself with X-Ray”Smart Review gives you an agent’s opinion. X-Ray helps you form your own: it shows the changed files grouped by module, with the imports between them, and walks you through them in dependency order. X-Ray works in the web app.
- Open the X-Ray tab at the top of the session.
- Choose Working to include uncommitted edits, or Committed for the branch’s commits.
- Select Start review. The Review path bar shows where you are, such as 1 of 3; use its arrows to step through the files in dependency order. The pinned file shows its markers, what it imports, and what imports it, with Open diff to read the change.
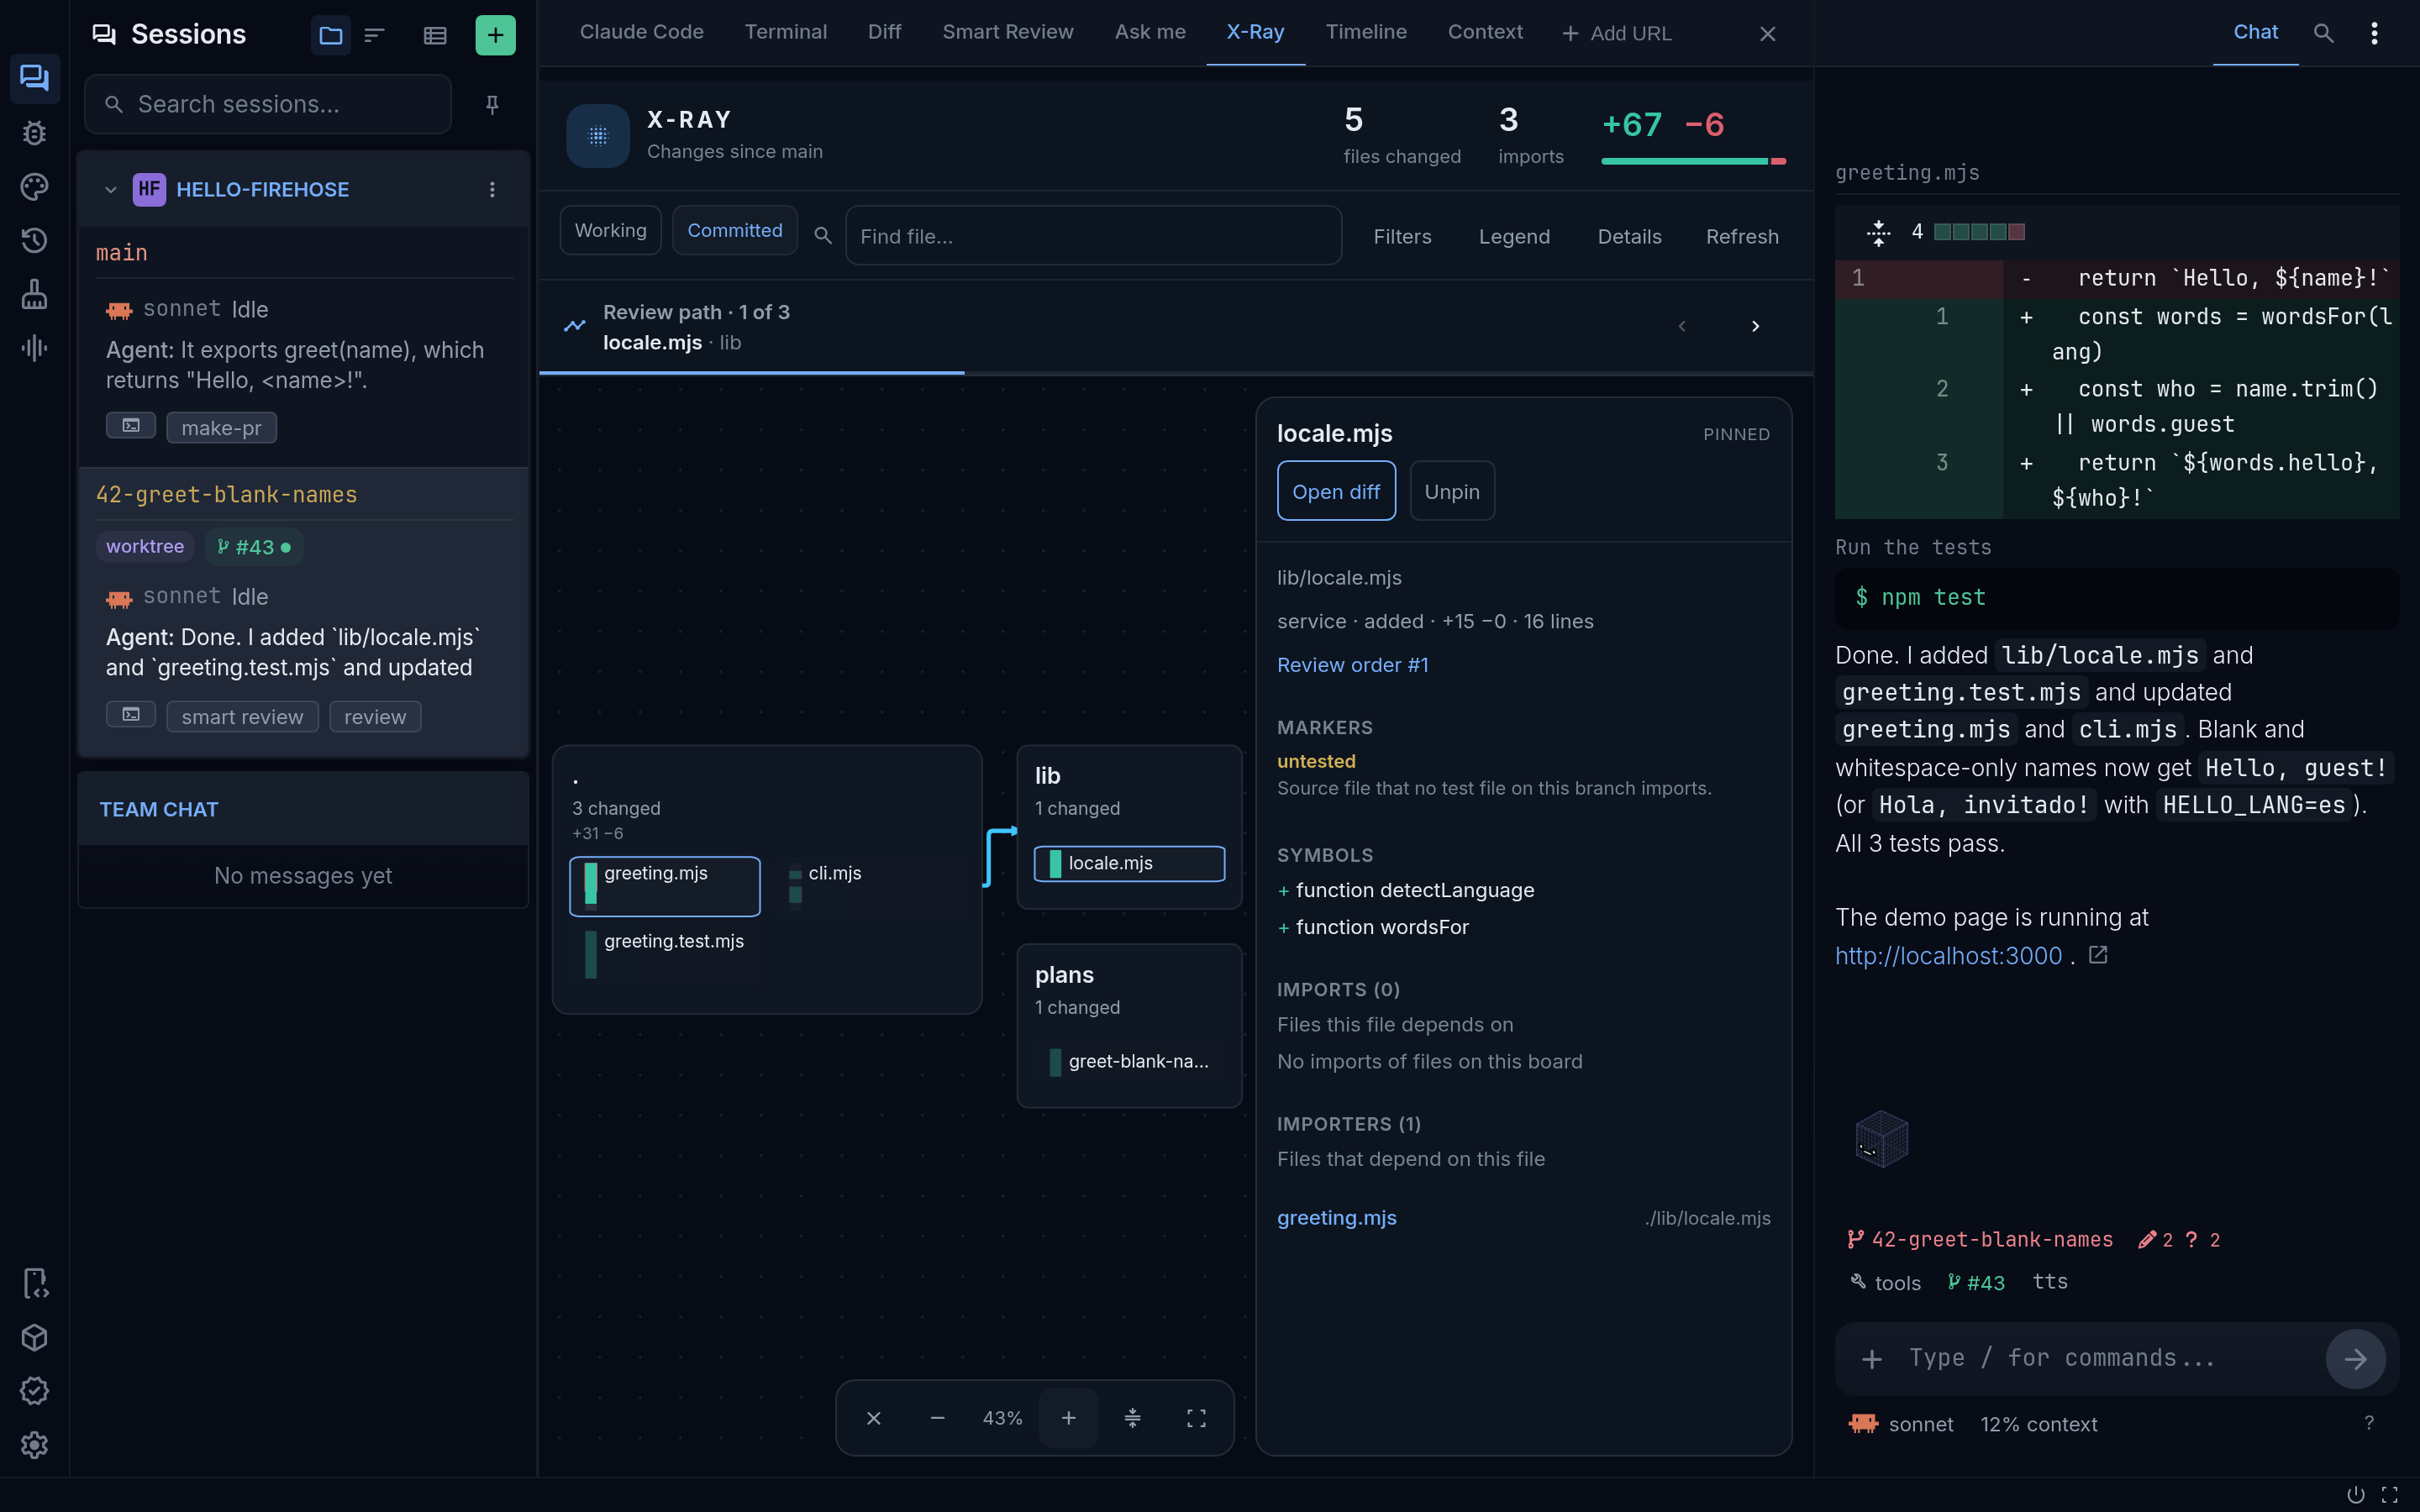
Watch for the markers on files:
- untested: a changed source file that no test imports.
- hub: a changed file that many of the other changed files import, so a mistake there spreads furthest.
- cross-layer, orphan, and unresolved import: structure worth a second look.
Use Filters to show or hide Tests, Docs, Config, and Assets. X-Ray does not send anything to the agent and does not record which files you have read; when you find a problem, describe it in the message box or add it to the Smart Review.
Run a final testing round
Section titled “Run a final testing round”Firehose has no single “test” button. Before you hand off, combine its tools into a final testing round:
- Close the test gaps. Check X-Ray for untested files, and ask the agent to add tests for any that matter.
- Run a test-focused review. Start another Smart Review with an area of focus such as
tests and edge cases; do the tests prove the feature works?, then Act on the findings. The agent runs the tests before it marks each fix done. - Run the suite yourself. Open the Terminal tab; it starts in the session’s folder. Run the project’s tests, for example
node --test, and read the result. See Run a check in the terminal. - Try it by hand. For a web app, start it, then select Add URL in the tab row, enter the address such as
http://localhost:3000, and use the app in the Preview tab. When Firehose runs on a Mac with Xcode set up, an iOS app can run in the Simulator tab. - Check what changed. In the Diff tab, use Diff filters to compare All changes and Working changes, so nothing is left uncommitted or unexplained. See Review changes with Diff.
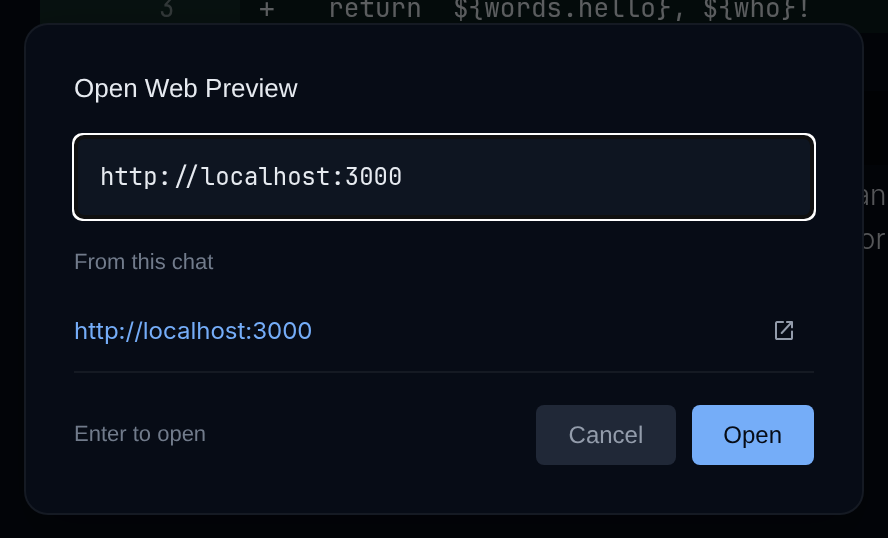
If a check fails, give the agent the exact input, expected result, and actual result, then repeat the round.
Hand it off
Section titled “Hand it off”-
Commit. If anything is uncommitted, select commit on the prompt bar. It lists Staged, Unstaged, and Untracked files; selecting Commit asks the agent for one local commit. It does not push.
-
Open a pull request. Select make-pr on the prompt bar. The agent commits anything outstanding, pushes the branch, and creates a pull request with a summary of the change. Sessions started from an issue with Claude Code may already have one.
-
Keep the pull request current. Once it exists, a badge such as #43 replaces make-pr. Its menu has View PR, Commit and update the PR, and Just update PR description. The badge in the sidebar shows the pull request’s checks. If the branch falls behind its base, a rebase button appears on the prompt bar.
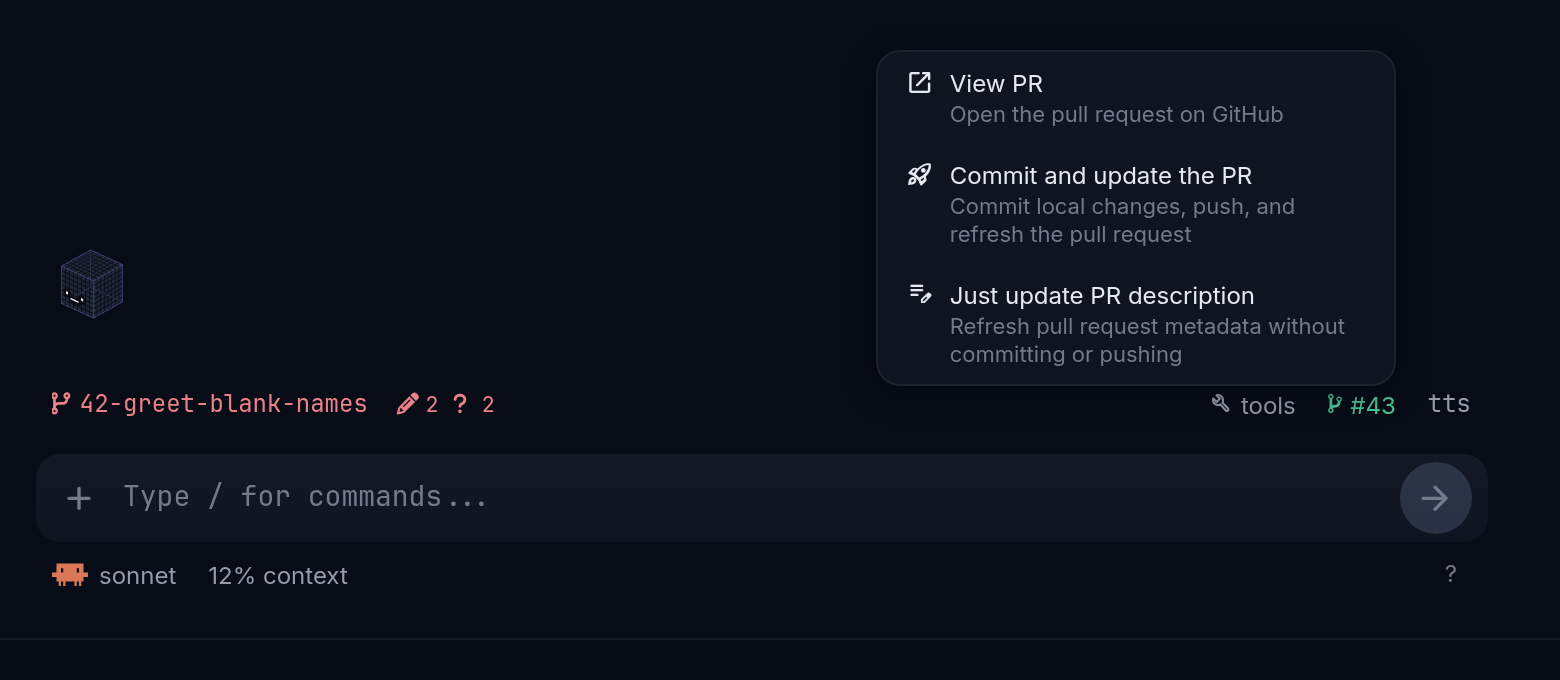
The pull request badge menu on the prompt bar. Sample pull request. -
Close the session. When the pull request is merged, select the session row’s ⋮ (Session options) in the Sessions sidebar, then Close. To remove the worktree too, check Also delete the worktree and select Close and delete. Sessions whose pull request is merged close without asking.
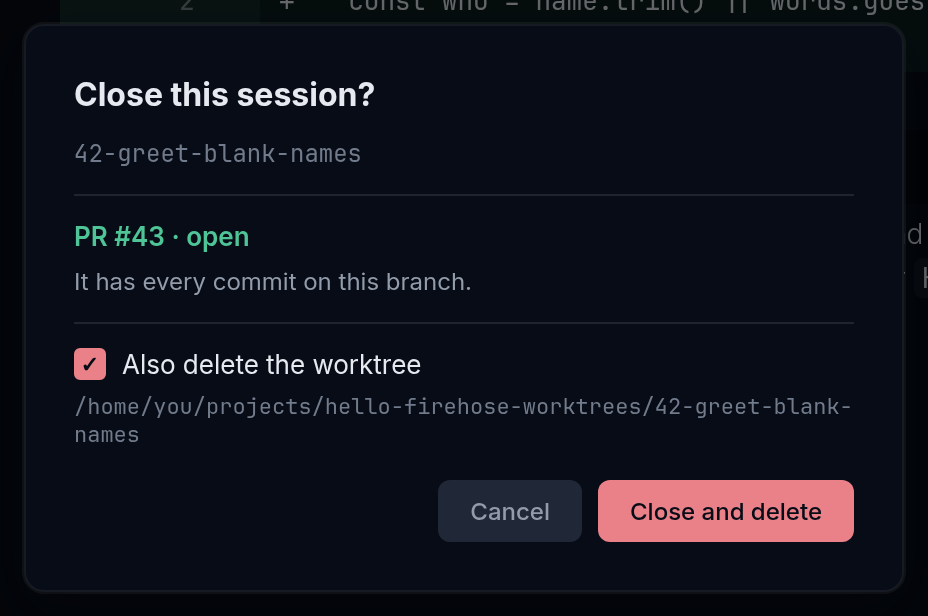
See Finish and close a task for what each choice keeps and removes.
If something goes wrong
Section titled “If something goes wrong”| What you see | What to do |
|---|---|
| GitHub Issues shows no issues | Check that gh auth status succeeds on the Firehose computer and that the project’s origin remote is on GitHub. |
| Session created, but kickoff delivery failed. | Select View session, check whether the agent started, then Retry kickoff if it did not. |
| Smart review is not in the tools menu | The session is on main or master. Start the work in a new worktree. |
| Refine Plan is not in the Writing menu | Open a Markdown file, and use a provider that supports writing tools, such as Claude Code. |
| Submitting answers started the work before you had a plan | Stop the agent with Escape, then ask for the plan in the message box. |
For more, see Get unstuck.