# Firehose documentation
# Help improve these guides
Help the next reader by describing a confusing instruction, a broken example, or a missing topic.
## Prepare a correction
Record the page title and the step you were following. Describe the result you expected and what actually happened. If a control has a different label, include the label you see and the Firehose version, if available.
A useful report looks like this:
```text
Page: Start your first session
Step: Choose where the agent works, step 4
Expected: Find Current checkout
Observed: [the label or error I actually see]
Environment: [desktop or mobile web, browser, Firehose version if known]
Suggested correction: [the wording or extra step that would help]
```
If you need server version information, follow the [diagnostic steps](/troubleshooting/common-problems/#i-need-to-report-a-problem). If a version is unavailable, say so; the exact control label and error still help.
Remove credentials, private repository content, and personal machine names from examples before sharing them.
## Request a missing topic
Describe the task you want to finish and where you got stuck. “How do I continue an existing branch?” is easier to turn into a useful guide than “Add more advanced docs.”
Share your report through the channel where you received these docs, or give it to the person maintaining your Firehose setup. A public issue destination will be linked when this documentation repository is ready for release.
## Read with an agent
Use the [documentation index](/llms.txt) to find plain Markdown pages, or [read all guides as text](/llms-full.txt). These are generated from the same source as the website.
Readers and agents should treat sample prompts as examples to adapt. Follow your own task’s constraints and check results against the relevant project.
---
# Activate Firehose
Activate Firehose on your computer so it can start agent sessions. Until you do, the dashboard shows an activation screen and nothing else works.
This page describes Firehose 1.0.1. You need a Firehose installation from [Install Firehose](/getting-started/install/) and an email address you can open on this device.
## Before you begin
Activation needs a paid subscription. If your account does not have one yet, you subscribe during activation. Billing starts the day you subscribe.
Activation happens in two browser tabs:
- **Your dashboard** at `http://localhost:4801` shows a code and waits.
- **The activation page** at `agents.okthink.ai/activate` is where you sign in, subscribe if needed, and approve the code.
## 1. Get an activation code
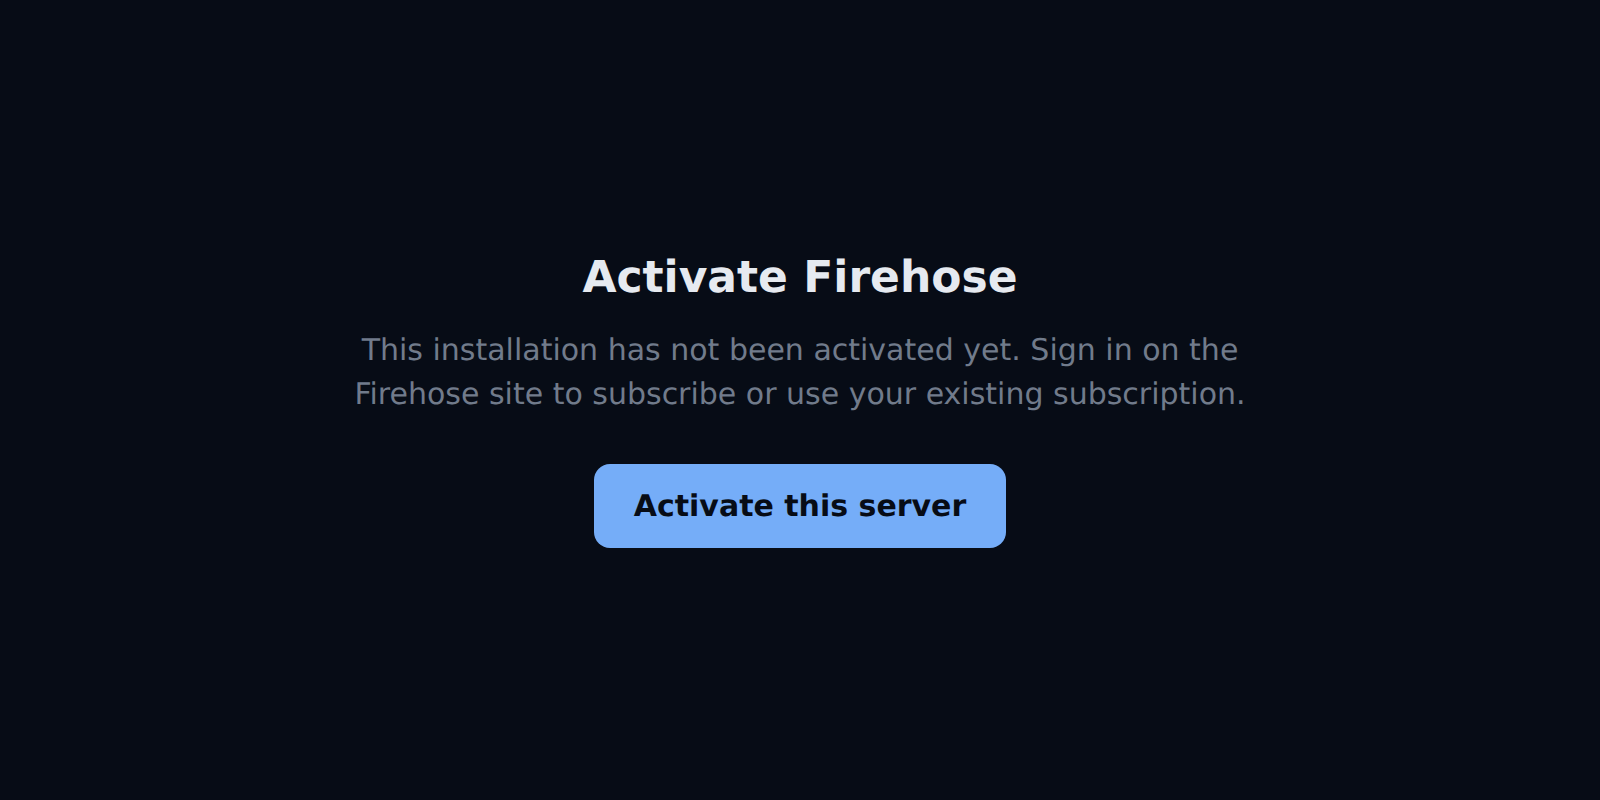
1. Open your dashboard. After a fresh install, it is already open and shows **Activate Firehose**.
2. Select **Activate this server**.
The dashboard before activation.
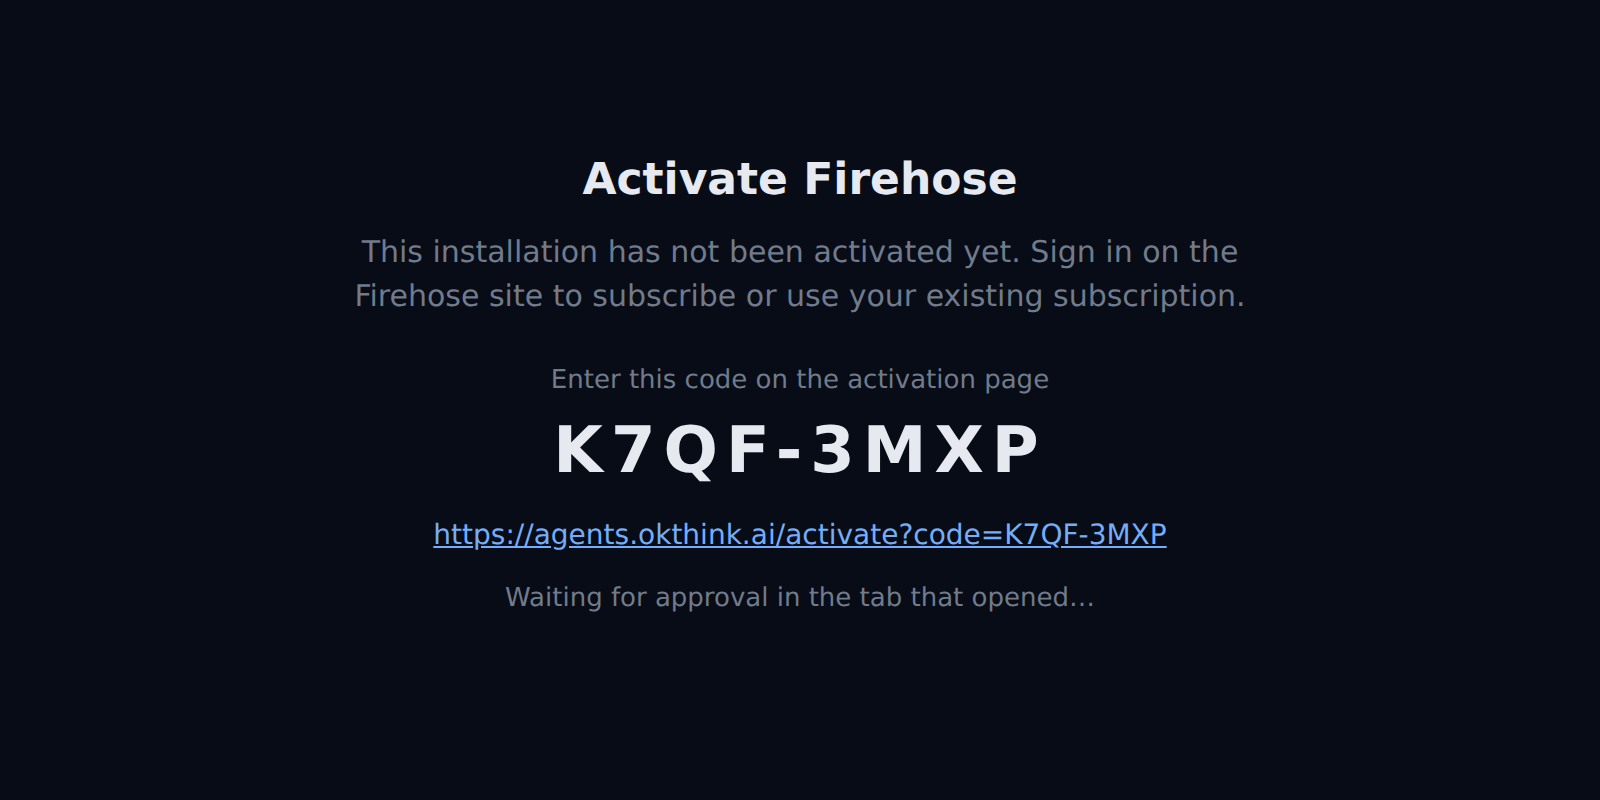
Firehose shows a code under **Enter this code on the activation page** and opens the activation page in a new tab. The dashboard says **Waiting for approval in the tab that opened…**. Leave it open. The code works for one hour. If no tab opened, select the link under the code.
The dashboard while it waits for approval. The code is an example; yours will differ.
## 2. Sign in with your email
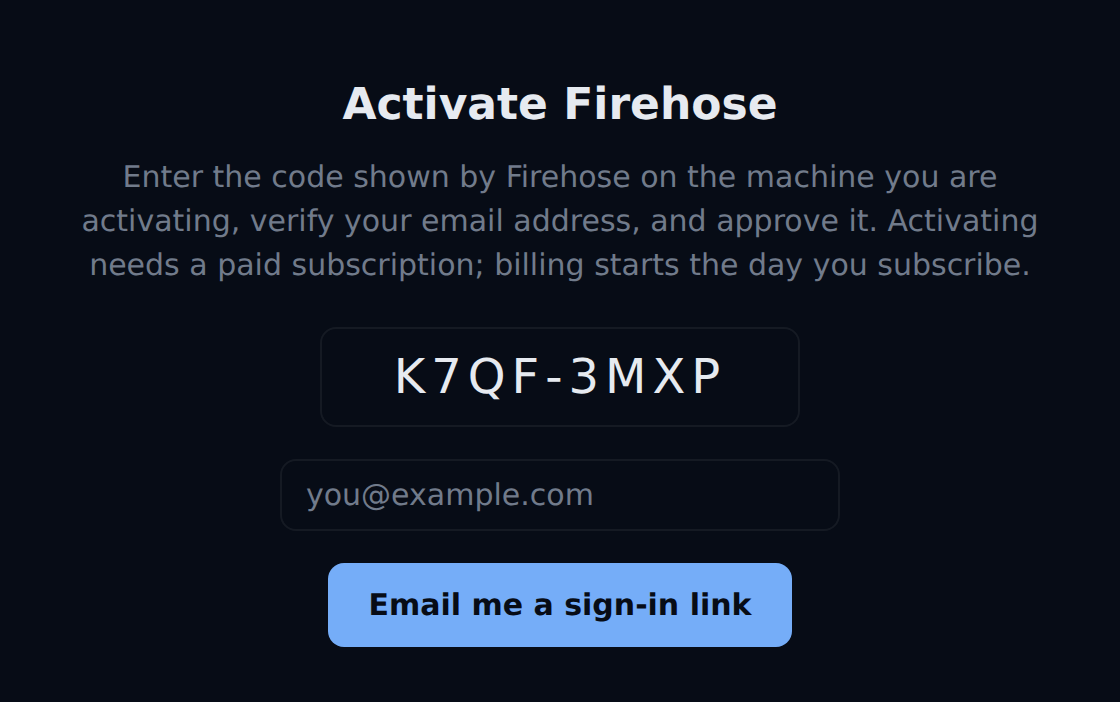
The activation page opens with your code already filled in. Type it in if the field is empty.
Enter your email address and select **Email me a sign-in link**.
The activation page before you sign in. The code and email address are examples.
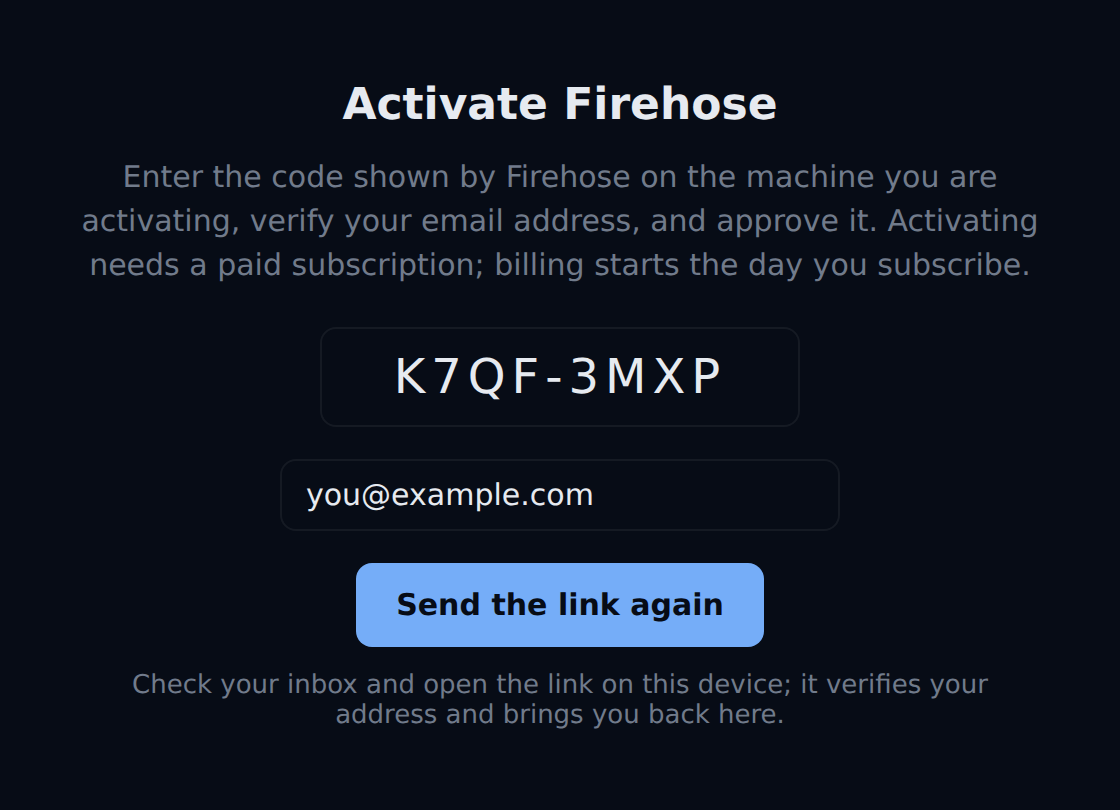
The page then says **Check your inbox and open the link on this device; it verifies your address and brings you back here.** Open the email on this same device and select its link.
After you ask for the link. The code and email address are examples.
## 3. Approve the code
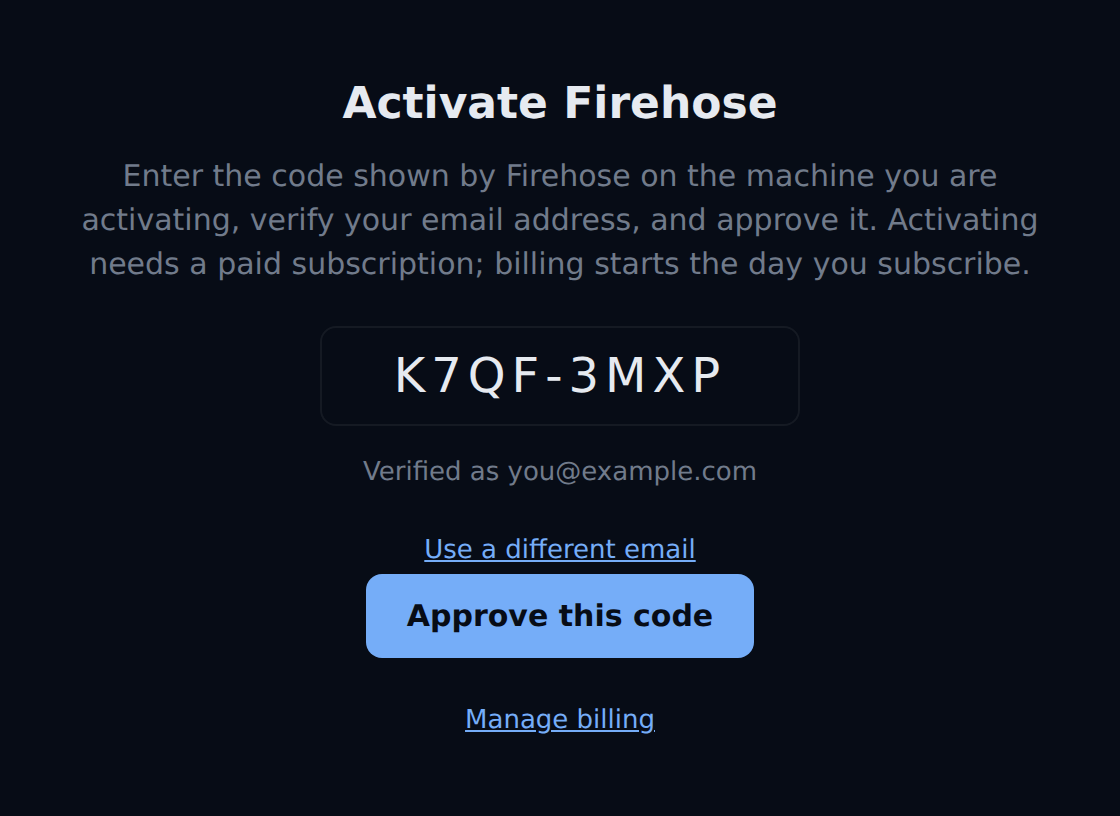
Back on the activation page, it shows **Verified as** and your address. Your subscription belongs to this address. To use another one, select **Use a different email**.
Select **Approve this code**.
Signed in and ready to approve. The code and email address are examples.
What happens next depends on your subscription.
### If you already subscribe
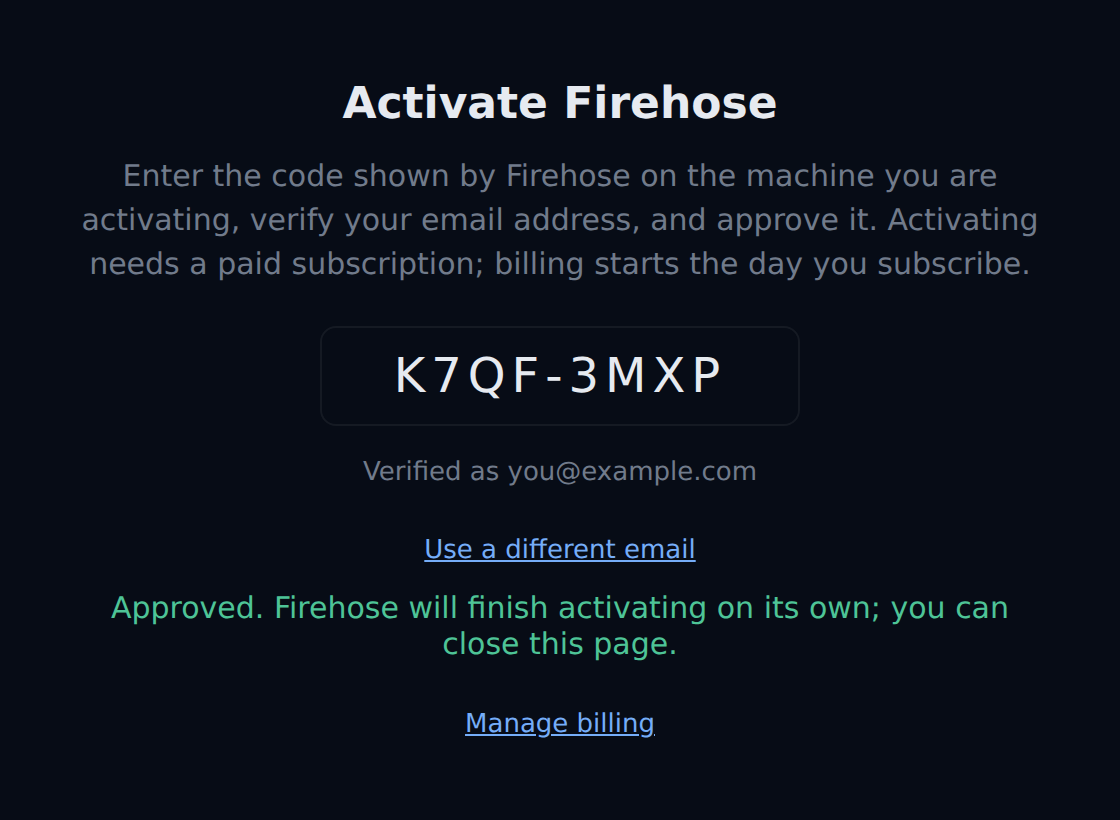
The page says **Approved. Firehose will finish activating on its own; you can close this page.**
The code is approved. The code and email address are examples.
### If you do not subscribe yet
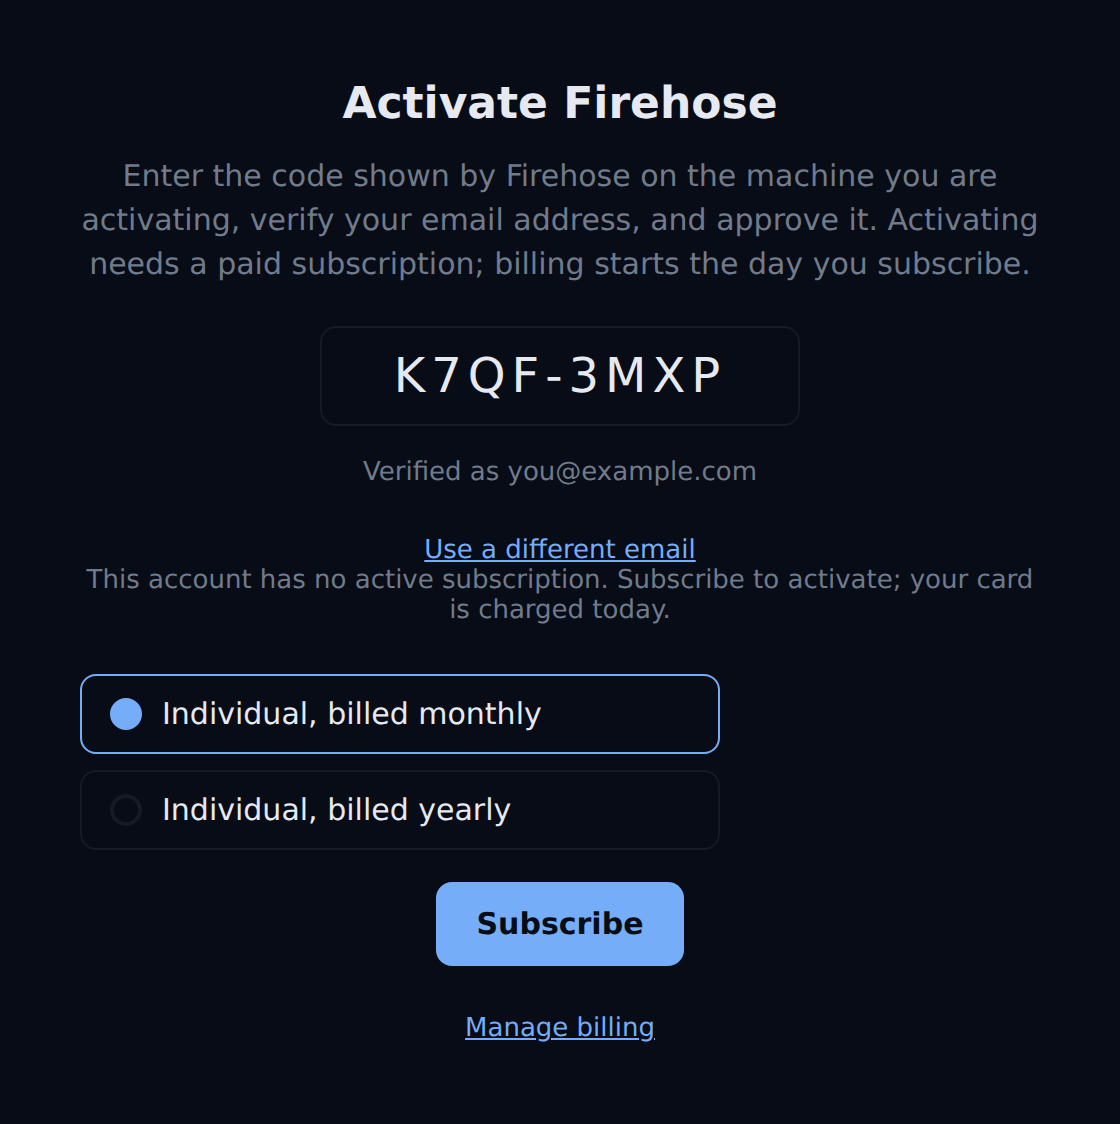
The page says **This account has no active subscription. Subscribe to activate; your card is charged today.**
1. Choose **Individual, billed monthly** or **Individual, billed yearly**. The checkout page shows the price.
2. Select **Subscribe** and pay on the checkout page.
3. When you return to the activation page, select **Approve this code** again.
Choosing a plan. The code and email address are examples.
### If your subscription needs attention
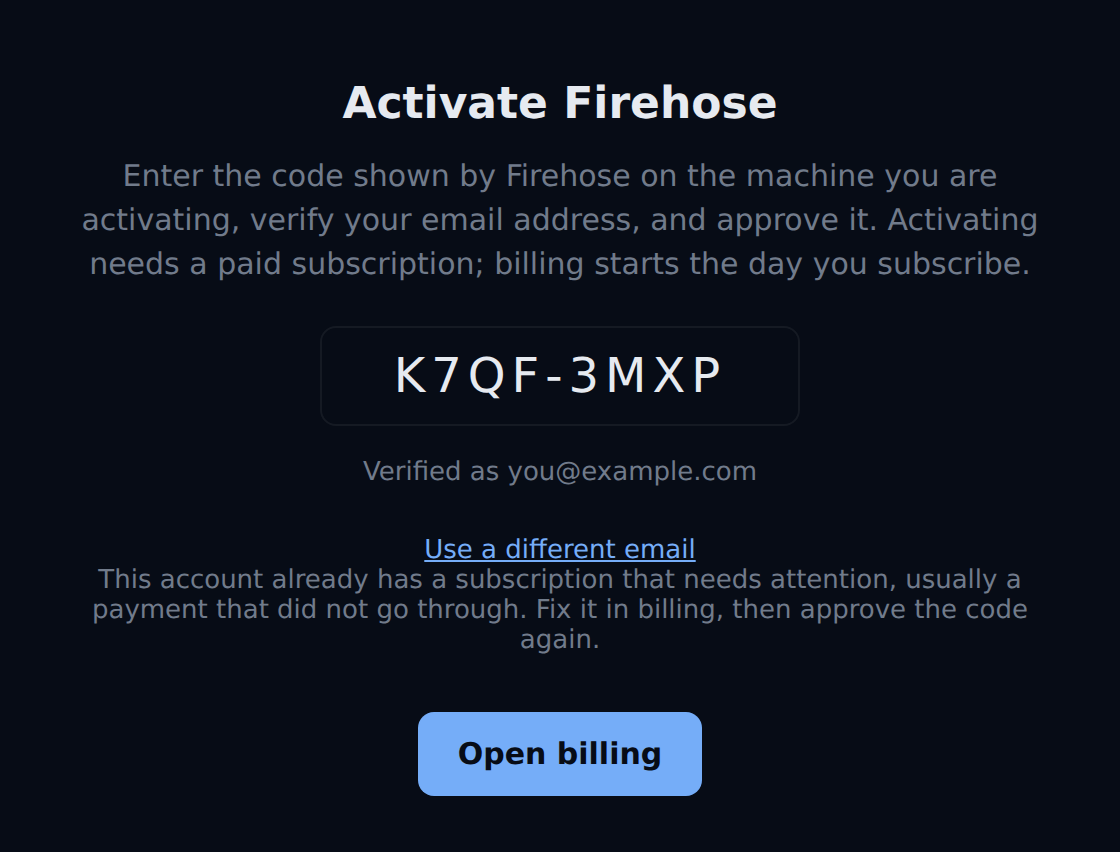
The page says the subscription needs attention, usually because a payment did not go through. Select **Open billing**, fix the payment, then select **Approve this code** again.
A subscription with a failed payment. The code and email address are examples.
## 4. Check the result
Return to your dashboard tab. Within a few seconds, the activation screen closes and Firehose opens with the **Sessions** sidebar. You do not need to reload. See [Find your way around Firehose](/getting-started/find-your-way/) for what you are looking at.
Next, [connect to Firehose](/getting-started/connect/) and check that your agent is ready.
## Manage your subscription
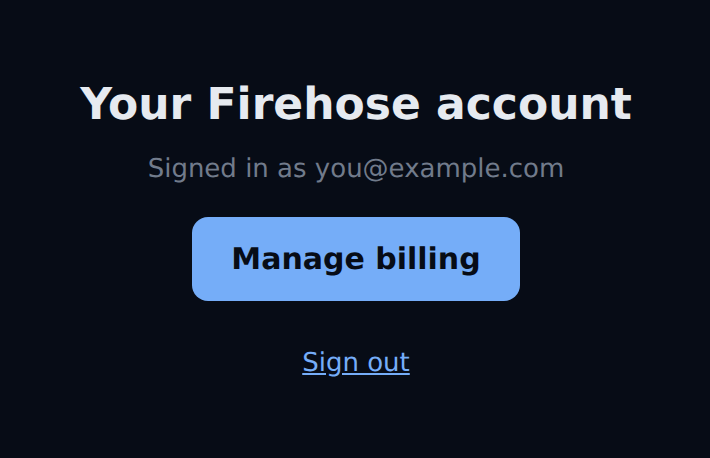
Open `agents.okthink.ai/account` and sign in with an email link. Select **Manage billing** to open your billing details. The activation page also has a **Manage billing** link once you are signed in.
The account page. The email address is an example.
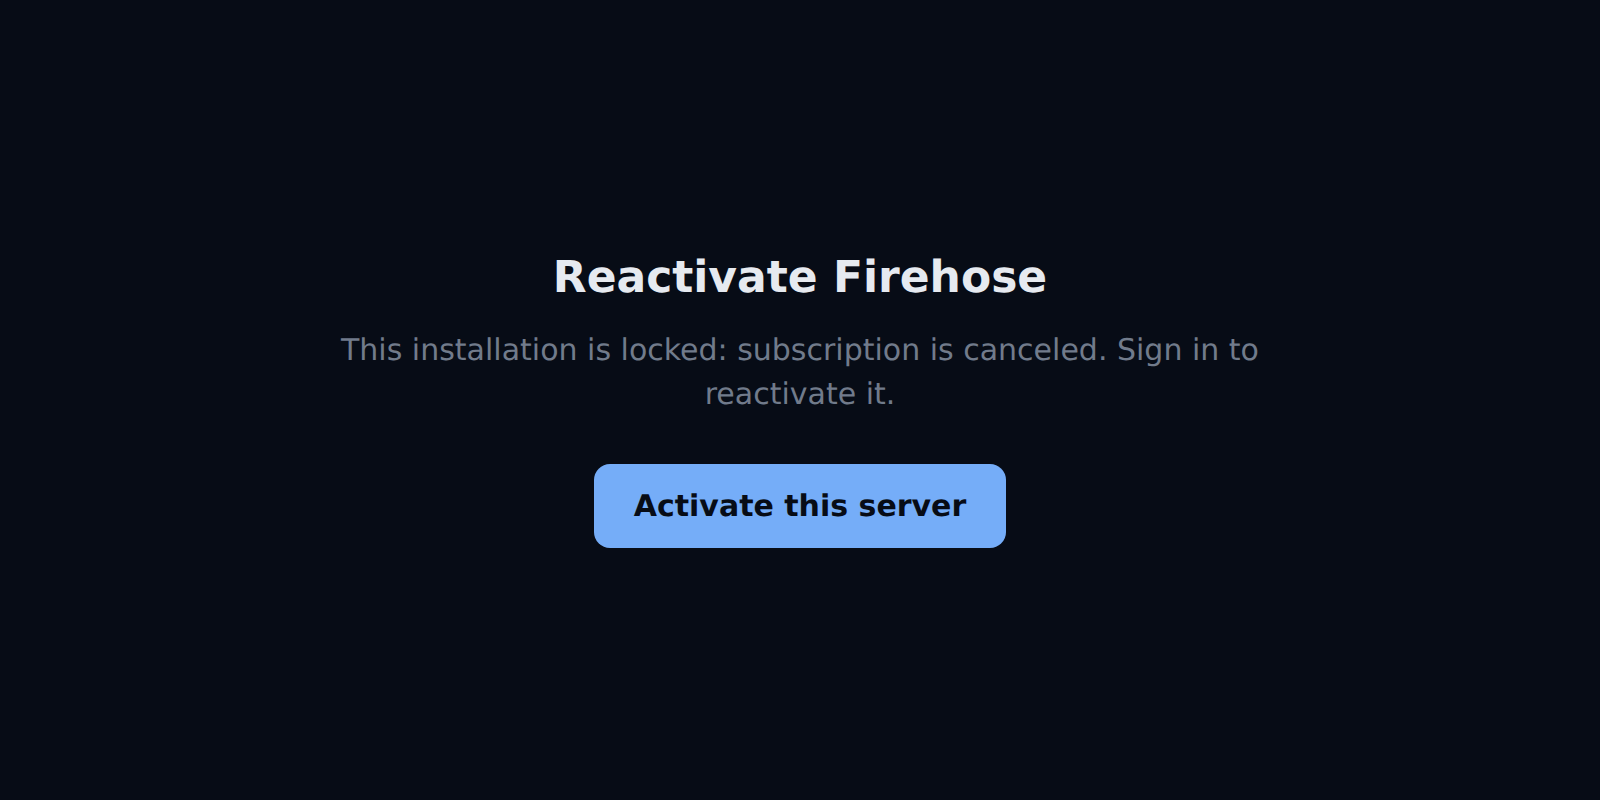
## If Firehose asks you to reactivate
You do not need to reactivate after time away. Firehose renews its license on its own, including right after the computer starts.
The dashboard shows **Reactivate Firehose** only when a renewal fails:
- **Your subscription stopped,** for example it was canceled or a payment failed. The screen names the reason. Fix it at `agents.okthink.ai/account`, and Firehose unlocks on its own at its next check, within about an hour.
- **Firehose could not reach the license service for 14 days** while it kept running. Reconnect the computer to the internet, and Firehose unlocks at its next check.
To unlock right away instead of waiting, select **Activate this server** and repeat the steps above.
A locked installation, with the reason the license service gave.
## If activation does not finish
| What you see | What to do |
| --- | --- |
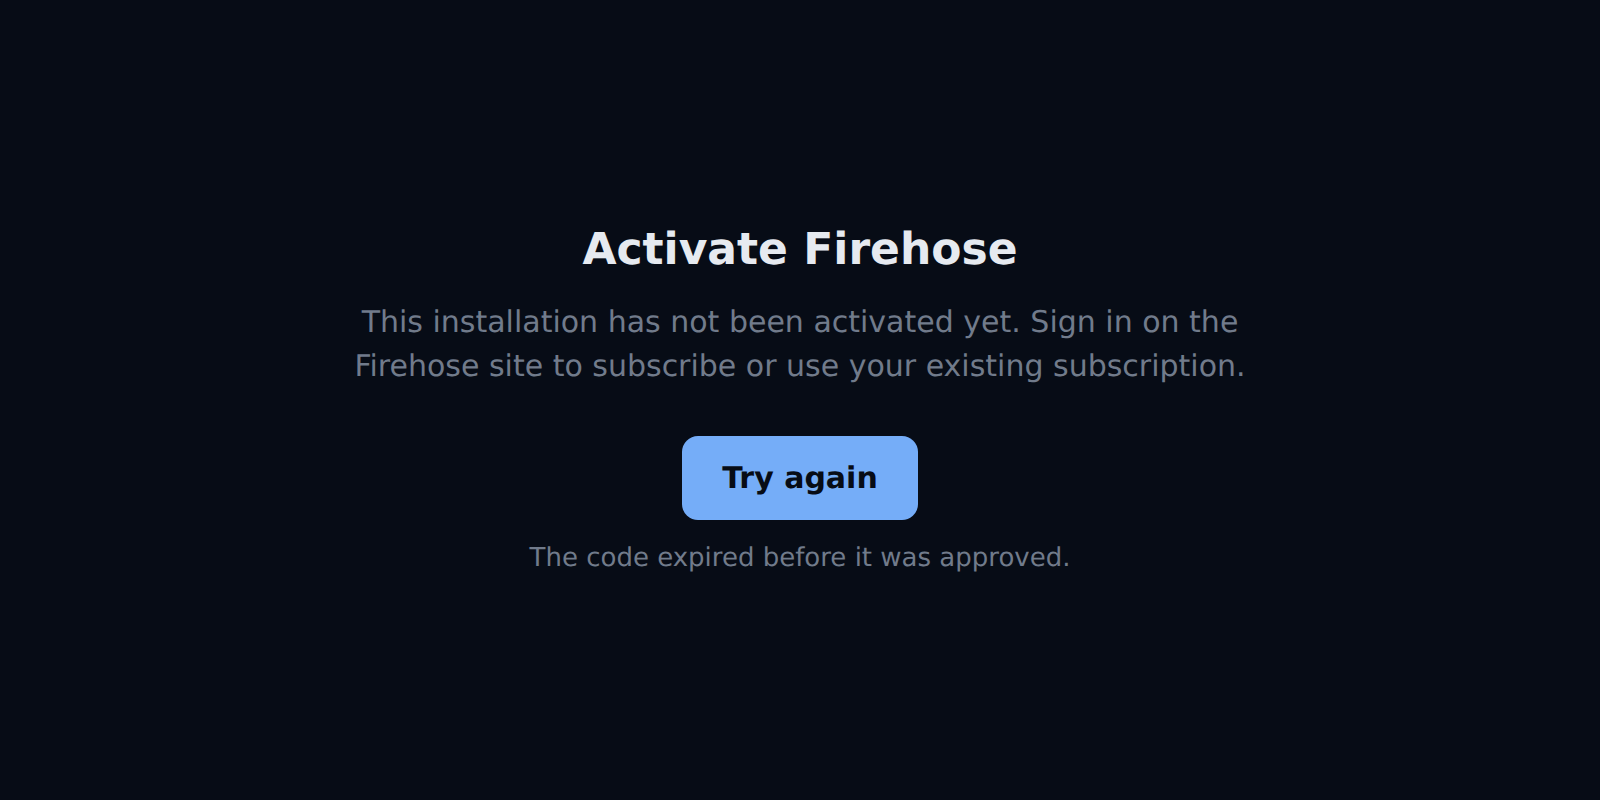
| **The code expired before it was approved.** | More than an hour passed. Select **Try again** for a new code. |
| **The activation was not approved.** | Select **Try again**. If it happens again, check your subscription at `agents.okthink.ai/account`. |
| The dashboard keeps waiting after the page said the code was approved | Check that the computer is online, then wait a minute. Firehose checks for approval every few seconds. |
| The sign-in email does not arrive | Check your spam folder, then select **Send the link again**. |
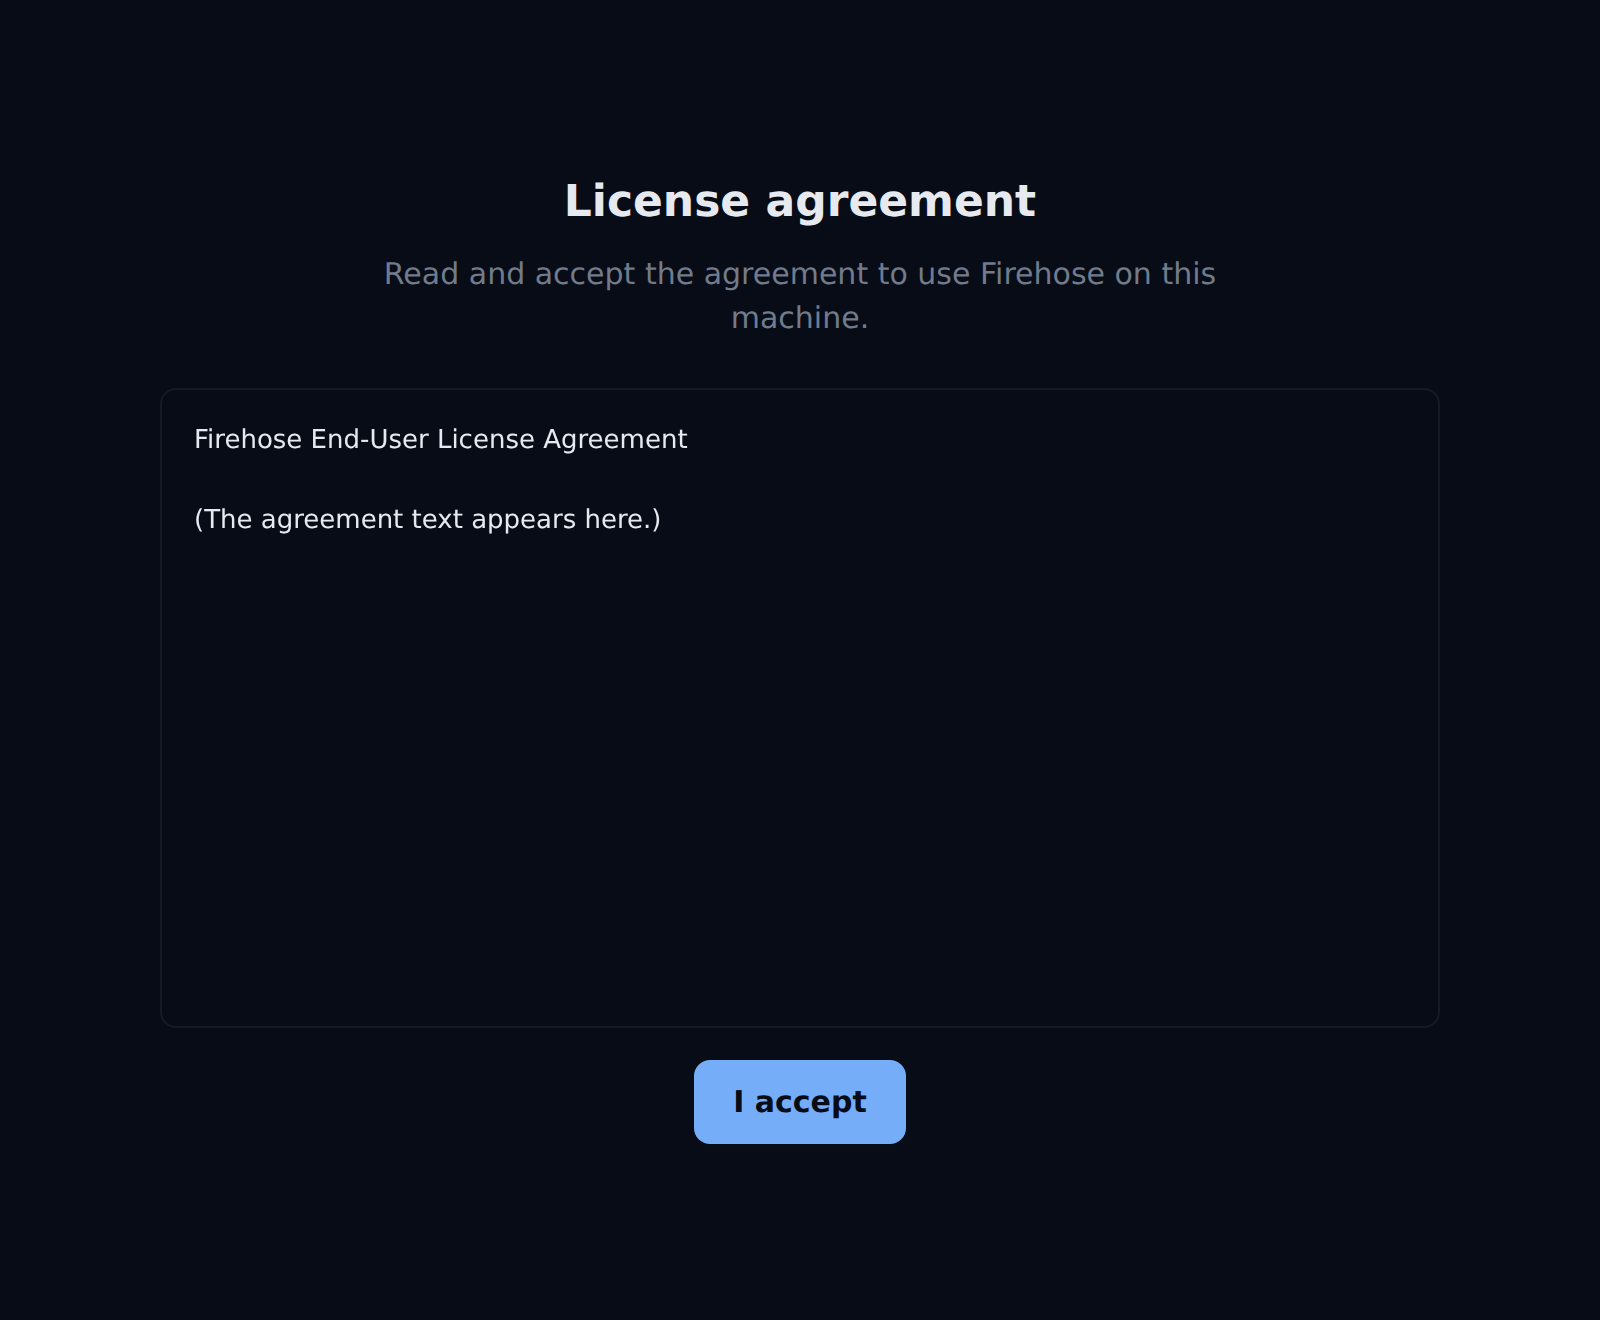
| **License agreement** instead of **Activate Firehose** | Read the agreement, also available as the [published end-user license agreement](https://github.com/okthink-ai/firehose-releases/releases/latest/download/EULA.md), and select **I accept**. This appears if the agreement was not accepted during installation. |
An expired code.The license agreement screen. The agreement text is shortened here; read the full agreement on the screen or at the link above.
---
# Connect to Firehose
Open Firehose on the computer where you installed it, or from your phone or another computer. Then check that your agent can start a session.
This page describes Firehose 1.0.1.
## Before you begin
You need a Firehose installation that you have [installed](/getting-started/install/) and [activated](/getting-started/activate/). Firehose runs on your own computer: your repositories and agents stay there, and your browser is how you work with them.
You also need an agent command-line tool, such as Claude Code or Codex, installed and signed in on that computer.
## Open Firehose on your computer
Open `http://localhost:4801` in a browser on the computer running Firehose. If you installed with `--port`, use that port instead.
Your projects and sessions appear once the page loads. If you see **Activate Firehose**, finish [activation](/getting-started/activate/) first.
This address works only on that computer. Another device on your home or office network cannot open it, even with the computer's IP address.
## Open Firehose from your other devices
To use Firehose from your phone or another computer, turn on tailnet access. It uses [Tailscale](https://tailscale.com/download), a private network between your own devices, and serves Firehose over HTTPS with a certificate from Tailscale.
**Only you can connect this way.** Firehose answers only the Tailscale account that owns the computer. Anyone else who opens the address sees `This Firehose only answers its owner over the tailnet.`
### Set up Tailscale
Tailscale connects your own devices to each other over a private network, called a tailnet. Every device you use with Firehose needs Tailscale installed and signed in to the same Tailscale account. You set this up once.
1. On the Firehose computer, install Tailscale from [tailscale.com/download](https://tailscale.com/download):
- **macOS:** download the app, or get it from the Mac App Store. Open it and sign in.
- **Linux:** run the install script, then connect the computer and follow the sign-in instructions:
```sh
curl -fsSL https://tailscale.com/install.sh | sh
sudo tailscale up
```
2. On your phone or other computer, install Tailscale from the same page and sign in with the same account.
3. Check that MagicDNS is on. It is on by default for tailnets created on or after October 20, 2022. Otherwise, open the [DNS page](https://console.tailscale.com/admin/dns) of the Tailscale admin console and select **Enable MagicDNS**.
4. On the same DNS page, under **HTTPS Certificates**, select **Enable HTTPS**. Firehose needs it to serve your address over HTTPS.
Enabling HTTPS publishes your computer names and your tailnet's DNS name on a public certificate ledger. Tailscale asks you to acknowledge this before it turns HTTPS on.
For other platforms and details, see Tailscale's [installation guide](https://tailscale.com/kb/1347/installation) and [Enabling HTTPS](https://tailscale.com/kb/1153/enabling-https).
### Turn on tailnet access
With Tailscale running on the Firehose computer, use one of these:
- **During installation:** answer `y` when the installer asks to open Firehose from your other devices, or install with `--tailnet`.
- **In the terminal:** run `firehose tailnet on`.
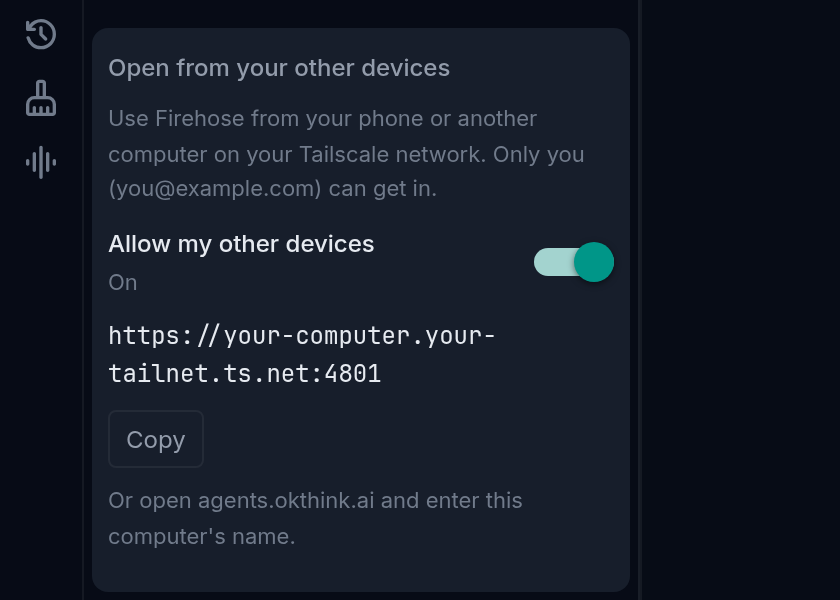
- **In the dashboard:** open **Settings** (the gear icon at the bottom of the icon rail on the far left). Under **Open from your other devices**, turn on **Allow my other devices**. If Settings says **Restart Firehose to apply this.**, select **Restart now**.
When it is on, Firehose shows the address to use. It looks like `https://your-computer.your-tailnet.ts.net:4801`, where `your-computer.your-tailnet.ts.net` is a placeholder for your computer's full Tailscale name. Under **Open from your other devices** in **Settings**, select **Copy** to copy it.
Open from your other devices in Settings, turned on. The address is a placeholder; yours uses your computer's Tailscale name.
If Settings says **Install Tailscale and sign in to use this.** or **Turn on MagicDNS for your tailnet in the Tailscale admin console.**, fix that in Tailscale first. MagicDNS gives your computer the `.ts.net` name the address uses.
### Connect from the other device
1. Install Tailscale on the other device and sign in with the same Tailscale account.
2. Open the address Firehose showed you.
3. Check that your projects and sessions appear.
You can also open **agents.okthink.ai**, the hosted Firehose app, and enter your computer's full Tailscale name:
1. In the **Connect to Firehose** dialog, enter the name in **Server address**, such as `your-computer.your-tailnet.ts.net`, without `https://` or a port.
2. Select **Save and connect**.
The hosted app always connects on port 4801. If you installed Firehose on another port, open the address shown under **Open from your other devices** in **Settings** directly instead.
A short computer name or a Tailscale IP address does not work in the hosted app. Use the full name ending in `.ts.net` so it matches the HTTPS certificate.
To turn tailnet access off, run `firehose tailnet off` or turn off **Allow my other devices**.
## Check that your provider is ready
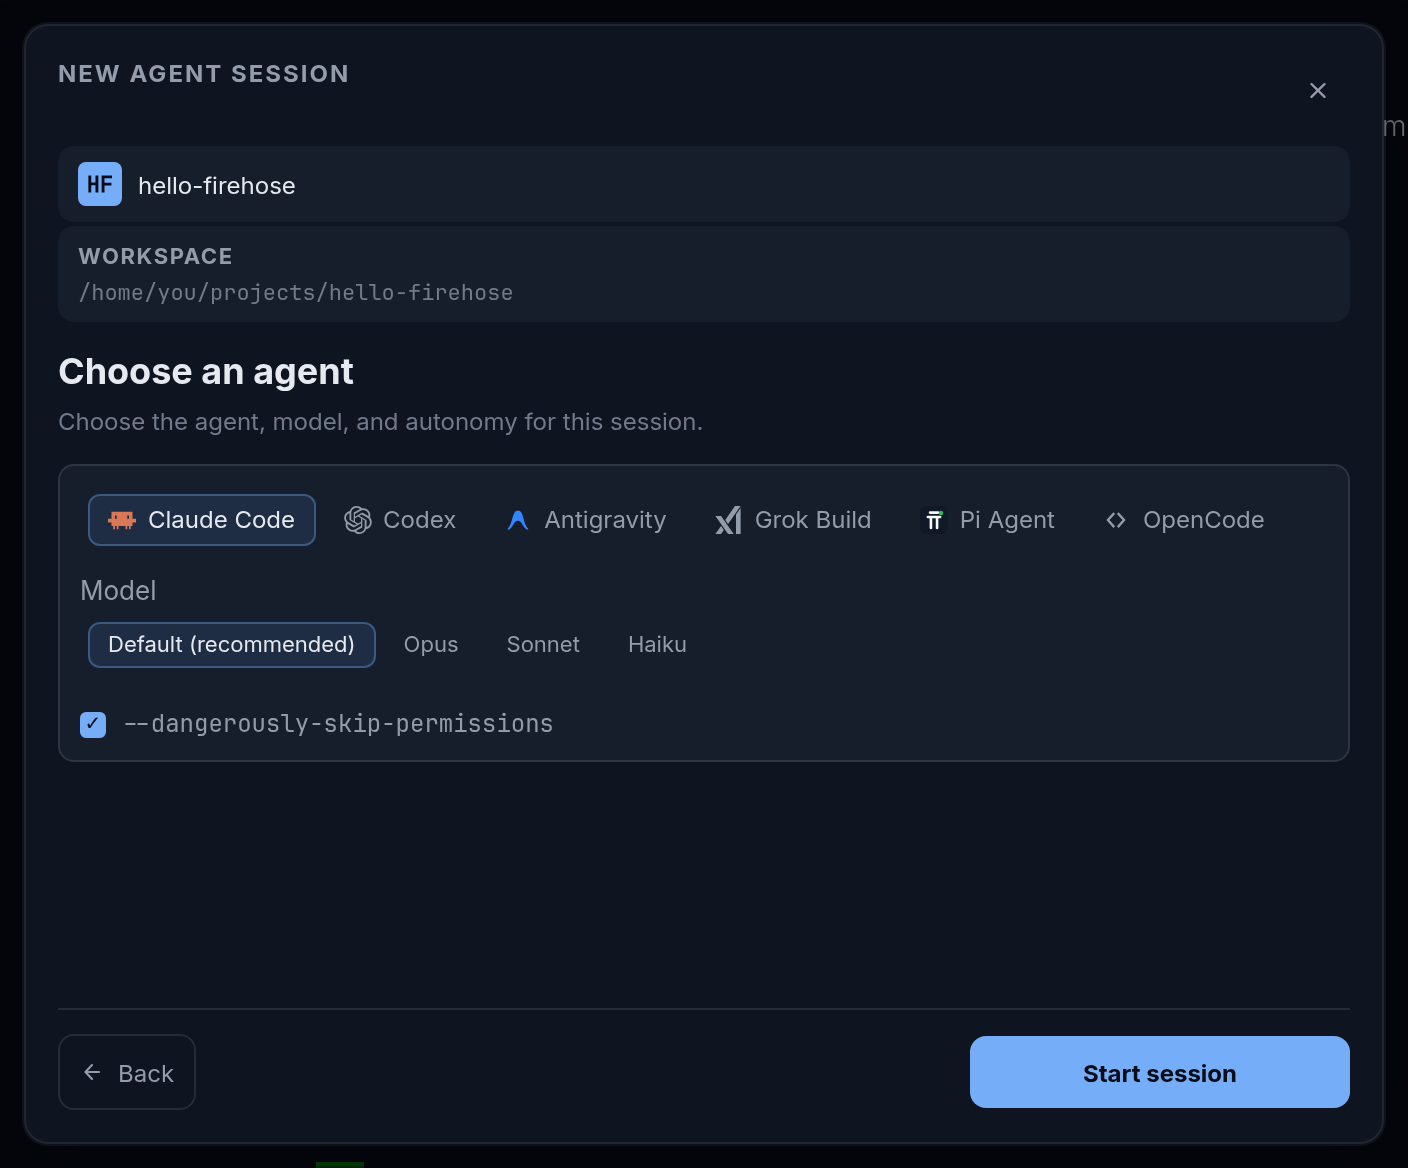
Select **New session**, the **+** button at the top right of the **Sessions** sidebar. In the **New agent session** dialog, confirm that your project appears at **Pick a project**, choose its workspace, and select the provider you installed. Its model choices should load. After you choose an available model and check permissions, **Start session** should open a session in that workspace.
Choose an agent. Model choices depend on your provider and account. Sample project.
These are three separate checks: project discovery, model discovery, and session startup. A model list alone does not prove the provider can handle your account’s requests. Complete the [small explanation task](/getting-started/first-session/#4-give-it-a-clear-request) to check an actual response.
If a check fails, note the project name, provider, selected model, exact error, and the last step that worked. See [startup troubleshooting](/troubleshooting/common-problems/#start-session-is-unavailable-or-fails).
## Use more than one server
In the hosted app, each browser tab chooses its own server. Reloading a tab keeps its selected address. You can connect another tab to a different server.
To switch servers, open **Settings** (the gear icon at the bottom of the icon rail on the far left). Under **Server connection**, enter the other server's address and select **Save and connect**. Switching preserves the previous server’s stored workspace for when you return.
**Forget this server** clears that server’s stored workspace, including drafts, annotations, open files, and project ordering. Use switching when you intend to return; read the confirmation before forgetting a server.
## If you can’t connect
On the Firehose computer, run `firehose status` to check that Firehose is running. From another device, check that the Firehose computer is awake and that both devices are signed in to the same Tailscale account. Follow [connection troubleshooting](/troubleshooting/common-problems/#i-cant-connect-to-my-server) for the next checks.
Once connected, [start your first session](/getting-started/first-session/).
---
# Put files in the right workspace
Put `greeting.mjs` in the project your agent will use, then open a terminal in that same directory. Choose the route that matches where you are sitting.
## Before you begin
You need the project directory on the Firehose server. For the practice route, first create `hello-firehose` through **New git project** in **New session**, as described in [Start your first session](/getting-started/first-session/#1-prepare-a-practice-project). Its path combines the **Location** you selected and the project name.
Ask your operator for the full path if you do not know it. Do this before copying a file. The examples below use `~/projects/hello-firehose`; replace it with your actual path.
| Your situation | Use this route |
| --- | --- |
| You can open a terminal on the server computer | [Work on that computer](#work-on-the-server-computer) |
| You use another computer and already have SSH access | [Copy over SSH](#copy-from-another-computer-with-ssh) |
| You are on a phone or do not have terminal access | [Ask your operator](#ask-your-operator-to-place-the-file) |
You can also select the **Terminal** tab at the top of a session to [open a shell in that session's folder](/tools/terminal/) for these location and command checks. Attaching a file to Chat stages prompt material; it does not place `greeting.mjs` at the project root for this tutorial.
SSH is a separate way to sign in to the server from a terminal. Access to the Firehose app or its Tailscale network does not by itself establish an SSH login. The shell examples here use a macOS or Linux terminal with Git and Node.js available on the server.
## Work on the server computer
1. Open your computer’s terminal application.
2. Change into the project directory:
```sh
cd ~/projects/hello-firehose
pwd
git rev-parse --show-toplevel
```
Both printed paths should identify `hello-firehose` on the server. If `cd` fails, stop and confirm the path; do not continue in the terminal’s previous directory.
3. Open a text editor, paste the [quickstart’s greeting code](/getting-started/first-session/#3-add-the-example-file), and save it in that directory as `greeting.mjs`, without an extra `.txt` extension. Alternatively, save the [downloadable file](/examples/hello-firehose/greeting.mjs) there.
4. Continue with [Check the file](#check-the-file).
## Copy from another computer with SSH
Have your operator confirm your SSH username, server hostname, login method, and destination directory first. `YOUR_USER` and `YOUR_SERVER` below are placeholders. Use the operator’s SSH address, not a documentation URL or the hosted app URL.
1. Download [greeting.mjs](/examples/hello-firehose/greeting.mjs) to your computer. Open a terminal in the folder where you saved it.
2. Sign in to check the destination:
```sh
ssh YOUR_USER@YOUR_SERVER
```
On the server, run:
```sh
cd ~/projects/hello-firehose
pwd
git rev-parse --show-toplevel
exit
```
For a first SSH connection, verify the host identity with your operator before accepting it. If login fails, send the error to the operator; Firehose’s Connect button cannot repair SSH access.
3. Back in your computer’s terminal, copy the file:
```sh
scp ./greeting.mjs YOUR_USER@YOUR_SERVER:projects/hello-firehose/greeting.mjs
```
The destination after `:` is relative to that SSH account’s home directory. Replace it if your operator supplied a different path. This command replaces a file with the same name, so use it only for the intended practice file.
4. Sign in again with `ssh YOUR_USER@YOUR_SERVER`, change into the same project directory, and check the file below.
## Ask your operator to place the file
Send the operator the sample download and your project name through your usual support channel. Ask them to save it in the server’s project directory and run the checks below. Ask for the full path and printed greeting in their reply.
Once they confirm that result, continue in Firehose from your phone or browser. You do not need to set up SSH on your phone just to read an agent’s explanation.
## Check the file
In the server terminal, inside the intended project, run:
```sh
pwd
ls -l greeting.mjs
node --input-type=module -e "import { greet } from './greeting.mjs'; console.log(greet(' Ada '));"
```
**Expected result:** the path is your project, the file is present, and the last command prints `Hello, Ada!`.
If the file is missing, check the save location and extension. If `node` is unavailable, ask the operator to supply Node.js before proceeding. If the greeting differs, compare the file with the original sample before asking an agent to explain it.
Return to [Add the example file](/getting-started/first-session/#3-add-the-example-file) to commit the baseline. For a new worktree later, repeat the location check using that worktree’s path; its files live in a different directory.
---
# Find your way around Firehose
Learn where Firehose keeps its controls, so you can follow any guide on this site. Every guide names a control and where it is; this page shows how those places fit together.
This page describes Firehose 1.0.1.
## The layout on a computer
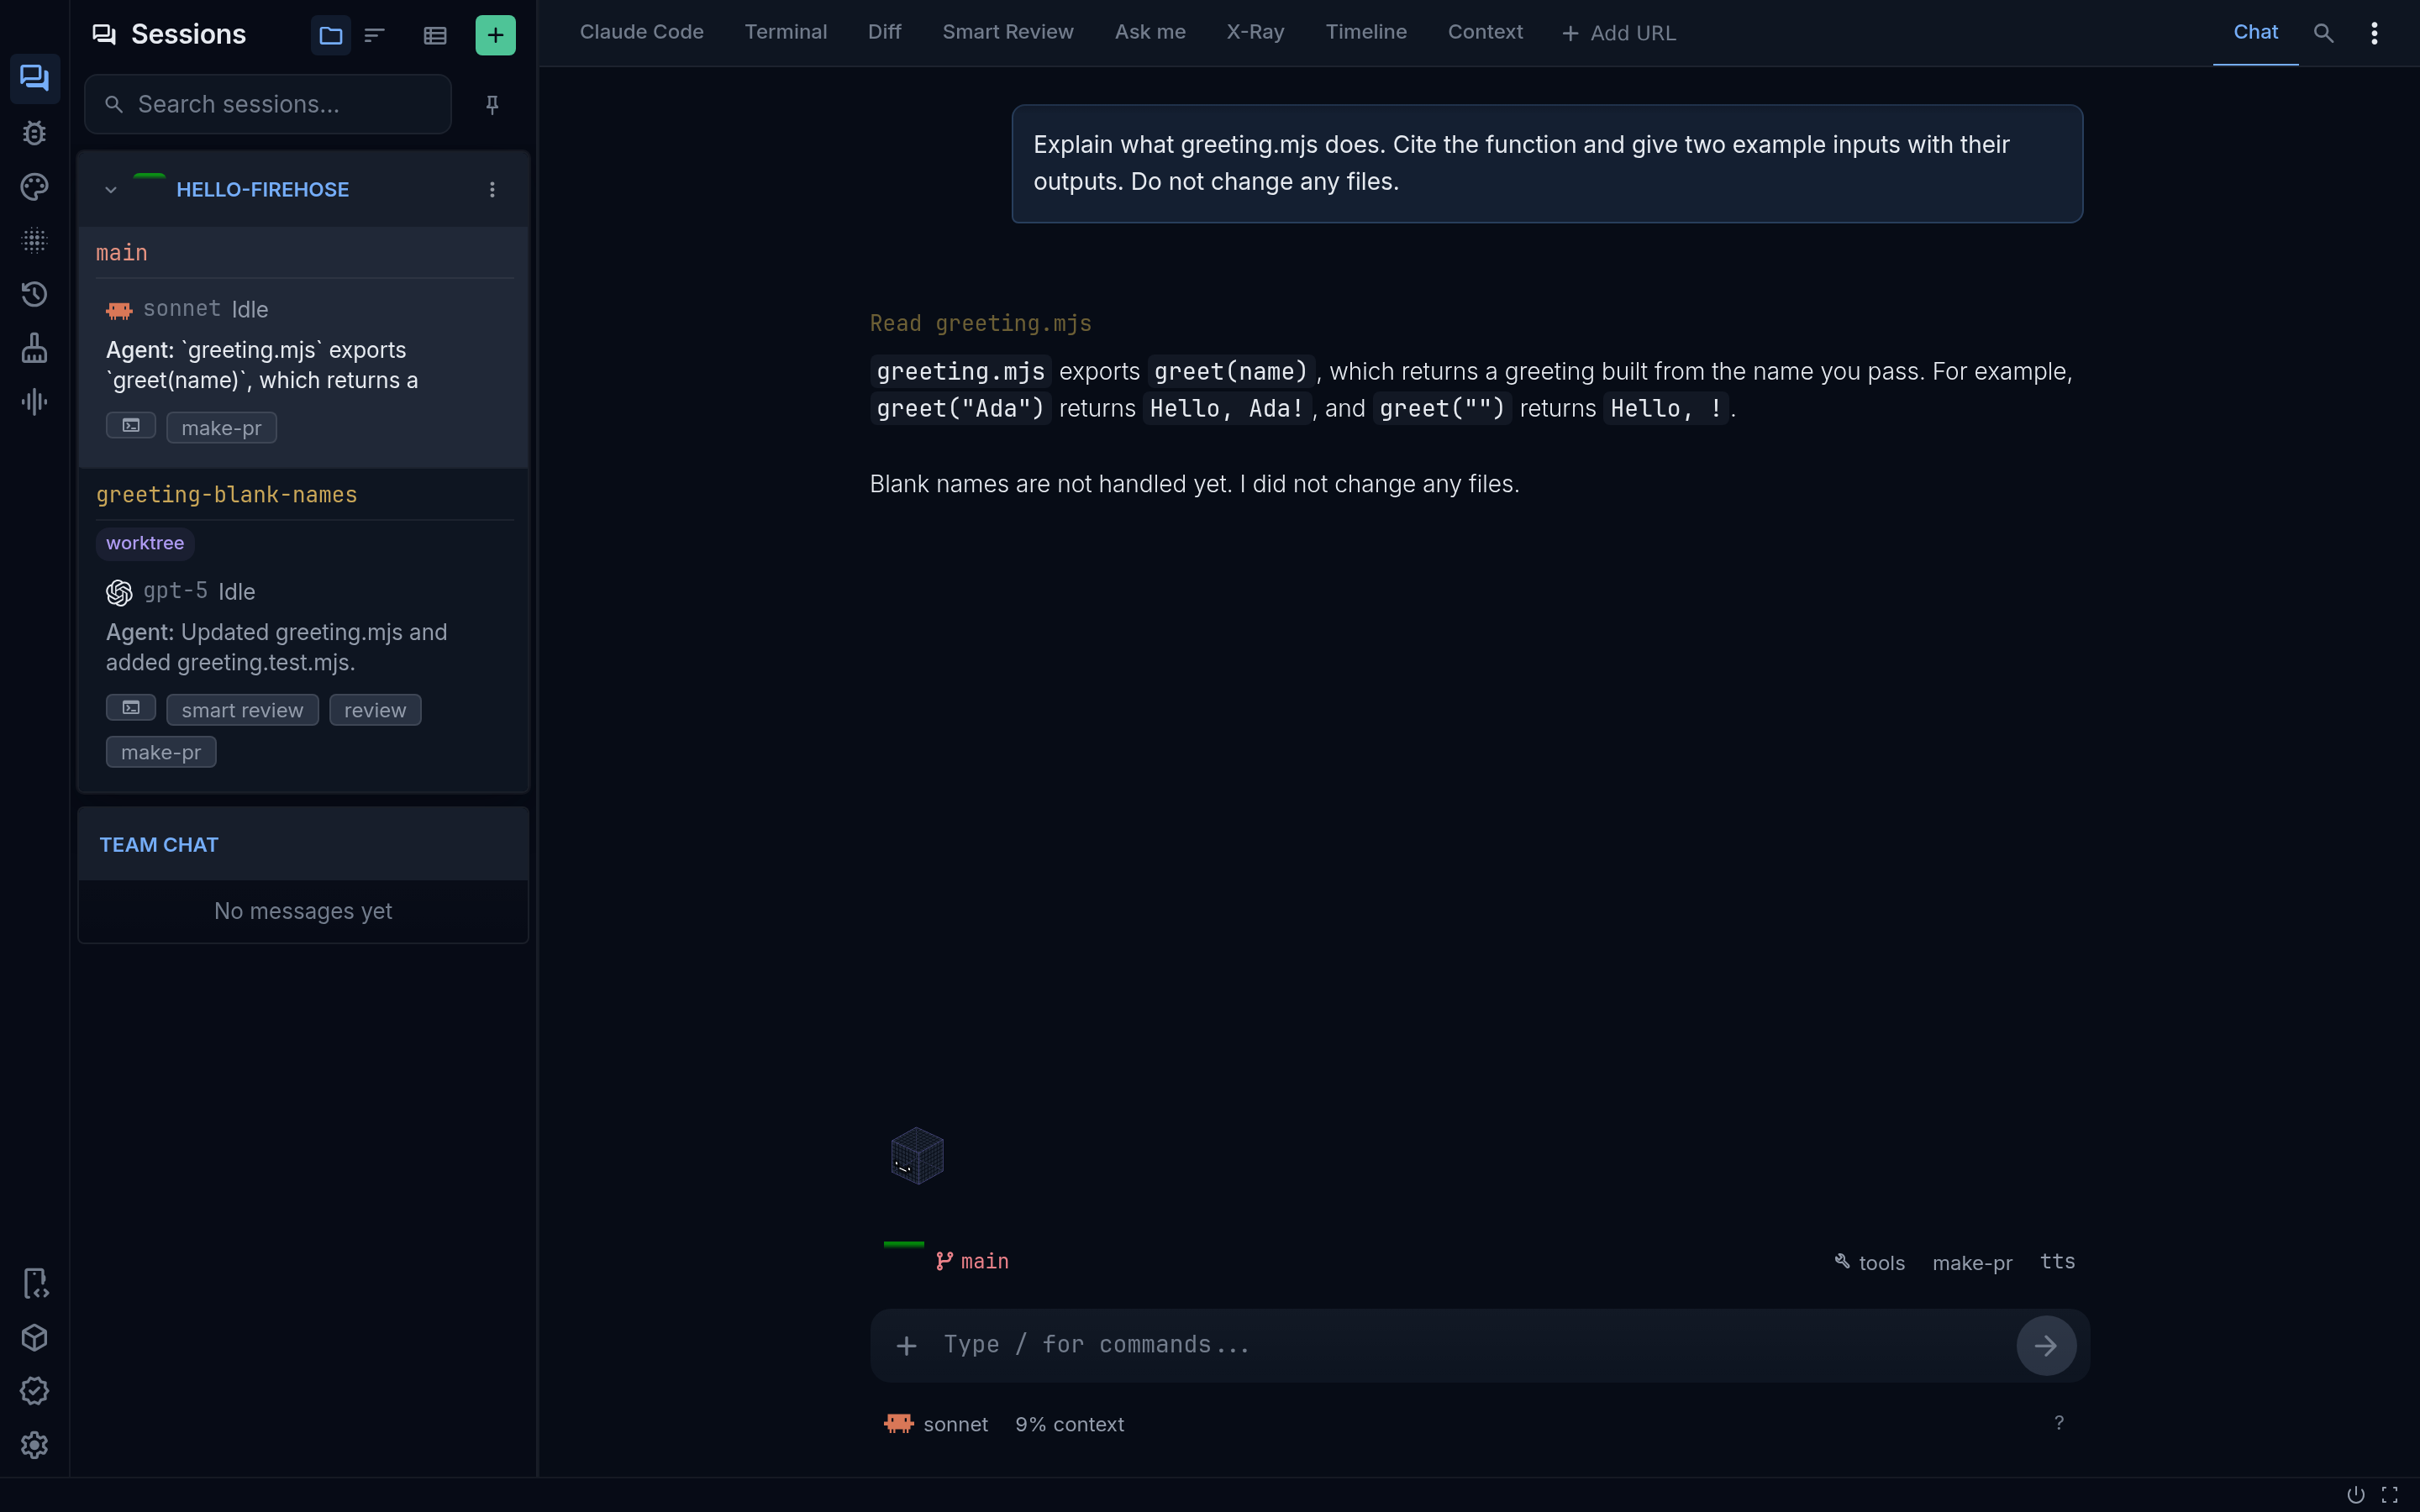
The Firehose window has four areas, from left to right and top to bottom:
| Area | Where it is | What you use it for |
| --- | --- | --- |
| **Icon rail** | The narrow strip of icons on the far left edge | Switch the sidebar between panels. The speech-bubble icon at the top shows **Sessions**. The gear icon at the bottom opens **Settings**. |
| **Sessions sidebar** | Beside the icon rail | See every session, grouped by project. The **+** button in its header, labeled **New session**, starts a session. |
| **Workspace tabs** | A row across the top of the selected session | Open **Terminal**, **Diff**, **Smart Review**, **Ask me**, and other tools. The **Chat** toggle sits at the right end of this row. |
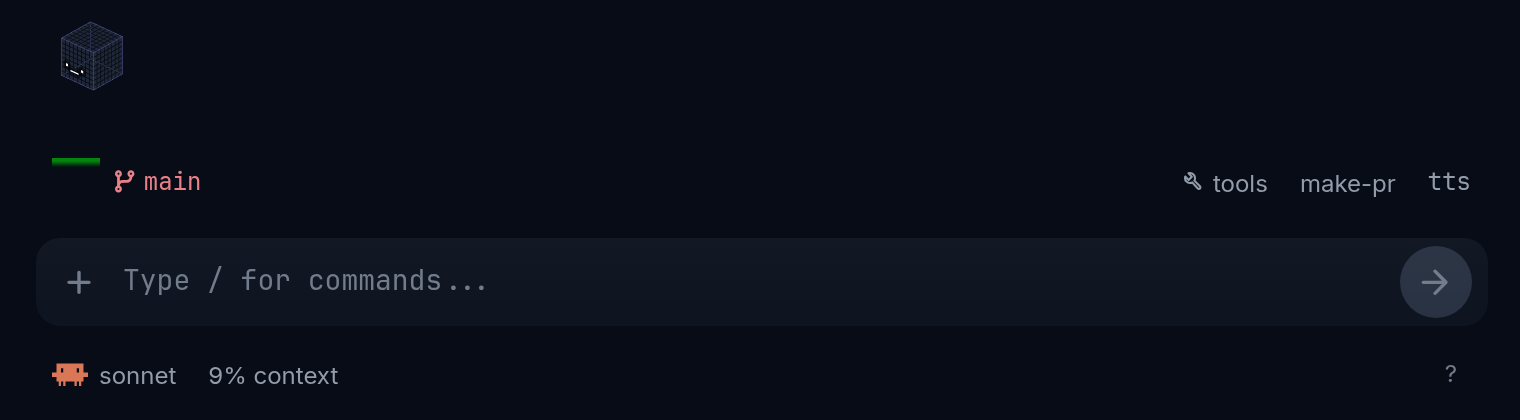
| **Prompt bar and message box** | The bottom of the selected session | The prompt bar shows the session's folder and branch, with **commit** and **tools** on the right. Below it, the message box is where you type to the agent. |
A status bar runs along the very bottom of the window.
The Firehose window: icon rail, Sessions sidebar with the + button, workspace tabs, and the prompt bar and message box. Select the image to open it full size. Sample project and messages.
## Start a session
Select **New session**, the **+** button at the top right of the **Sessions** sidebar. If the sidebar is too narrow to show it, open the **⋮** **Menu** button in the sidebar header instead.
The **New agent session** dialog walks through three steps:
1. **Pick a project.** Choose a project, then select **Next: Choose a workspace**. To create a project, select **New git project** below the list.
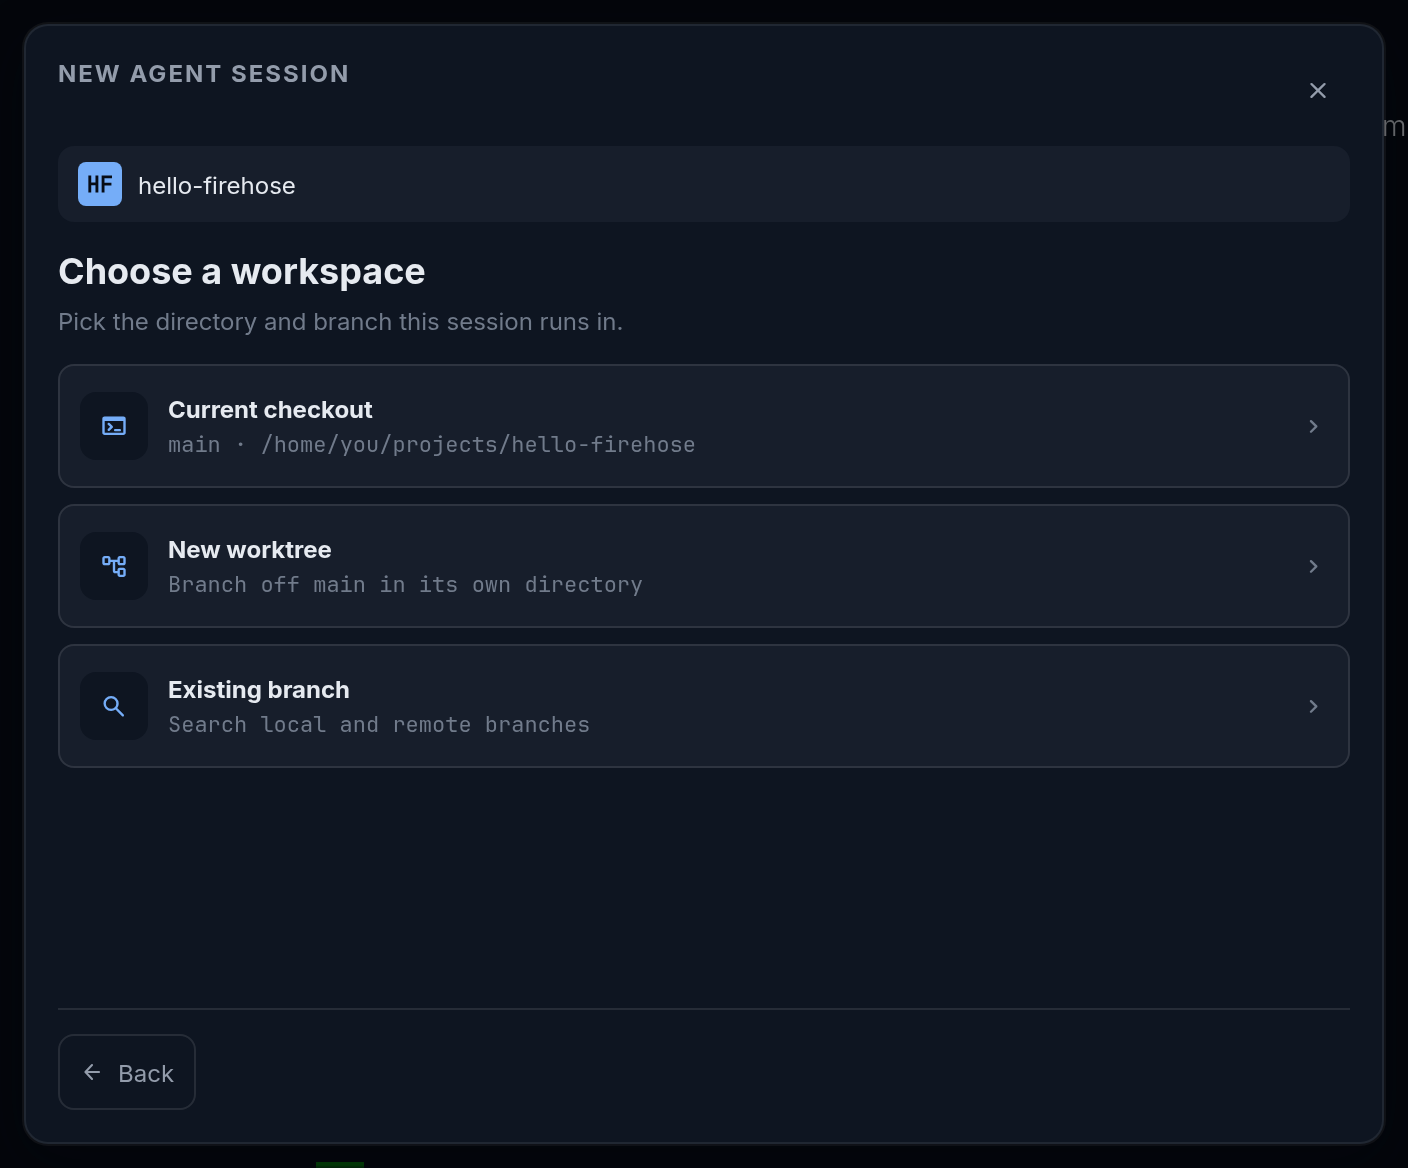
2. **Choose a workspace.** Choose **Current checkout**, **New worktree**, or **Existing branch**. See [Choose a workspace](/guides/workspaces/).
3. **Choose an agent.** Choose a provider and model, check permissions, and select **Start session**.
## Open Settings
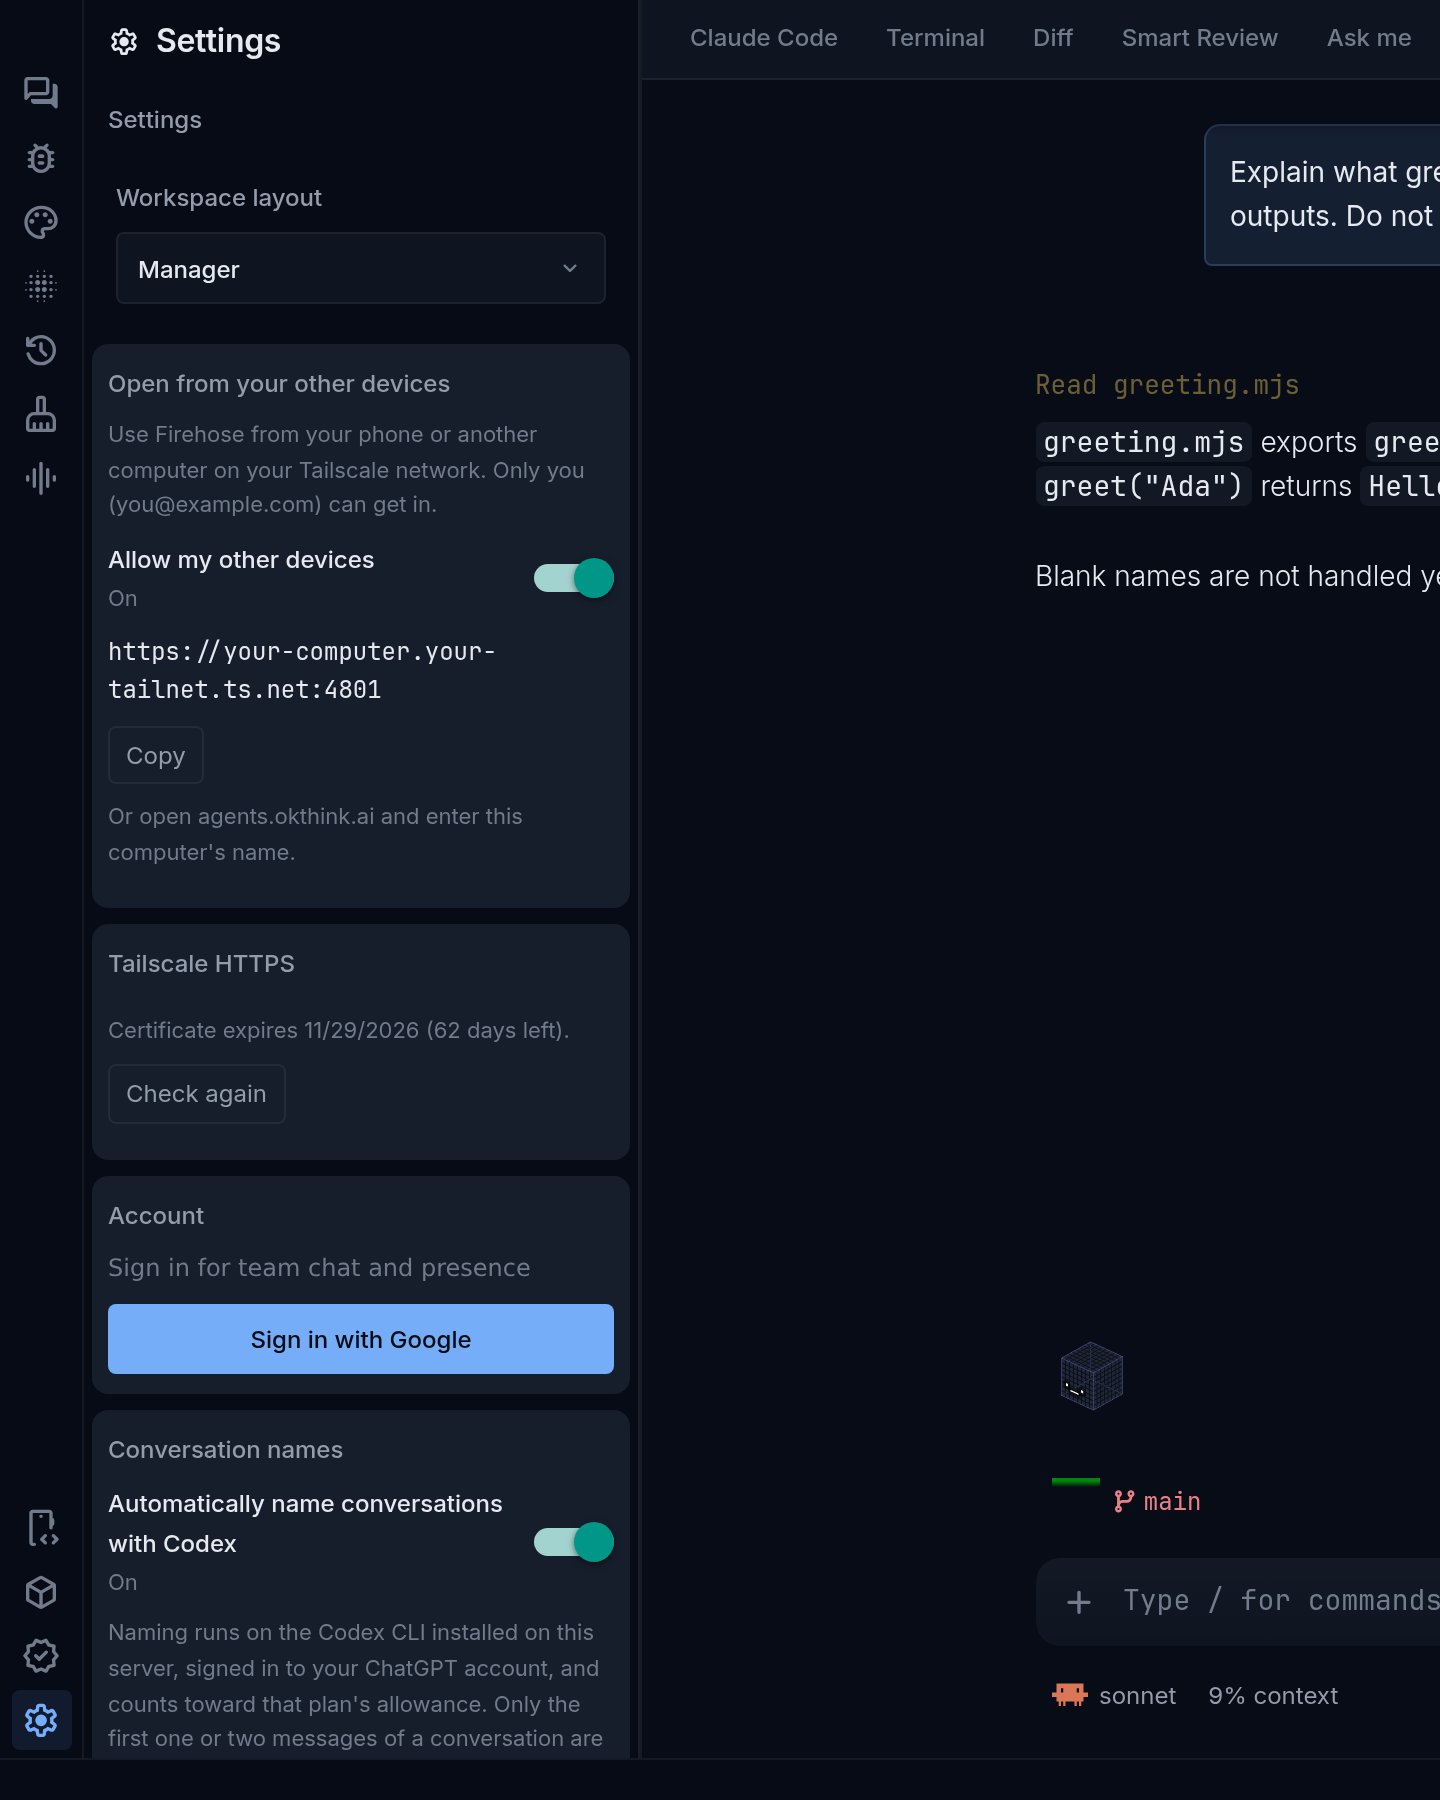
Select the gear icon labeled **Settings** at the bottom of the icon rail. Settings opens in the sidebar. See [Projects, agents, and settings](/reference/settings/) for what each section does.
Settings in the sidebar, opened from the gear at the bottom of the icon rail. Sample values.
## Work in a session
Select a session in the **Sessions** sidebar to open it.
- **Talk to the agent.** Type in the message box at the bottom, which shows `Type / for commands...` when empty. Press Enter or select the round arrow button at its right to send.
- **Check where it runs.** The prompt bar above the message box shows the session's folder and branch. Select the branch to refresh Git status. For the full path, open **More actions** (the **⋮** at the right end of the workspace tabs), then **Session details**, and read **Directory**.
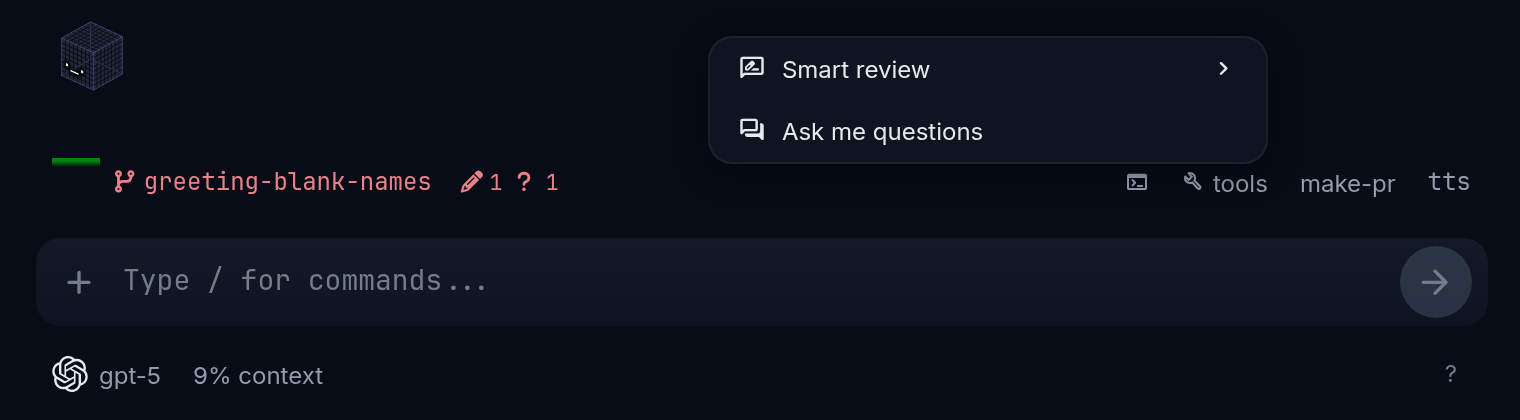
- **Use tools.** Select **tools** on the prompt bar for **Ask me questions** and **Smart review**. The **commit** button appears beside it when the branch has uncommitted changes.
- **Attach a file.** Select the **+** at the left of the message box's lower row.
- **Check context use.** The **NN% context** button below the message box shows how much of the agent's context window is used, with **Compact** and **Clear**.
- **Stop the agent.** While it works, press Escape in the message box, or select the red stop button, **Stop (interrupt)**, beside the activity indicator above the message box.
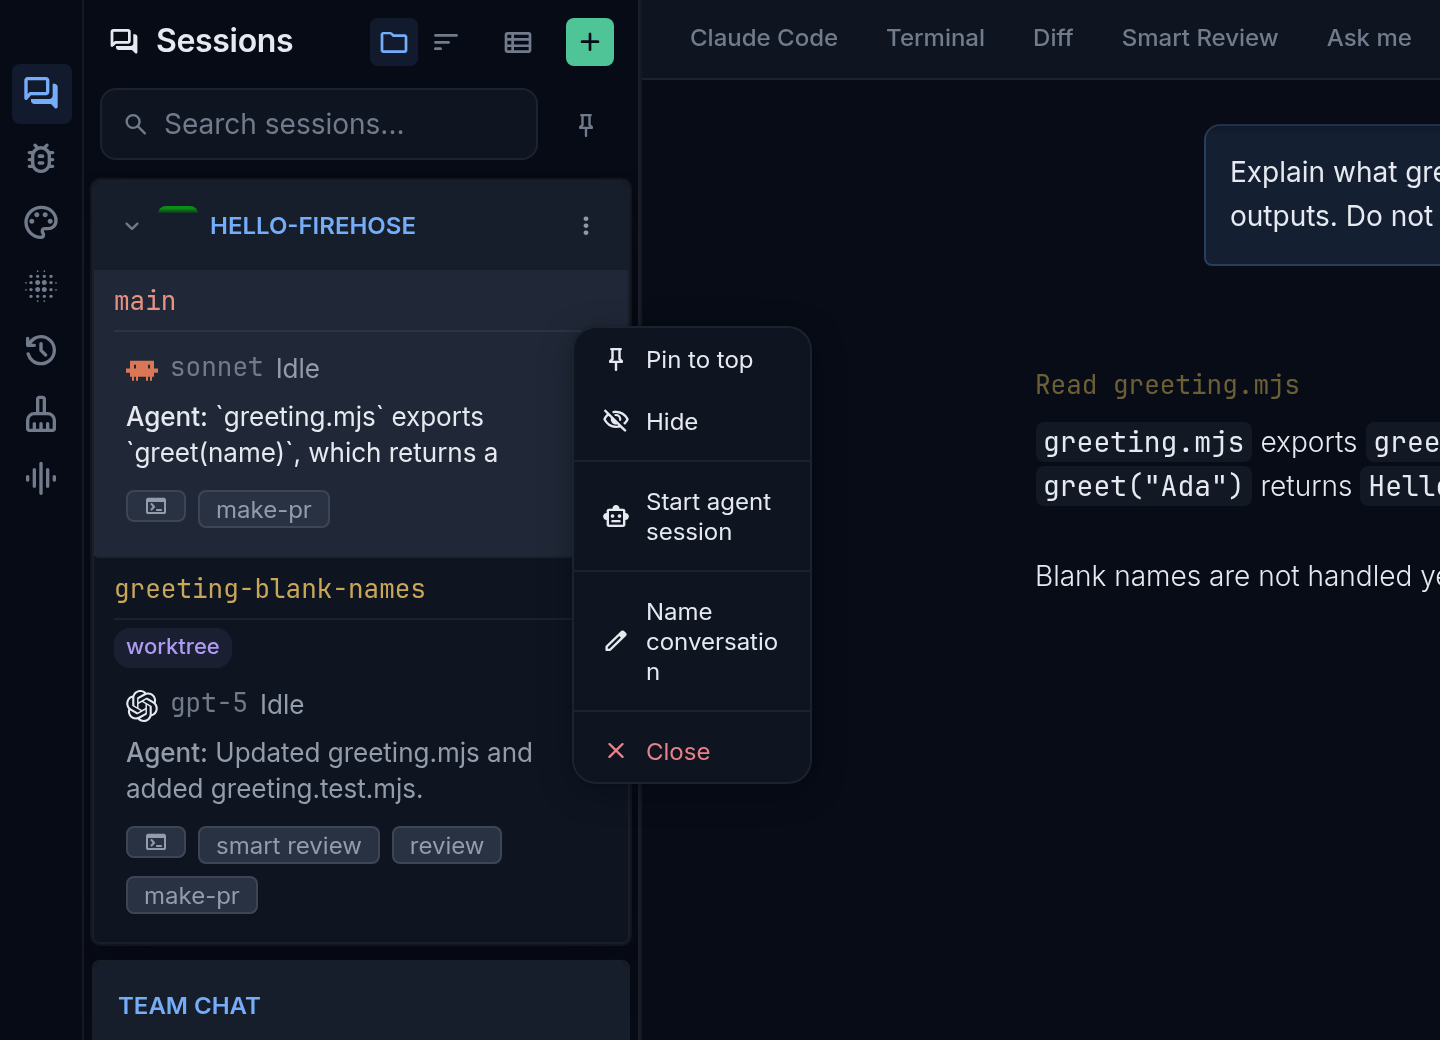
- **Close the session.** In the **Sessions** sidebar, select the session row's **⋮** (**Session options**), then **Close**.
The prompt bar, message box, and NN% context button. Sample session.
A session's status, such as **Idle** or **Stopping...**, appears on its row in the **Sessions** sidebar.
## The layout on a phone
On a phone, Firehose shows one screen at a time:
- **The session list** is the first screen. The icon rail, including **Settings**, appears only here.
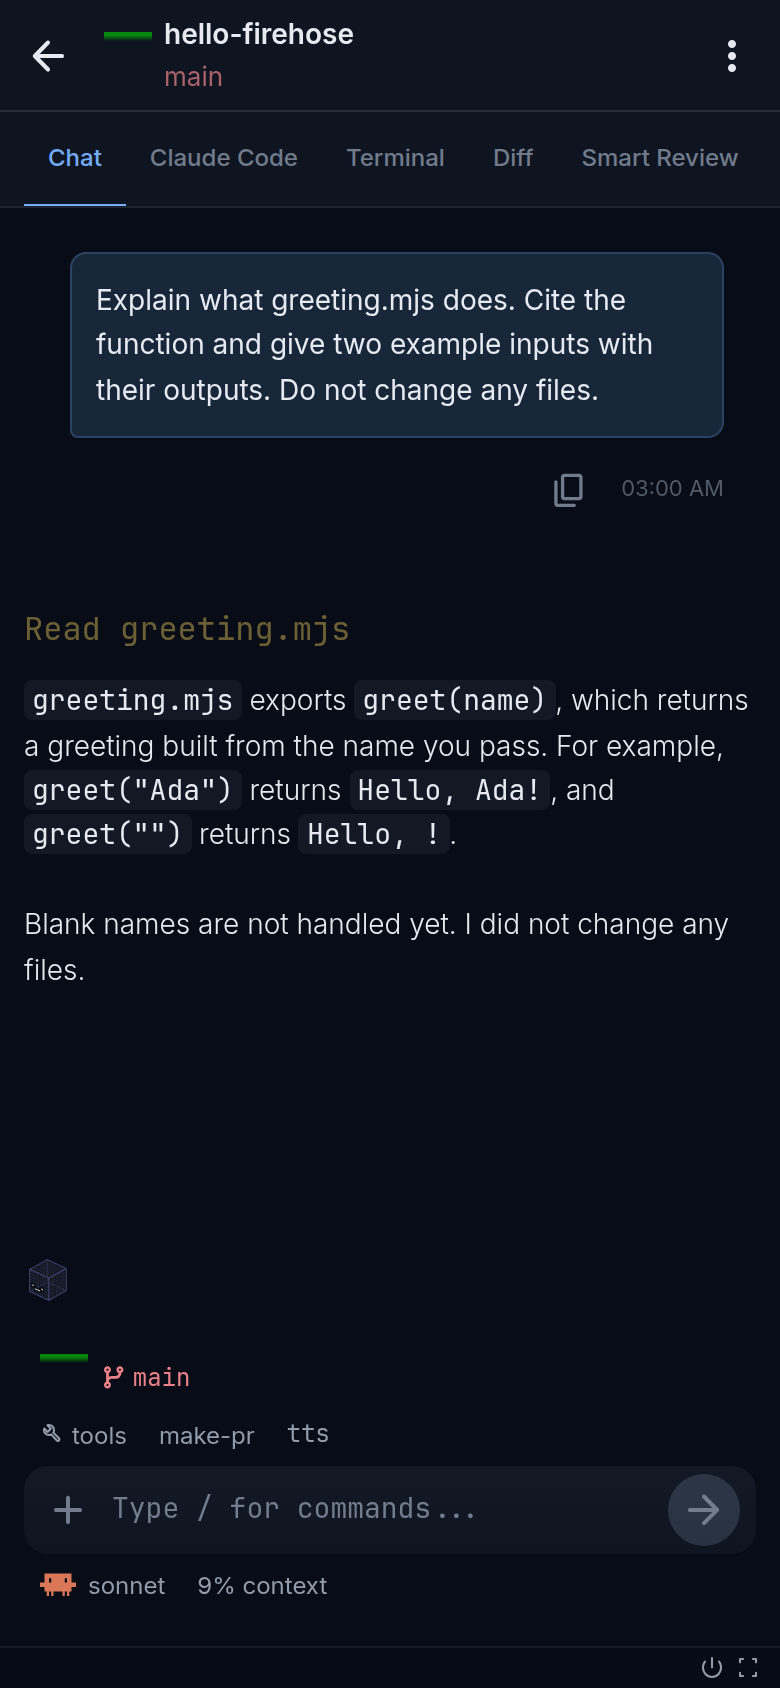
- **A session** fills the screen when you select it. The workspace tabs start with **Chat** and scroll sideways. Select the back arrow in the session header to return to the list.
- **The session header's ⋮ menu** has **Interrupt** and **Session details**.
A session on a phone: back arrow and ⋮ menu in the header, tabs starting with Chat. Sample project and messages.
See [Use Firehose on mobile web](/guides/mobile/) for a full walkthrough.
---
# Start your first session
Start an agent and ask it to explain a small piece of code. You’ll finish with an answer you can check against the file.
## Before you begin
[Connect to your Firehose server](/getting-started/connect/) and have an available agent provider on that machine. A provider is the agent system, such as Claude or Codex, that handles your requests.
**The practice project** is a tiny repository you create yourself in step 1, called `hello-firehose`. It holds one file from this site, [`greeting.mjs`](/examples/hello-firehose/greeting.mjs), a three-line function that greets a name. Because you know exactly what the file does, you can check whether the agent's explanation is right. The same project carries on through [Make and review a change](/guides/make-a-change/). It needs Git and Node.js on your computer.
**Already have a Git repository on the server?** [Skip to choosing your workspace](#2-choose-where-the-agent-works). Use the [own-project adaptation](/guides/explain-code/#use-your-own-project) to choose a small file and a result you can verify. The practice route below also needs Git and Node.js on the server.
## 1. Prepare a practice project
In Firehose:
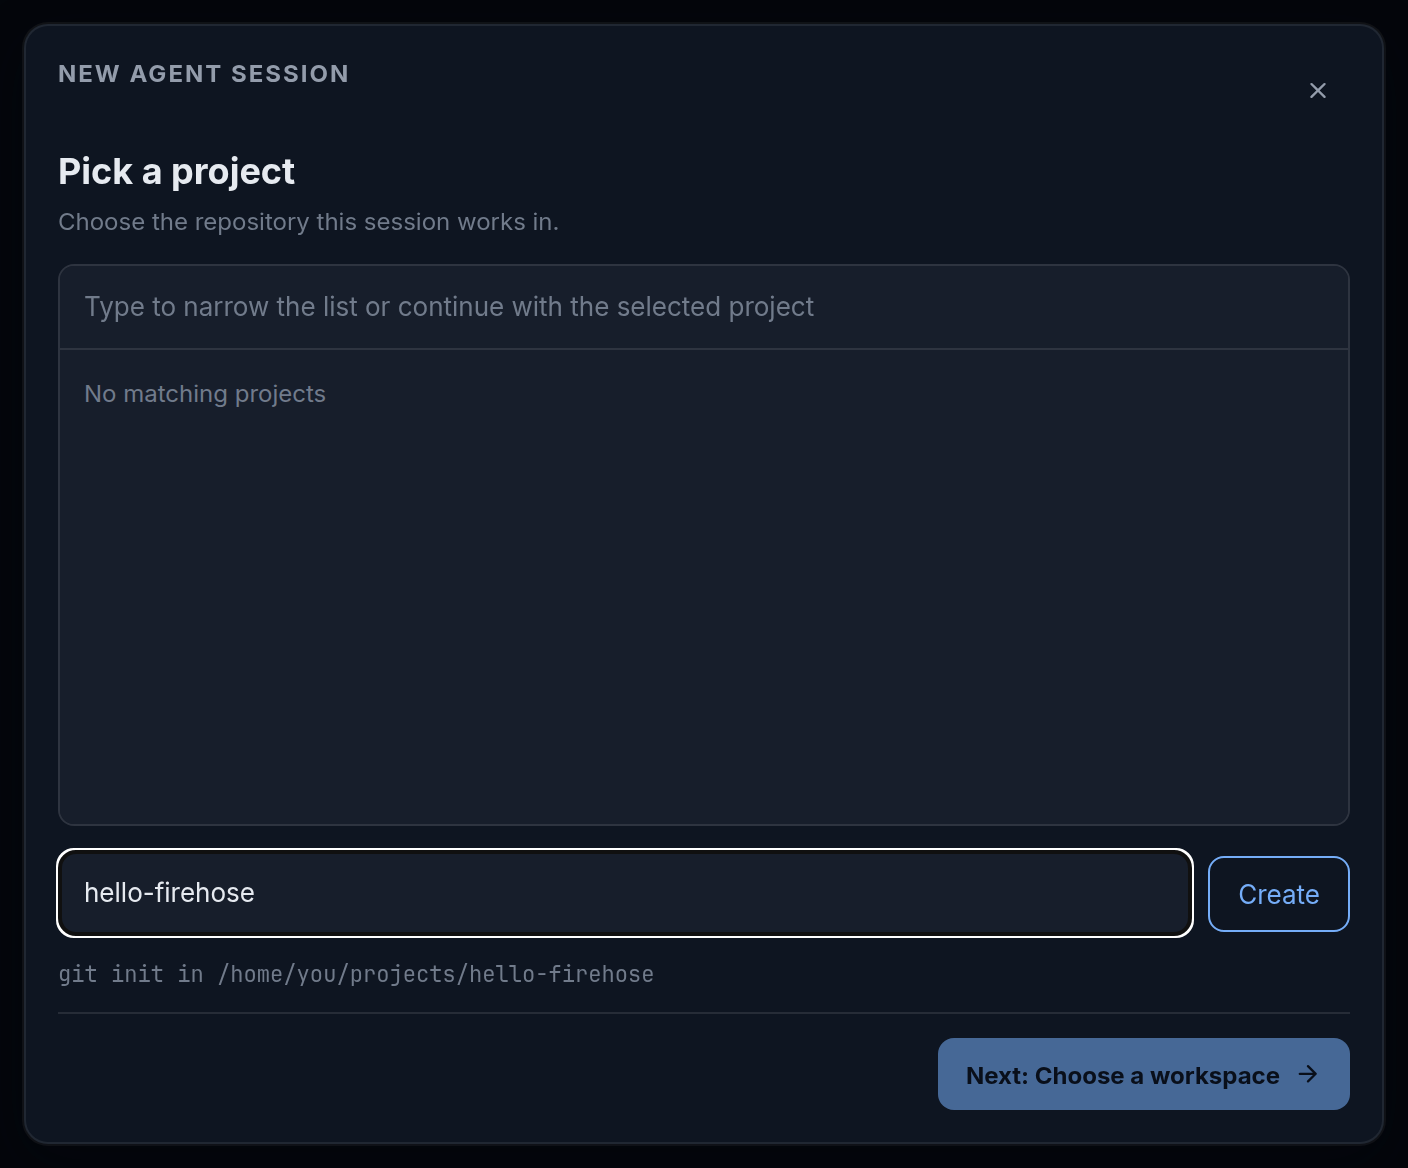
1. Select **New session**, the **+** button at the top right of the **Sessions** sidebar. The **New agent session** dialog opens at **Pick a project**.
2. Below the project list, select **New git project**.
3. Enter `hello-firehose` in the name field, which shows `new-project-name` when empty. If you see **Location**, choose the parent directory first; with one project directory, Firehose shows where it will create the project instead.
4. Select **Create**.
Creating the practice project. The folder in the hint is an example; Firehose uses your project directory.
**Expected result:** Firehose creates a Git repository with a README and attempts an initial commit. You add the example file in step 3, once a session is open.
If Firehose says **No project directories configured — add one in Settings first.**, open **Settings** (the gear icon at the bottom of the icon rail on the far left). Under **Project directories**, add your projects directory to the comma-separated list and select **Save**. These are paths on the server. Preserve existing entries.
If the name already exists, choose that project or use another name. If creation reports no initial commit, configure your usual Git name and email on the server, then commit the README before using branch or worktree workflows.
## 2. Choose where the agent works
1. Select **New session** (the **+** at the top of the **Sessions** sidebar) and choose your repository at **Pick a project**.
2. Select **Next: Choose a workspace**.
3. Choose **Current checkout** to use that directory. For a separate task directory, see [workspace choices](/guides/workspaces/).
4. At **Choose an agent**, choose a provider and an available model.
5. Check the permission controls described below, then select **Start session**.
Choose an agent. Model choices depend on your provider and account. Sample project.
### Check what the agent can do
The wizard starts with autonomy enabled. For Claude, the checkbox is **--dangerously-skip-permissions**. For Codex, **Full Auto** enables actions without approval requests and removes the workspace sandbox restrictions.
Turning Codex’s **Full Auto** off uses workspace restrictions and the provider’s on-request approval policy. It does not mean every command asks for approval. Claude and other providers have different controls; read [agent permissions](/reference/agent-permissions/) for the exact distinctions.
A request such as “Do not change files” expresses your task’s constraints; it does not change these permission settings.
**Expected result:** your session opens in the selected workspace. If the button says **Loading models**, the choices are still being fetched; continue when model choices appear. If a model is unavailable or launch fails, follow [startup troubleshooting](/troubleshooting/common-problems/#start-session-is-unavailable-or-fails).
## 3. Add the example file
Skip this step if you are using your own repository.
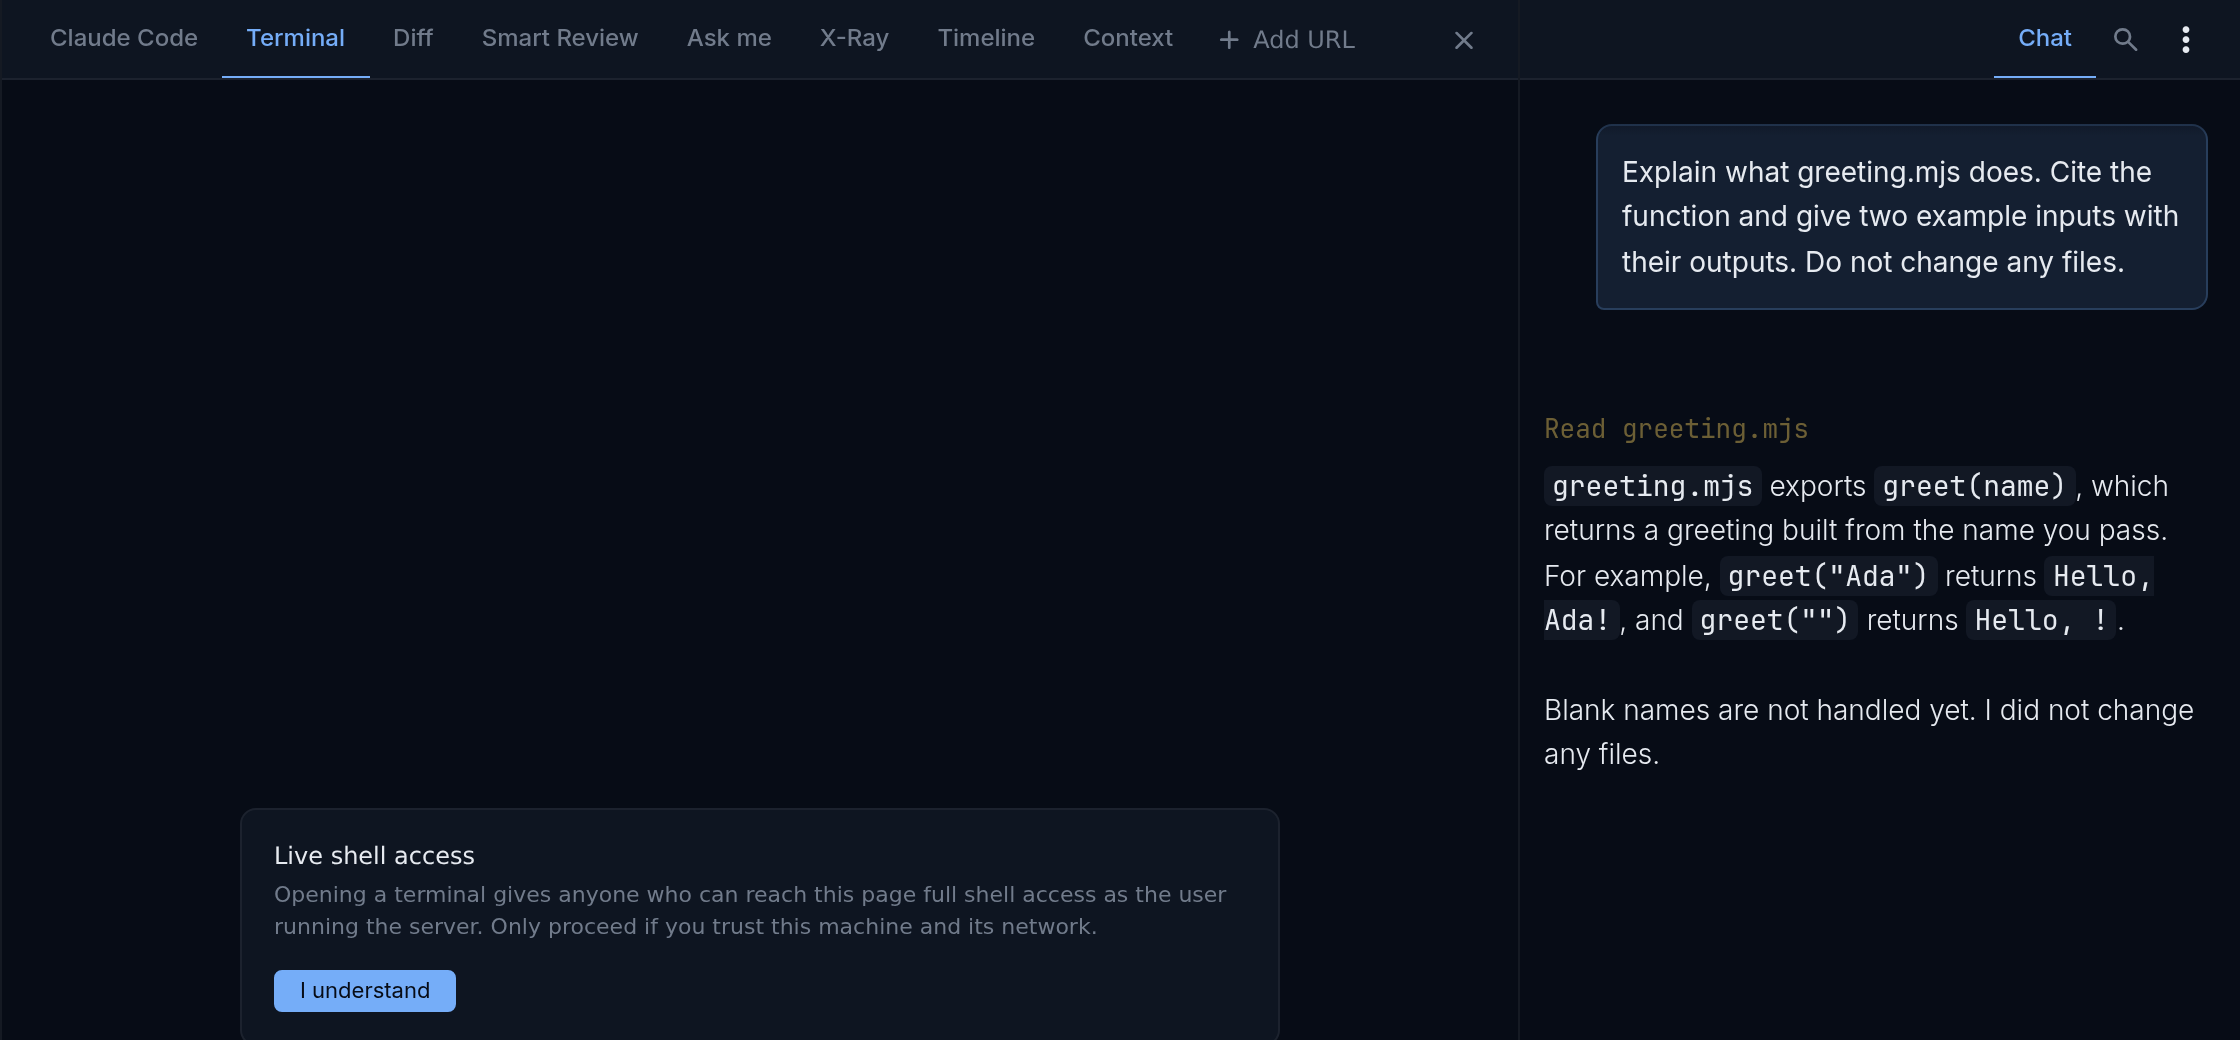
1. Select the **Terminal** tab at the top of the session. The first time, read **Live shell access** and select **I understand**. The shell opens in the project folder.
The Terminal tab the first time you open it. Sample session.
2. Run these commands to download `greeting.mjs`, commit it, and check it:
```sh
curl -fsSL https://firehose-docs.web.app/examples/hello-firehose/greeting.mjs -o greeting.mjs
git add greeting.mjs
git commit -m "Add greeting example"
node --input-type=module -e "import { greet } from './greeting.mjs'; console.log(greet(' Ada '));"
```
**Expected result:** the last command prints `Hello, Ada!`. The file contains:
```js
export function greet(name) {
return `Hello, ${name.trim()}!`;
}
```
If `curl` is not available, create `greeting.mjs` in the project folder with that content, then run the last three commands. For other ways to place files, see [Put files in the right workspace](/getting-started/files-and-terminal/). Keep this baseline committed so later changes are easy to identify.
Select **Chat** at the right end of the tab row to return to the conversation.
## 4. Give it a clear request
Type this in the message box at the bottom of the session and press Enter, or select the round arrow button at its right. For your own repository, replace the filename and question with a small example you can verify:
```text
Read greeting.mjs and explain what greet does.
Show the result for " Ada " and for an empty string.
Do not change files or run installation commands.
Point to the code that explains each result.
```
Follow the response in the session's conversation above the message box. If the agent asks for information, answer in the same session.
## 5. Check the answer
The function trims spaces from the name and adds a greeting:
| Input | Expected result |
| --- | --- |
| `" Ada "` | `"Hello, Ada!"` |
| `""` | `"Hello, !"` |
The agent may phrase its explanation differently. Check its answer against `greeting.mjs`.
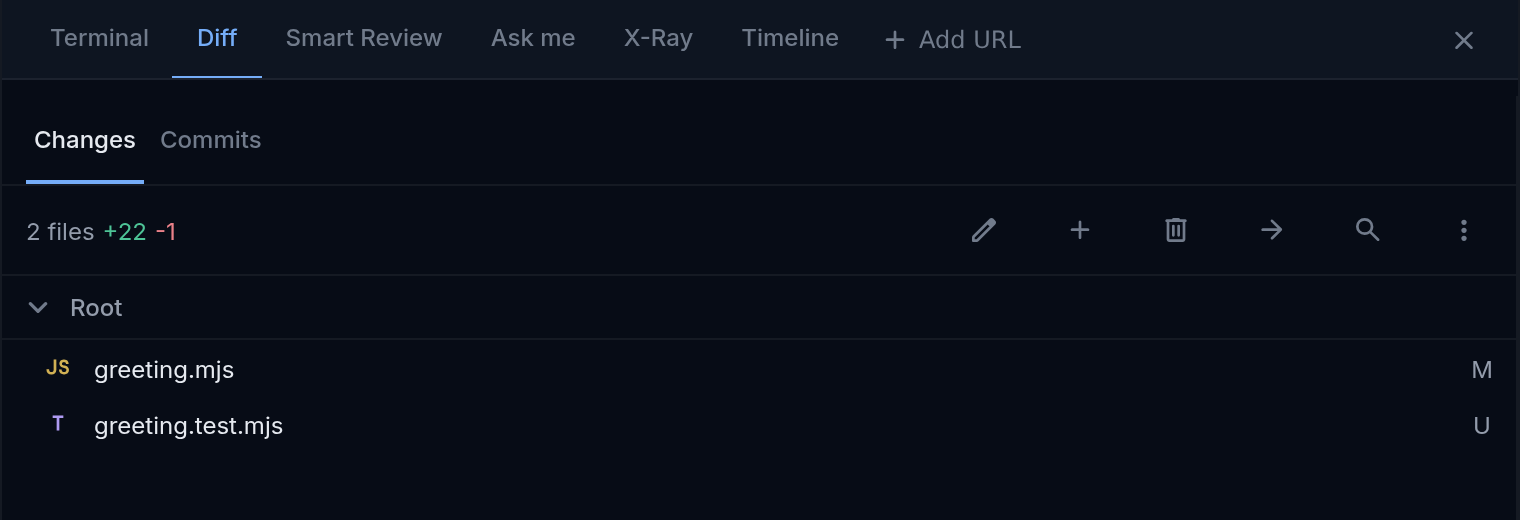
Select the **Diff** tab at the top of the session, then **Changes**. Select **Diff filters**, the **⋮** button next to the search icon, and under **Compare** choose **Working changes** to check for uncommitted edits. With a clean starting repository, you should see none. If you already had edits, compare with that starting state instead of attributing them all to this session.
You’ve started a session, sent a request, and checked its result. Next, [ask for a small improvement](/guides/make-a-change/) using the same project.
---
# Install Firehose
Install Firehose on the computer where your repositories live. When you finish, Firehose is running on that computer and its dashboard is open in your browser, ready to [activate](/getting-started/activate/).
This page describes Firehose 1.0.1.
## Before you begin
You need:
- A computer you control running macOS or Linux, on an x64 or arm64 processor. Linux needs a glibc-based distribution; Alpine and other musl-based systems are not supported.
- `curl` and `tar`, which the installer uses to download and unpack Firehose.
- `tmux`, which Firehose needs to launch agent sessions, and `git` for workspace features.
- At least one agent command-line tool installed and signed in: Claude Code (`claude`), Codex (`codex`), or Antigravity (`agy`). Firehose does not install or sign in to these for you.
- Agreement to the [Firehose end-user license agreement](https://github.com/okthink-ai/firehose-releases/releases/latest/download/EULA.md). You can read it before you install; the installer asks you to accept it.
- A paid Firehose subscription, or the email address you will use to buy one during [activation](/getting-started/activate/).
- [Tailscale](https://tailscale.com/download), only if you want to open Firehose from your phone or another computer. Install it before running the installer and the installer offers to set up access for you. You can also add it later; see [Set up Tailscale](/getting-started/connect/#set-up-tailscale).
The installer warns rather than stops if `tmux`, `git`, or an agent tool is missing. Install them before you start a session.
## 1. Run the installer
Open a terminal on the computer and run:
```sh
curl -fsSL https://github.com/okthink-ai/firehose-releases/releases/latest/download/install.sh | sh
```
The installer downloads the latest release for your computer, checks its checksum, and unpacks it into `~/.firehose`. The release includes its own Node.js runtime, so nothing is built on your computer.
## 2. Accept the license agreement
Firehose is licensed software. You can read the [end-user license agreement](https://github.com/okthink-ai/firehose-releases/releases/latest/download/EULA.md) before you start; it is the same text the installer saves on your computer. The installer shows where it saved the agreement and asks:
```text
Do you accept the end-user license agreement? [y/N]
```
Read the agreement, then type `y` to continue. Any other answer stops the installation without changing anything.
## 3. Choose whether to allow your other devices
If the computer is connected to Tailscale, the installer asks:
```text
This machine is on Tailscale. Also open Firehose from your other devices
on your tailnet (only you, over HTTPS)? [y/N]
```
Type `y` to use Firehose from your phone or another computer, or press Enter to skip it. You can turn it on later; see [Connect to Firehose](/getting-started/connect/#open-firehose-from-your-other-devices). Without Tailscale, the installer does not ask.
## 4. Check the result
The installer registers Firehose to start when you log in, starts it, and opens `http://localhost:4801` in your browser. It finishes with a message like this:
```text
==> Firehose 1.0.1 installed
Firehose is running at http://localhost:4801.
It starts by itself when you log in.
Activate it in the browser window that just opened.
```
On a computer without a desktop, such as one you reach over SSH, no browser opens. The message tells you to open `http://localhost:4801` in a browser instead.
The dashboard shows **Activate Firehose** until you activate it. Continue to [Activate Firehose](/getting-started/activate/).
If the installer could not register a login service, it starts Firehose for this session only and says so. Run `firehose service install` later to start it at login.
## Use installer options
To pass an option through the one-line command, add `sh -s --` and the options:
```sh
curl -fsSL https://github.com/okthink-ai/firehose-releases/releases/latest/download/install.sh | sh -s -- --port 4900
```
| Option | Use it to |
| --- | --- |
| `--port ` | Serve the dashboard on a port other than 4801, between 1024 and 65535 |
| `--tailnet` | Allow your other devices on Tailscale without being asked |
| `--accept-eula` | Accept the license agreement without a prompt, after reading it |
| `--no-browser` | Skip opening the dashboard when the installer finishes |
| `--no-start` | Install without starting Firehose or registering it to start at login |
| `--release ` | Install a specific version instead of the latest |
| `--dir ` | Install somewhere other than `~/.firehose` |
Changing the port has a cost: the hosted app at agents.okthink.ai always connects on port 4801. On another port, open **Settings** (the gear icon at the bottom of the icon rail on the far left) and copy the address under **Open from your other devices** to use on your other devices instead.
## Manage Firehose from the terminal
The installer adds a `firehose` command. Open a new terminal window if the command is not found yet.
| Command | What it does |
| --- | --- |
| `firehose status` | Show a quick status in the terminal |
| `firehose update` | Upgrade to the latest release |
| `firehose tailnet on` | Open Firehose from your other devices on Tailscale |
| `firehose service uninstall` | Stop starting Firehose at login |
| `firehose uninstall` | Remove Firehose from this computer |
Running the installer again also upgrades Firehose. It keeps the port you chose before.
## If the installation stops
The installer prints `ERROR:` followed by the reason. Common ones:
| Message | What to do |
| --- | --- |
| `unsupported operating system` or `unsupported architecture` | Firehose 1.0.1 runs on macOS and Linux, on x64 and arm64. Use a supported computer. |
| `musl-based Linux (Alpine and similar) is not supported` | Use a glibc-based Linux distribution. |
| `the license agreement must be accepted to install` | Run the command again and type `y`, or add `--accept-eula` after reading the agreement. |
| `no terminal to confirm the license agreement` | The installer could not ask you. Read the agreement at the path shown, then run it with `--accept-eula`. |
| `conflicting command(s) already on PATH` | Another program named `firehose` exists. Check what it is before re-running with `--force`. |
| `Firehose did not answer on port 4801` | Check the logs in `~/.firehose/logs`, then run `firehose status`. |
---
# Ask for a code walkthrough
Understand a small part of a project before changing it. Ask a focused question and check the answer against the code.
## Before you begin
Open a session in the repository you want to understand: select **New session** (the **+** at the top of the **Sessions** sidebar) and pick its project, or select an existing session in the sidebar. This example uses `greeting.mjs` from [your first session](/getting-started/first-session/); replace the filename when using another project.
**Starting state:** use the committed original `greeting.mjs`, before adding the fallback. Inputs are strings; blank strings produce `Hello, !`. This guide asks for an explanation without edits. If you already completed the change guide, the blank-string result is now `Hello, guest!`; do not reset useful work just to match this example.
## Use your own project
Choose one small function and an existing test that calls it. For example, in a fictional shop project you might choose `formatPrice` and a test for a zero price. Replace these names with files that actually exist:
```text
Find the function that formats a price and one existing test for it.
Name the exact files before explaining anything.
Explain its inputs and output using the zero-price case in that test.
State whether you read the expected value or actually ran the test.
Do not change files. Do not invent a test if none exists.
```
Compare the cited input and expected output with the test file. If there is no relevant test, ask for the evidence the agent used and mark the explanation as untested. For a test command, use the project README or its configured test script; ask before running a command that needs services or credentials.
If the answer claims “this returns $0.00” but the cited test expects “Free,” respond:
```text
The cited test expects "Free" for zero. Your answer says "$0.00".
Recheck the function and test. Explain the discrepancy with file references.
Do not edit either file to make your explanation appear correct.
```
**Expected result:** you can trace one concrete input through real code and distinguish a source-based explanation from a passing test run.
## Ask a specific question
Send:
```text
Explain greet in greeting.mjs for someone new to this project.
Describe its input and return value. Trace what happens for " Ada ".
Identify one edge case and point to the relevant code.
Do not change files.
```
The scope is small enough to check. For a larger project, begin with one user action, such as “trace what happens when a person submits the sign-in form,” and ask for the few files involved.
## Verify the explanation
Compare the cited file with the answer. In the sample, `trim()` removes surrounding whitespace and the template string adds the greeting prefix and an exclamation mark.
Run the example check from the quickstart if you want to confirm the output. If the answer names a file that does not exist, ask the agent to recheck the repository and give the actual location.
## Ask the next useful question
Try:
```text
What happens for a string containing only spaces?
Explain the current result and suggest a small improvement.
Wait for my next request before editing.
```
The current function produces `Hello, !` for spaces alone. That gives you a concrete behavior to discuss. When you’re ready, [make and review the improvement](/guides/make-a-change/).
---
# Finish and close a task
Check the result, hand off the changes, and close the session with a deliberate choice about its files.
## Before you begin
Select the intended session in the **Sessions** sidebar and check its project and branch on the prompt bar above the message box. An **Idle** session, shown on its sidebar row, may have finished its turn or need input. Read its last response before deciding the task is complete.
**Example starting state:** the greeting fallback and four test cases have been implemented in the task workspace. Changes may still be uncommitted. If the task is unfinished or checks fail, continue the same session rather than treating this checklist as an automatic close instruction.
## 1. Verify the work
1. Compare the result with your original request.
2. Select the **Diff** tab at the top of the session, then **Changes**. Open **Diff filters** (the **⋮** next to the search icon), and switch **Compare** between **All changes** and **Working changes** so you account for committed work and outstanding edits.
3. Run the relevant checks in the session’s workspace on the server. Record what passed and what remains untested.
4. Resolve important review findings or record why you are leaving them open.
**Expected result:** you can explain what changed and what evidence supports it. For the greeting example, that includes the blank-name fallback, unchanged nonblank behavior, and passing tests.
If something is missing, send a focused follow-up instead of closing the task.
## 2. Hand off the result
Follow your repository’s commit and pull-request requirements. If you are unsure of that process, ask its maintainer before publishing changes. You can ask the agent for a handoff without authorizing publication:
```text
Summarize the files changed, checks run, and any remaining concerns.
Identify changes that are not committed yet.
Do not commit, push, or create a pull request.
```
Closing a Firehose session does not itself commit, push, merge, or approve its changes. For a concrete path from a reviewed diff to a local commit and an explicit next-step decision, follow [Complete a browser task](/guides/project-workflow/#4-request-and-inspect-a-local-commit).
### Example handoff
Here is an illustrative handoff for the [completed reference example](/examples/hello-firehose-result/README.md). Replace its claims with your actual results:
```text
Requested: blank strings return "Hello, guest!"; other strings keep trimming.
Workspace: [full server path and branch]
Files: greeting.mjs; greeting.test.mjs
Check: node --test greeting.test.mjs
Result: 4 tests passed: plain name, padded name, empty string, spaces only.
Review: inspected Working changes for unrelated edits.
Remaining: changes are not committed; no pull request was created.
Limits: string inputs only; no browser UI or deployment was tested.
```
If a test failed or could not run, replace “4 tests passed” with that failure and the next action. For example: “Spaces-only input returns Hello, !. Ask the agent to choose the fallback after trimming and rerun the checks.” A handoff can report unfinished work; it should not hide it.
## 3. Choose what to keep
When you are ready to end the session: In the **Sessions** sidebar, select the session row's **⋮** (**Session options**), then **Close**. The **Close this session?** dialog shows the branch, pull-request information, and worktree path.
A session row's ⋮ menu, with Close at the bottom. Sample project and messages.
An unknown check is not confirmation that your work has been pushed.
For a worktree, the dialog may offer **Also delete the worktree**. It starts unchecked:
| Choice | What you request |
| --- | --- |
| Leave deletion unchecked and select **Close** | Close the session while retaining its worktree |
| Check **Also delete the worktree**, then **Close and delete** | Close the session and remove the worktree; read any subsequent branch-deletion decision separately |
| **Cancel** | Return without confirming the close |
Keep the worktree if you still need its files. Removing a worktree removes that checkout, including work you have not preserved elsewhere. Check the path carefully before choosing deletion.
### Find retained work later
Before closing, record the full workspace path and branch. The path appears under **Also delete the worktree** in the close dialog; you can also open **More actions** (the **⋮** at the right end of the workspace tabs), select **Session details**, and read **Directory**. If you leave deletion unchecked, the close handler retains the worktree. On the server, open that recorded directory and use `pwd`, `git status --short`, and `git branch --show-current` to confirm the files and branch are the ones you kept.
To continue in Firehose, select **New session** (the **+** at the top of the **Sessions** sidebar), choose the same project, select **Next: Choose a workspace**, then **Existing branch**. Search the recorded branch; the result should read **Open existing checkout · <path>** with your recorded path. This starts a session for the retained work; it does not promise restoration of the old conversation. If no result appears, give the saved path and branch to your operator. Do not create a replacement directory and assume it contains the old files.
## Check the outcome
Follow the close or cleanup notice. Cleanup can continue after the session closes; starting deletion is not proof it finished. Read any failure or branch-deletion prompt before taking another action.
Deletion may be unavailable because Firehose is running from that worktree, another agent is still working there, or the main repository could not be located. Read the stated reason. Ask the server operator for help when the server’s own checkout needs to move.
Stopping an active turn is separate: press Escape in the message box or select the red **Stop (interrupt)** button above it, or **Interrupt** in the session header's **⋮** menu on a phone. It does not undo edits or replace the handoff and cleanup steps above. See [session activity](/tools/chat/#read-the-session-signals) when you only need to change direction.
---
# Make and review a change
Improve the greeting example, check the result, and review the files before deciding what to do next.
## Before you begin
Complete the [first-session example](/getting-started/first-session/). The initial `greeting.mjs` returns `Hello, !` for a blank name. This task changes that behavior to `Hello, guest!`.
**Starting state:** `greeting.mjs` is committed and still returns `Hello, !` for empty or spaces-only strings. The input contract remains strings only. There should be no unrelated uncommitted edits. The task adds `greeting.test.mjs` and leaves the resulting change uncommitted for review.
For a separate branch and directory, [start a new worktree](/guides/workspaces/) named `greeting-blank-names`. Confirm that the session is using the intended workspace.
## 1. Describe the change
Send:
```text
Update greet in greeting.mjs to use "guest" when the trimmed name is empty.
Keep the existing output for nonblank names.
The input contract is strings only; do not add other input types.
Add a greeting.test.mjs file using Node's built-in test runner.
Cover "Ada", " Ada ", "", and " ".
Run node --test and report the result. Do not commit or push.
```
This gives the agent a small implementation target and a clear check. If it needs a decision, answer in the same session.
## 2. Check the behavior
The expected outputs are:
| Input | Expected output |
| --- | --- |
| `"Ada"` | `"Hello, Ada!"` |
| `" Ada "` | `"Hello, Ada!"` |
| `""` | `"Hello, guest!"` |
| `" "` | `"Hello, guest!"` |
Read the agent’s test report. To verify independently, use [the terminal location checks](/getting-started/files-and-terminal/#check-the-file) to open this session’s workspace on the server, then run:
```sh
node --test
```
The test run should pass and cover all four cases. The exact test names and implementation may differ. If the agent could not run the command, resolve the reported cause and run it before treating the result as verified.
### If a check fails
A fallback that checks the original name before trimming can still return `Hello, !` for spaces. If the test expects `Hello, guest!`, the run must fail. Send the failure back with the exact input:
```text
The spaces-only test fails: expected "Hello, guest!", got "Hello, !".
Check whether you choose the fallback before or after trimming.
Fix the function, keep the expected result, and rerun all four cases.
```
Do not accept a change that merely deletes the failing test. A passing run should cover both blank cases and both nonblank cases.
A [completed reference function](/examples/hello-firehose-result/greeting.mjs) and [four-case test file](/examples/hello-firehose-result/greeting.test.mjs) are available for comparison. They are one checked implementation, not guaranteed agent output. Keep them separate from the original sample until you have attempted the task.
## 3. Review the files
Select the **Diff** tab at the top of the session, then **Changes**. Open **Diff filters** (the **⋮** next to the search icon), and under **Compare** choose **Working changes**. You should see the greeting change and a new test file. If the test file is missing, turn on **Untracked files** in the same **Diff filters** panel.
Look for unrelated edits, deleted behavior, or tests that only check the easy case. If needed, send a precise follow-up:
```text
The test file does not cover spaces-only input yet.
Add that case and rerun node --test. Keep the change scoped to this task.
```
## 4. Decide whether it is ready
You’re done with this walkthrough when the expected outputs are covered, the checks pass, and you understand the diff. Follow [Finish and close a task](/guides/finish-a-task/) to hand off the result and choose what to keep. [Smart Review](/tools/smart-review/) is optional: it starts from committed branch changes and needs a usable review base. The standalone practice repository has no remote by default, so Diff and the test checks are sufficient for this walkthrough.
---
# Use Firehose on mobile web
Check an agent’s progress and respond from your phone while its work stays on your Firehose server.
## Connect your phone
[Set up Tailscale](/getting-started/connect/#set-up-tailscale) and turn on [tailnet access](/getting-started/connect/#turn-on-tailnet-access) on your Firehose computer first. Then install the Tailscale app on your phone and sign in with the same account that owns the computer, and open the address Firehose showed you, such as `https://your-computer.your-tailnet.ts.net:4801`.
You can also open agents.okthink.ai, enter the full `.ts.net` name in **Server address**, and select **Save and connect**. Only the computer's owner can connect either way.
`localhost` on a phone refers to the phone itself. It will not reach Firehose running on your computer.
## Find and read a session
Use the session list, the first screen on a phone, to open the task you want to follow. To go back to the list, select the back arrow in the session header. Check the project and branch in the session header before sending anything.
Read the latest response and visible activity. The workspace tabs can scroll on a narrow screen, so move along the tab row to find views such as **Diff** and **Ask me**.
## Find a control on a narrow screen
- Swipe horizontally along the workspace tab row to reach **Ask me** or **Diff**.
- In **Diff**, select **Changes**, then the **⋮** button labeled **Diff filters** next to the search icon to reach **Compare**. A narrower layout may show one pane at a time; select **Back to file list** to return.
- Tap the branch name in the prompt bar to refresh Git status. On desktop, hovering over it shows “Click to refresh Git status”; phones do not require hovering.
- Use the session header’s three-dot menu for **Interrupt**. Do not confuse it with the documentation site’s navigation menu.
For the practice file, use the [operator-assisted file route](/getting-started/files-and-terminal/#ask-your-operator-to-place-the-file) if you do not have a terminal connection to the server.
## Respond or redirect
Use the message box for a follow-up, or open the **Ask me** tab to answer a structured questionnaire. Check the selected session before submitting answers.
If you need to stop the current turn, open the session header’s menu and select **Interrupt**. Look for **Stopping...** on the session's row in the session list, then check the last response when the session settles. If the state does not change and progress is unreadable, report it rather than repeatedly interrupting.
## Return later
Keep the server machine awake and connected while its agents work. Reloading a hosted browser tab retains that tab’s server address. Another tab can choose its own server.
For a saved stopping point and the differences between a browser disconnect, server restart, and closed session, see [Leave and return to work](/guides/return-to-work/).
If progress does not resume after reconnecting, read any connection or delivery notice and check the server’s reachability. Use [troubleshooting](/troubleshooting/common-problems/) to separate a connection problem from an agent waiting for input.
---
# Coordinate several sessions
Run independent tasks in clearly identified workspaces and keep responsibility for each result visible.
## Before you begin
Split the work into outcomes that can be checked separately. Two tasks that must change the same function are easier to sequence unless you have agreed how their edits will be combined.
For example, in a fictional shop project, one session could improve checkout error text while another documents an unrelated account setting. These are task examples, not Firehose features.
## Give each task a home
1. For each independent task, select **New session** (the **+** at the top of the **Sessions** sidebar), pick the project, select **Next: Choose a workspace**, and choose **New worktree**. Enter a name in **Task or branch name**. Choose descriptive names such as `checkout-errors` and `account-help`.
2. Record each session's project, full workspace path, branch, intended files, and acceptance check. To find the path, open **More actions** (the **⋮** at the right end of the workspace tabs), select **Session details**, and read **Directory**.
3. [Prepare each workspace](/guides/prepare-project/) before asking for implementation.
4. Send a focused task to the matching session, including what it should leave for the other task.
Worktrees separate working files. They still share repository history and can use the same databases, ports, or external services. Agree on those resources before starting parallel commands. Do not assume a second worktree includes another session's uncommitted changes.
## Check in without losing your place
Select a session in the **Sessions** sidebar, then confirm its project and branch on the prompt bar above the message box before replying. Its status, such as **Idle**, appears on its row in the sidebar. Read the latest response alongside its activity signal. **Idle** can mean a completed turn or a request for input; it does not establish completion.
Keep a small task list with three fields: latest result, decision needed, and next check. Resolve ordinary questions in that session's conversation. For questionnaires in the **Ask me** tab, verify the receiving session before submission; sessions in the same worktree share the unfinished questionnaire.
## If sessions share a directory
Changes made by one session are visible to the other. Assign one editing task at a time when overlapping work is possible. Ask the other session to wait or limit its task to an explanation. That request communicates responsibility; it is not a file lock.
If edits collide, pause the affected work, compare the files with the recorded starting states, and use [targeted recovery](/guides/recover-changes/). Do not ask both agents to repair the same conflict simultaneously.
## Review and combine results
Inspect each workspace's diff and checks separately. Record the commit and remaining concerns for each task. Ask the project maintainer which order to integrate them, then rerun relevant checks after integration. Passing independently does not establish that the combined result works.
This procedure uses ordinary sessions and worktrees. Dedicated coordination tools such as Team Chat still need a verified user walkthrough before these guides can explain their complete behavior.
---
# Prepare a project for an agent
Give the agent a workspace where you can reproduce the problem and check its work. Finish this preparation before asking it to implement a change.
## Before you begin
Choose a repository already on the server and confirm you can use its development setup. For a first exercise, use the [greeting example](/getting-started/first-session/). For a browser task with no dependencies, try the [greeting form walkthrough](/guides/project-workflow/).
## 1. Establish the starting point
Select **New session** (the **+** at the top of the **Sessions** sidebar), pick the project, and choose a [workspace](/guides/workspaces/). In the session's **Terminal** tab or another [server terminal](/tools/terminal/), run:
```sh
pwd
git branch --show-current
git status --short
```
Record the full path, branch, and existing edits in your task notes. If the branch name is blank or the directory is unexpected, confirm the checkout with the project maintainer before continuing. Existing edits are part of your starting state; do not discard them to make the output empty.
## 2. Find the project's instructions
Ask in the message box at the bottom of the session:
```text
Read this project's README and applicable contributor and agent instructions.
Identify the package manager, required runtime, setup command, test command,
and how to run the app. Cite the files that specify each one.
List required configuration names and services without printing secret values.
Report existing working changes. Do not install, edit, or start services yet.
```
Check the cited files. A missing setup instruction is a question for the maintainer, not permission to guess a package manager or install unrelated tools.
## 3. Confirm dependencies and configuration
Agree on the commands and services needed for this task, then run the documented setup in this workspace. Use the project's prescribed runtime and lockfile. Have the operator supply required configuration through the project's usual process.
A new worktree does not establish that dependencies, ignored configuration files, or external services are ready. Firehose has a specific copy helper for `apps/expo/.env`; it is not general provisioning for every project's configuration. Check the files your project actually needs. Never paste secret values into a setup report.
If another task already uses a service, agree on whether to share it or use a separate instance. Record the application address and port so you can distinguish this workspace's app from another task's server.
## 4. Run a baseline check
Run the documented relevant tests before editing. For a visible bug, open the app and reproduce the behavior too. Record the exact command, outcome, and manual steps.
For example, a fictional project's baseline might be: “Tests pass; submitting a spaces-only name displays `Hello, !`.” If tests already fail, preserve the failure output and decide whether fixing it belongs to this task. Do not later attribute that failure to the agent without comparing the baseline.
**Ready to proceed:** you know the workspace, existing edits, setup requirements, verification command, and observable behavior to change. Continue with [a complete browser task](/guides/project-workflow/), or adapt that sequence to your application.
---
# Complete a browser task
Fix a small greeting form and finish with a local commit you have inspected. This example adds a visible browser check to the earlier function exercise.
## Before you begin
Use a separate disposable Git project, such as `hello-form`, with no unrelated edits. Download the [original index.html](/examples/hello-form/index.html) and save it as `index.html` in that server workspace using the [file-access guide](/getting-started/files-and-terminal/). The location checks apply; its greeting command is specific to the earlier JavaScript example.
This form is a standalone HTML file. It needs a browser with JavaScript enabled, with no dependency installation, backend, credentials, or development server. For your own application, complete [project preparation](/guides/prepare-project/) and use its documented startup and check commands instead.
In a terminal in the project folder, such as the session's **Terminal** tab, record the baseline:
```sh
git add index.html
git commit -m "Add greeting form baseline"
```
Start a Firehose session in this project's **Current checkout**: select **New session**, pick `hello-form`, select **Next: Choose a workspace**, then **Current checkout**. The standalone example can be completed with Diff; it has no remote review base by default.
## 1. Reproduce the problem
Open that saved `index.html` in a browser on the server computer. If you use another computer, copy this exact workspace file back to it and open the copy. With SSH, adapt this download command to your operator's account and path:
```sh
scp YOUR_USER@YOUR_SERVER:projects/hello-form/index.html ./index.html
```
This replaces a local file named `index.html`. Check its destination before copying. On a phone without file access, ask the operator to perform the browser check and report the input and output.
Enter `Ada` in **Name**, then select **Show greeting**. Expect `Hello, Ada!`. Submit an empty value and then three spaces: both currently display `Hello, !`.
## 2. Request the change
```text
In index.html, make empty and spaces-only names display "Hello, guest!".
Keep trimming nonblank names. Preserve the label, submit button, and result area.
Keep the app standalone, with no dependencies or backend.
Check "Ada", " Ada ", "", and " ". Report what you actually tested.
Do not commit or push yet.
```
If the agent cannot run a browser, have it say so. A code inspection alone does not complete the next step.
## 3. Check the visible result
Reload the changed workspace file. If you copied it to another computer, copy it again first; refreshing an old copy cannot show the new implementation.
| Name entered | Result after submitting |
| --- | --- |
| `Ada` | `Hello, Ada!` |
| ` Ada ` | `Hello, Ada!` |
| Empty | `Hello, guest!` |
| Three spaces | `Hello, guest!` |
Also focus **Name**, type a name, and press Enter. Confirm submission still works. Select the **Diff** tab, then **Changes**. Open **Diff filters** (the **⋮** next to the search icon) and under **Compare** choose **Working changes**. Inspect `index.html` for unrelated edits. A [completed reference](/examples/hello-form-result/index.html) is available after your attempt; it is one possible result, not guaranteed agent output.
If the blank case still fails, report the exact input and visible output. Ask for a targeted correction while keeping all four expectations. For unwanted edits, use [recovery](/guides/recover-changes/).
## 4. Request and inspect a local commit
When the checks pass and the diff is correct, send:
```text
Commit only the greeting fallback change in index.html.
Preserve any unrelated files and staged changes.
If index.html contains unrelated edits, stop and identify them before committing.
Do not push, create a pull request, or merge.
Report the commit hash and checks completed.
```
This message authorizes a local commit. Review the agent's response, then independently inspect it in a terminal in the project folder:
```sh
git log -1 --oneline
git show --stat HEAD
git show HEAD -- index.html
git status --short
```
Confirm the reported hash matches, the commit contains the intended change, and outstanding edits are explained. For this clean practice project, no working changes should remain. In Firehose, the **Commits** view beside **Changes** in the **Diff** tab also lets you inspect a commit's files.
## 5. Decide the next step
The practice task ends here with a reviewed local commit. Follow [Finish and close a task](/guides/finish-a-task/) to retain or clean up its workspace.
In a shared project, follow the maintainer's review process. Ask the agent to prepare a pull-request title, description, test results, destination repository, and target branch for review first. Explicitly request pushing or opening the pull request when you intend those actions. Afterward, verify the actual pull request and its checks in your Git hosting service; merging is a separate decision.
---
# Recover from an unwanted change
Correct an agent's unwanted edits without treating every change in the workspace as disposable.
## 1. Stop additional work and identify the workspace
If the agent is still making the wrong change, press Escape in the message box, or select the red stop button, **Stop (interrupt)**, beside the activity indicator above the message box. On mobile, open the session header's **⋮** menu and select **Interrupt**. Check the last response once the session settles. Interrupting does not undo commands or file edits already completed.
Confirm the full workspace path and branch: open **More actions** (the **⋮** at the right end of the workspace tabs), select **Session details**, and read **Directory**. If another session shares the directory, coordinate a pause in its editing too.
## 2. Separate the changes
Select the **Diff** tab at the top of the session, then **Changes**. Open **Diff filters** (the **⋮** next to the search icon), and under **Compare** choose **Working changes**. Compare the files with the starting state recorded before the task. For work already committed, select **Commits** beside **Changes**.
Ask the agent to explain which edits it made, but verify its answer against the diff and your notes. If an affected file contained earlier uncommitted work and you cannot distinguish it, preserve the current files and ask the owner to review the relevant lines before requesting a reversal. Do not use a repository-wide reset or clean command to resolve that uncertainty.
## 3. Request a targeted correction
Suppose the greeting task changed the function correctly but also changed unrelated README text. If that README edit is confirmed to belong to this task, send:
```text
Keep the blank-name fix and all four tests.
Reverse only the README paragraph edit you made during this task.
Preserve the README edits that existed before the task.
Show the affected lines before changing them if their ownership is unclear.
Rerun the greeting checks. Do not commit or push.
```
Review the resulting diff and rerun the checks. Success means both the unwanted edit is corrected and the intended behavior still works.
If the bad change is already committed, ask for a proposed corrective commit. Review its patch before authorizing it. In shared history, follow the maintainer's process rather than asking the agent to rewrite published commits.
## 4. Account for effects outside Git
A diff cannot reverse a command that changed a database, contacted a service, or published something. Record the command and reported result, stop further related actions, and have the resource owner identify the recovery procedure. A clean working tree does not establish that those effects were reversed.
If you deleted the worktree, the retained-work instructions no longer apply to that directory. Ask the maintainer to locate preserved commits or backups; these guides cannot promise recovery of deleted uncommitted files.
Finish with a short record of the correction, checks, and anything still unresolved. Continue the task only when that remaining scope is clear.
---
# Leave and return to work
Leave a clear stopping point and check the actual state when you return. Your browser connection, agent process, conversation, and repository files have separate lifetimes.
## Before leaving
Record the server, project, full workspace path, branch, latest completed check, and next action. Let a critical command finish and record its result, or interrupt the task deliberately. Save important instructions in the task's handoff rather than relying on an unsent browser draft.
Keep the server awake and connected if you expect agents to work while you are away. Closing a browser tab is not the Firehose session's **Close** action, which is in the session row's **⋮** (**Session options**) menu in the **Sessions** sidebar.
| Event | What to check when you return |
| --- | --- |
| Browser reload or connection loss | Reconnect to the same server, select the session in the **Sessions** sidebar, and read its latest response and activity |
| Browser tab closed | Reopen the app with the intended server details; confirm the selected workspace rather than assuming a new tab selected it |
| Server restart or sleep | Confirm reachability first, then check whether the session accepts input and what work actually completed |
| Agent exited | Inspect retained files and the last readable response before continuing in a new session |
| Session closed with worktree retained | Use the recorded path and branch to [find retained work](/guides/finish-a-task/#find-retained-work-later) |
| Terminal disconnected | Check whether that terminal and command still exist; detached terminals can be cleaned up |
Firehose has restoration paths for managed sessions using saved session information and history. That does not establish that every provider, in-flight command, or restart will resume identically. Full restart outcomes still need release walkthroughs; check the visible state rather than treating restored history as proof that the agent is running.
## Resume from evidence
1. Confirm the server, path, and branch against your notes.
2. Read the latest conversation and inspect the **Diff** tab. **Transcript unavailable**, shown on the session's sidebar row, means the conversation cannot be read reliably, not that no work happened.
3. Check whether your last request already received a result before sending it again.
4. If input is available, give the next specific instruction. Otherwise, create a new session in the retained workspace and provide a short handoff.
```text
Continue the greeting fallback task in this workspace.
First inspect the current diff and test output; do not repeat completed edits.
Last known result: [actual result]. Still needed: [next check or correction].
Preserve existing work and report any mismatch with this handoff.
```
If the directory or history is missing, give the operator your saved path, branch, and last successful step. A new directory with the same name does not restore old work.
---
# Choose a workspace
Put each session in the directory and branch intended for its task. Firehose offers three workspace choices during session creation.
A Git **worktree** is a separate checkout of a repository. It gives a task its own directory and branch while sharing the repository’s Git history.
## Choose the right option
| Option | When to use it | What to check |
| --- | --- | --- |
| **Current checkout** | You want the agent to use the project directory already on disk | Its branch and any existing uncommitted work |
| **New worktree** | You want a separate directory and branch for a new task | A clear, unused task or branch name |
| **Existing branch** | You want to continue work on a branch that already exists | The selected result’s branch and checkout information |
## Start a separate task
1. Select **New session**, the **+** button at the top right of the **Sessions** sidebar, and pick the project at **Pick a project**.
2. Select **Next: Choose a workspace**.
3. Select the **New worktree** card, which reads “Branch off *main* in its own directory” with your project's base branch.
4. Enter a **Task or branch name**, such as `greeting-blank-names`.
5. Select **Next: Choose agent**.
6. Review the agent, model, and autonomy settings, then select **Start session**.
The three workspace choices. Sample project and messages.
The task name chooses the workspace; send the actual instructions in chat after the session starts. See [make and review a change](/guides/make-a-change/) for an example.
## Continue an existing branch
In **New session**, pick the project, select **Next: Choose a workspace**, then select the **Existing branch** card. Search in **Search local and remote branches**. The filters are **Checked out**, **Local or remote**, and **All**.
Each result says what it will do: **Open existing checkout · <path>** reuses a directory where the branch is already checked out, and **Create worktree from <ref>** makes a new one. Read it before selecting the result, then choose the agent and start the session.
## Keep parallel work understandable
Use descriptive names and check the branch when switching sessions. Sessions in the same directory share files, so changes from one can affect another.
A worktree separates directories; it does not promise isolation for services, databases, or other resources outside the repository. Include any task-specific setup in the request you give the agent. [Prepare each project workspace](/guides/prepare-project/) before implementation, then use [Coordinate several sessions](/guides/parallel-sessions/) to assign work and review the results.
---
# Put your agents to work.
Give a coding agent a task. Follow the conversation, answer its questions, and review the changes—all in one Firehose workspace.
[Install Firehose →](/getting-started/install/)
**What you need:** a Mac or Linux computer, a Firehose subscription, and an agent tool such as Claude Code or Codex. These guides describe Firehose 1.0.1.
## Find your next step
- **[Set up Firehose](/getting-started/install/)**
Install and activate it, then open it on your computer or your phone.
- **[Start a session](/getting-started/first-session/)**
Choose a workspace, send a useful request, and check the answer.
- **[Review the result](/tools/diff/)**
Read the changed lines and decide what needs another pass.
## Know where the work happens
1. **Your browser**
Send requests and read results, on your computer or your phone.
2. **Your computer**
Firehose and your agent sessions run on the computer where you installed it. It needs to be on for you to connect.
3. **Your project folder**
Files and commands belong to the session's folder. Save example files and run terminal checks there.
A **provider** is the agent system you choose when starting a session, such as Claude or Codex. Providers have their own setup, model access, and permission controls.
## Build confidence, one task at a time
[Understand unfamiliar code](/guides/explain-code/) before asking for a [small change](/guides/make-a-change/). Use [Questions](/tools/questions/) to clarify decisions, [Smart Review](/tools/smart-review/) for another assessment, and the [finish-task checklist](/guides/finish-a-task/) before closing a session.
For ongoing project work, [prepare the environment](/guides/prepare-project/), [complete a browser task](/guides/project-workflow/), or [coordinate several sessions](/guides/parallel-sessions/). Learn how to [recover unwanted edits](/guides/recover-changes/) and [return to a task later](/guides/return-to-work/).
If something doesn’t match what you expect, [find your symptom](/troubleshooting/common-problems/). The [tool guide](/tools/overview/) and [glossary](/reference/glossary/) are here when you need them.
---
# Choose agent permissions
Decide what a new agent session may do before you start it. Permissions affect file changes and commands; they are separate from which model you choose. See [data and access](/reference/data-and-access/) for where task material is used and what cleanup actions affect.
## Before you begin
Select **New session** (the **+** at the top of the **Sessions** sidebar), pick a project and workspace, and at **Choose an agent**, select your provider and model. The wizard initializes autonomy as enabled. Check its current value each time you launch.
Your provider must already be usable on the server. Seeing its name in Firehose does not install it, authenticate your account, or grant model access.
## Claude
**--dangerously-skip-permissions** passes Claude’s permission-bypass option when enabled. Turning it off launches without that option and leaves approval behavior to Claude’s normal configuration.
Do not assume turning it off makes every operation require approval. The provider’s configuration also matters.
## Codex
Check Full Auto at the bottom of the provider controls before starting. This capture shows it enabled. Model choices vary by installation.
| Full Auto | What Firehose requests |
| --- | --- |
| Enabled | Commands can run without approval requests and without the provider’s workspace restrictions. The agent may access files beyond the selected project, subject to the server account’s permissions. |
| Disabled | The provider limits file writes to its allowed workspace area. Its **on-request** policy lets it ask for permission when needed; this is not a prompt before every command. Firehose also requests network access to be disabled for the turn. |
The **workspace sandbox** is the provider’s set of restrictions on where commands can write and what they can access. Network restrictions can matter for tasks such as downloading dependencies; read the actual provider message rather than assuming every failure is a permission problem.
These controls change the provider’s permissions, not the operating system permissions of the account running it. A prompt asking for a read-only explanation does not itself switch the sandbox or approval policy.
## Antigravity
Antigravity separates editing mode from tool approval:
- **Default** uses the provider’s default mode.
- **Accept edits** applies file changes automatically, while **Full Auto** separately controls tool approvals.
- **Plan only** prevents edits.
- **Sandbox terminal commands** adds terminal restrictions; it does not grant automatic approval.
Review both the mode and **Full Auto**. Choosing an editing mode is not a substitute for checking command permissions.
## Other providers
Grok, Kimi, and Pi display **Full Auto**. Their provider-specific approval behavior is not covered by this guide yet. Ask the person configuring that provider to confirm its behavior before using it for a task that depends on approval boundaries.
## Respond to an approval request
Approval is a separate decision from answering a question about what to build. Approval cards appear directly above the message box. Read the requested action, target files or directory, reason, and the scope of each offered response before selecting it.
### Codex example
A command approval card can be titled **Approve command execution**. It can show **Command**, **Directory**, and **Reason**. For a provider request offering these choices:
| Response | Meaning |
| --- | --- |
| **Accept** | Allow this request once |
| **Accept For Session** | Allow matching requests for the rest of this session |
| **Decline** | Reject this request |
These options come from the provider; not every request offers all three. A generic approval card can instead offer **Approve** and **Deny**. Read the actual option descriptions.
Suppose a request asks to run a command in a directory outside your intended project. Choose the rejection option if that scope is wrong, then explain the correct directory in Chat. If the command and scope match your task and you want to allow only this request, choose the one-time option when offered. Selecting a button sends the decision immediately.
After a successful submission, the pending card is removed. Check the next response or command result: accepting a request permits an attempt; it does not establish that the command succeeded. If **Failed to submit approval decision** appears, the submission failed and the card remains available. Check the connection and the current request before trying again.
This example explains the implemented card and request contract; it is not a recorded live command execution.
### Claude example
A **Permission requested** card shows Claude’s actual parsed options. Selecting an available option submits it immediately; a **Persists this session** badge identifies wording about a lasting choice. If an explanation field is available, type your response there and select **Submit**.
If the card says the permission can only be answered in the terminal, select **Open Claude Code** and answer the current prompt there. Do not look for an invented universal Allow button. Check the response afterward before repeating your decision.
## Check your choice
Before **Start session**, confirm the project, workspace, provider, model, and permission controls. Start with a small task whose results you can inspect. Use a disposable practice project when learning unfamiliar provider settings.
If the provider asks for approval during work, read the requested action and its scope before answering. For questions about the task itself, respond in [Chat](/tools/chat/) or [Questions](/tools/questions/).
---
# Understand data and access
Decide what material to give an agent by understanding the browser, server workspace, and provider involved in your task.
## Where your task material goes
| Material | Relevant location or use |
| --- | --- |
| Requests and agent responses | Sent through your Firehose server to the selected agent integration and displayed in Chat |
| Project files and command results | Read or produced in the server workspace; relevant contents can become input to the selected provider |
| Attachments | Copied into `.agent-manager-attachments` in the workspace; delivered as native input or a file reference depending on the provider |
| Conversation history | Firehose restoration uses saved session information, history, and provider transcript sources; storage details vary by provider |
| Browser workspace state | Includes saved interface state such as drafts and open files, scoped to the connected server |
The server location of your repository does not establish that its contents stay only on that machine. Confirm the selected provider's data handling and your organization's rules with the account owner before supplying restricted material. This page describes Firehose's source-verified data paths; it does not certify provider retention terms or a complete inventory of logs and backups.
## Who can act on the workspace
Confirm with the operator who can access your server and connected application. Do not assume a separate conversation or worktree creates a separate user-access boundary. Sessions sharing a directory can affect the same files.
Agent permissions control the provider's allowed actions. The in-app terminal is a server shell with the rights of the server account. Review its access warning before enabling it. Keep credentials out of prompts, attachments, screenshots, and public diagnostic reports; use the project's established configuration process instead.
## What each cleanup action means
| Action | What it affects |
| --- | --- |
| Clear context (**NN% context** below the message box → **Clear**) | Requests a conversation reset for subsequent work; it does not undo files or establish erasure of provider records |
| Close a session, retaining the checkout (the session row's **⋮** → **Close**) | Stops that session while preserving the checkout, including staged attachment files |
| Delete the worktree (**Also delete the worktree** in the close dialog) | Removes that checkout and its local attachment directory; it does not establish deletion of copies elsewhere |
| Forget this server (**Settings** → **Server connection**) | Clears that server's saved client workspace state; it is not a request to delete the server repository or provider account data |
| Add attachment staging to `.gitignore` | Changes Git's ignore rules; it neither deletes the files nor makes them inaccessible to the agent |
For a deletion or retention requirement, ask the operator and provider account owner to identify the relevant server storage, provider records, and backups. Use their verified procedure. A disappearing panel or empty chat is not evidence of complete data erasure.
---
# Glossary
Look up an unfamiliar term, then return to the step where you encountered it.
## One task, several turns
Suppose you ask an agent to fix blank greetings. That is your **task**. You choose a **provider**, such as Codex, and a **model**, the AI system it uses to produce responses. Your **session** keeps the conversation with that agent together.
The agent explains the change in one **turn**. You ask it to add a missing test; it works again in another turn. Both turns belong to the same session and task.
**Context** is the conversation and other information available to the agent when it responds. If you clear conversation context, do not assume earlier chat instructions will carry into the next request. Put essential constraints in the new request. Clearing context is separate from changing files; see [Smart Review’s context choice](/tools/smart-review/#choose-whether-to-clear-context).
## Agent and conversation terms
| Term | Meaning |
| --- | --- |
| Agent | The coding assistant that reads files, responds, and can take actions allowed by its settings |
| Provider | The agent system you choose to handle requests, such as Claude or Codex |
| Model | The AI system selected within a provider to generate responses; the choices depend on your installation |
| Session | Your ongoing conversation with one agent, associated with a project workspace |
| Task | The result you want, such as fixing blank greetings; it may take several requests |
| Turn | A period of agent work following input, ending when it returns control or stops |
| Context | Information available for the next response, including the conversation so far and relevant material the agent has read |
| Approval | A decision about whether the agent may perform a requested action |
| Questionnaire | A set of task questions answered in the **Ask me** tab; submitting them tells the agent to continue the requested work |
## Files, Git, and connections
| Term | Meaning |
| --- | --- |
| Project | The repository you choose to work on |
| Repository | Files together with their Git history |
| Workspace | The directory and branch selected for a session |
| Checkout | Working files for a Git branch or revision |
| Worktree | An additional checkout with its own directory, sharing the repository’s Git history |
| Branch | A named line of changes recorded in Git |
| Diff | Differences between two versions of files |
| Commit | A recorded snapshot of changes in Git |
| Staged | Changes selected for the next Git commit |
| Unstaged | Edits to tracked files that have not been selected for the next commit |
| Untracked | A file Git is not tracking yet |
| Server | The machine running Firehose and your agent sessions |
| Tailnet | The Tailscale network used to connect your devices |
| SSH | A separate terminal login to another machine; it requires its own access |
See [What you can do](/what-you-can-do/) for tasks and [Find the right tool](/tools/overview/) for controls.
---
# Choose a provider and check usage
Choose an agent setup that can perform your task and identify where to check availability and usage.
## Start with a working account
Have the operator confirm which provider is installed and authenticated on the server, which account it uses, and which models that account can access. Choosing a name in **New session → Choose an agent** does not complete those steps.
Choose an available model, check [permissions](/reference/agent-permissions/), and try a small request whose result you can inspect. If startup fails, report the provider, model, exact error, and last successful step. Authentication and account-access problems need the operator's provider setup checked; an unavailable model needs a supported selection.
## Understand the differences that affect a task
| Choice | Practical consequence |
| --- | --- |
| Provider | Changes the agent integration, permission controls, and available capabilities |
| Model | Selects the AI system used within that provider; available choices depend on the installation and account |
| Reasoning effort, when offered | A provider/model setting, separate from permission to edit or run commands |
| Interview depth in Questions | Requests a number of questions; it is separate from model reasoning effort |
For Claude, the guides cover the live terminal and its permission cards. Codex exposes **Full Auto** and provider-supported reasoning choices. Antigravity separates editing mode and tool approval. See the permission reference for exact consequences.
Attachment handling also differs: an agent may receive native content or a staged file reference. Confirm it can use the material rather than assuming every provider accepts every format. These guides do not establish a quality or speed ranking among models; compare a small representative task using your own acceptance checks.
## Read usage without guessing a bill
When provider limit data is available, the status bar along the bottom of the Firehose window shows provider entries with reported window labels and percentages. Claude, Codex, and Antigravity have detail menus; select the provider entry to inspect the available information. Not every provider or account supplies the same data. Missing or unknown usage is not zero usage.
The **NN% context** button below the message box describes how much information occupies the model's context window. Its **Context window** details, where available, are separate from account limits and financial charges.
For actual charges, subscription terms, and account spending controls, use the account's billing information with its owner. This guide does not verify a universal Firehose budget cap or automatic stop at a chosen cost. If your task requires a spending boundary, have the account owner confirm where it is enforced before running the task.
If a request reports a limit, save the message, identify the provider/account with the operator, and check any reported reset or remaining allowance. Repeatedly starting sessions does not establish that an account limit has changed.
---
# Projects, agents, and settings
Find the settings that control which projects you see and where a new session runs.
To open Settings, select the gear icon labeled **Settings** at the bottom of the icon rail on the far left. On a phone, go back to the session list first; the icon rail appears only there. Settings opens in the sidebar.
## Project directories
Open **Settings** and scroll to **Project directories**, near the bottom of the panel. Enter a comma-separated list of directories to scan, such as:
```text
~/dev, ~/projects
```
These paths refer to the machine running Firehose. `~` is supported. Keep existing entries you still need, then select **Save** and look for **Saved**.
If a project is missing, check its location on the server and the configured parent directory before trying [project troubleshooting](/troubleshooting/common-problems/#my-project-isnt-listed).
## Agent and model
The **Choose an agent** step, the last step after you select **New session** (the **+** at the top of the **Sessions** sidebar), lets you select the agent, model, and autonomy for that session.
Use [provider and usage guidance](/reference/providers-and-usage/) to confirm account readiness and interpret usage indicators. Use the models listed by your installation. The selected provider’s models may need time to load, and a model marked unavailable can prevent the session from starting. Read its explanation and select an available option.
The wizard initializes autonomy as enabled. Read [Choose agent permissions](/reference/agent-permissions/) for the meanings of Claude’s **--dangerously-skip-permissions**, Codex’s **Full Auto**, and Antigravity’s separate editing and terminal controls. Check the displayed value before starting.
## Server connection
For the hosted app, use **Settings → Server connection** to manage the selected server. Switching lets you return to a previous server’s stored workspace. **Forget this server** deletes that server’s stored workspace after confirmation.
See [Connect to Firehose](/getting-started/connect/) for address requirements and tab behavior.
## Open from your other devices
**Settings → Open from your other devices** turns tailnet access on and off with **Allow my other devices**. When it is on, it shows the address to open from your phone or another computer, with a **Copy** button. Only the Tailscale account that owns this computer can connect. If it says **Restart Firehose to apply this.**, select **Restart now**. See [Connect to Firehose](/getting-started/connect/#open-firehose-from-your-other-devices).
## Tailscale HTTPS
**Settings → Tailscale HTTPS** shows the status of the HTTPS certificate used for remote access. Use it to investigate a missing, expired, or mismatched certificate. Restart Firehose after certificate installation or renewal.
You don’t need to change these settings to complete the everyday session guides on the Firehose computer itself.
---
# Give an agent a file or screenshot
Add a screenshot or file to a request so the agent can use concrete evidence when investigating a task.
## Before you begin
Select the intended session and check its workspace. Use material appropriate for that project's agent and provider. A screenshot should show the relevant state clearly; remove unrelated private information before uploading.
Attaching a file copies it to the server workspace. It does not replace an application file with the same name. To install the tutorial's source file, follow [file placement](/getting-started/files-and-terminal/) instead.
## Attach and explain the evidence
1. Select **Add attachment**, the **+** button at the left of the message box's lower row.
2. Choose **Photos** or **Files** when that menu is offered. Some configurations open the file picker directly.
3. Select the file. Check its preview or filename and upload status. If it shows progress, let that finish before sending. For an error, read the message and use **Retry** when offered.
4. Add a request that explains what to inspect, then press Enter or select the round arrow button to send.
For example:
```text
This screenshot shows the greeting form after submitting three spaces.
The result is "Hello, !"; I expect "Hello, guest!".
Find the code responsible and explain the smallest correction before editing.
Treat the screenshot as evidence of the visible result, not proof of its cause.
```
**Expected result:** the attachment uploads and the message reaches the selected session. Read the response to confirm the agent could use it. Provider handling varies: some accept native image/text input, while others receive a reference to the staged file. An uploaded preview alone does not establish that the agent understood the contents.
## Understand the staging notice
**Prompt attachments are staged in this project** explains the `.agent-manager-attachments` directory created inside the workspace. **Got it** acknowledges the notice. **Add to .gitignore** changes the project's `.gitignore` so Git ignores that directory; review that edit before committing.
This staging directory holds prompt material. Keep it out of application commits unless you deliberately intend to include that material. Ignoring it in Git does not delete it or prevent an agent from reading it.
Removing an attachment from the composer requests removal of its staged copy, but the server can retain a copy needed by a queued or active delivery. Closing a session while retaining the checkout also retains staged attachments. Deleting the worktree removes that directory with the checkout. See [data and access](/reference/data-and-access/) for the limits of these actions.
## If the file cannot be used
Read any size, upload, or format error and choose a smaller relevant file if necessary. If delivery says the attachment is unavailable, attach it again, then follow [delivery troubleshooting](/troubleshooting/common-problems/#my-message-didnt-reach-the-agent) before resending the request.
If the agent cannot read the format, provide an appropriate text excerpt or a clearer screenshot and ask it to identify what remains unreadable. Do not treat an invented description as successful attachment use.
---
# Chat and follow-ups
Give your agent a clear task, follow its response, and keep the conversation moving when more information is needed.
## Send a request
1. Select the intended session in the **Sessions** sidebar.
2. Check its project and branch on the prompt bar above the message box.
3. Type your request in the message box at the bottom of the session, which shows `Type / for commands...` when empty.
4. Press Enter, or select the round arrow button at the right of the message box.
5. Follow the response and activity in the conversation. On a phone, it is in the **Chat** tab.
A useful request names the result, relevant files, constraints, and how the agent should check its work. For example:
```text
In greeting.mjs, make greet return "Hello, guest!" for blank names.
Keep trimming whitespace around nonblank names.
Add checks for an empty string and spaces only.
Run the checks and tell me what changed. Do not commit or push.
```
## Follow the work
The conversation shows responses and tool activity as the agent works. Read the latest messages before intervening: it may be running a command, asking a question, or explaining why it could not continue.
A session that stops showing activity may have finished its turn or need help. Read the response to tell which. A turn ending does not mean every part of your task succeeded.
## Read the session signals
| What you see | What to check next |
| --- | --- |
| Animated activity and the current action | Follow the work in Chat; a long command may need time |
| **Idle** | Read the latest response: the turn may be finished or the agent may need information |
| **Stopping...** | Firehose has received your stop action; wait for the state to settle before sending another interruption |
| **Closing...** | A session close is in progress; follow the close or cleanup notice |
| **Transcript unavailable** | Firehose cannot read the conversation reliably; do not infer that the agent has finished |
Queueing and connection problems are separate from these activity signals. Read delivery notices and check connectivity if updates stop. An idle indicator does not verify that tests passed or the task is complete.
## Send a follow-up
When the agent has finished, send the next request in the same chat. Refer to the specific result you want to refine:
```text
Explain why the spaces-only check passes.
Point to the line that chooses the fallback name.
```
During an active turn, **Queue after current turn**, the list icon to the left of the send button, lets you hold a follow-up until that turn ends. Use it for work that should come afterward. Read any delivery notice before retrying a message.
## Change direction
If the task needs to stop, press Escape in the message box, or select the red stop button, **Stop (interrupt)**, beside the activity indicator above the message box. On mobile, **Interrupt** is in the session header’s **⋮** menu. Look for **Stopping...**, then check the latest response when the session settles. Explain what should happen next once it is ready for input.
Interruption does not undo file changes or commands that already ran. Use [targeted recovery](/guides/recover-changes/) if edits need correction. [Review the diff](/tools/diff/) before asking the agent to continue with a different approach.
## Handle a question or delivery problem
To provide concrete evidence, [attach a screenshot or file](/tools/attachments/) and explain what it shows. For an independent command check, use [a separate terminal shell](/tools/terminal/).
Answer ordinary questions in chat. For a structured clarification request, use the [**Ask me** tab](/tools/questions/).
If a send fails, read the delivery notice and check whether the message already appears in the conversation before sending it again. See [message troubleshooting](/troubleshooting/common-problems/#my-message-didnt-reach-the-agent).
---
# Review changes with Diff
Inspect the changes in your session’s repository before accepting an agent’s result. Start by choosing the question you want the diff to answer.
## Before you begin
Select the intended session and check its project and branch. A diff shows differences between versions; it does not establish that a feature works. Ask for tests or a manual check as well.
## 1. Choose a comparison
Select the **Diff** tab at the top of the session. In the Diff sidebar, select **Changes**, then **Diff filters**, the **⋮** button next to the search icon. If the Diff sidebar is hidden, select **Show Diff sidebar**. Under **Compare**, choose:
The Diff sidebar: Changes and Commits, with Diff filters as the ⋮ at the right of the toolbar. Sample project and messages.
| Compare option | Question it answers |
| --- | --- |
| **All changes** | What differs across this branch and its current working files? |
| **Working changes** | What is still outside commits, including new untracked files? |
| **Branch changes** | What has been recorded in this branch’s commits since its common ancestor with the base? |
Staged, unstaged, and untracked are different kinds of working changes. Staged changes are prepared for a commit; unstaged edits are not. Untracked files have not been added to Git yet.
### Understand the base
The base is the branch Firehose compares your branch with. Firehose uses a configured base when supplied; otherwise it tries the remote’s default branch, then common main/master branch names. The branch comparison starts at the **common ancestor**, where the two histories meet.
```text
A ── ● ── B ── C base branch
│
└── D ── E your branch + working edits
```
In this example, **Branch changes** compares the shared point with E. **All changes** also includes your working edits. It does not compare E directly with C. If no base can be found, Firehose can compare from an empty repository state, so the result may include every file.
## 2. Read a changed file
Select a file to inspect added and removed lines. Read them alongside the original request. Select **Code**, beside **Diff** above the file, for the contents represented by that comparison; deleted files have no new contents to display.
**Expected result:** you can identify the specific behavior changed, such as choosing `guest` when the trimmed name is blank.
Images, binary files, and files exceeding display limits may have a different preview or a limitation message. A missing text preview does not mean the file is unchanged.
## 3. Check commits and working edits separately
Suppose your task branch already contains a committed greeting fix, and you then edit the test file without committing it:
- **Branch changes** shows the committed fix relative to the common ancestor.
- **Working changes** shows the test edit still outside a commit.
- **All changes** gives you the combined view.
Select **Commits**, beside **Changes** in the Diff sidebar, to browse branch commits. Select a commit, then a file, to inspect that commit’s changes. Select **Back to file list** or **Back to commits** to return.
## If a file is missing
Check the selected comparison first. Then clear any search, status, or annotation filter excluding that file. A committed fix will not appear in **Working changes** once no further edits remain. A new test file may still be untracked.
If the repository changes while you read, click or tap the branch name on the prompt bar to refresh Git status. The file list can show **Refreshing…** while it updates. If loading fails and **Retry** appears, select it and check for files or an error before deciding. See [diff troubleshooting](/troubleshooting/common-problems/#i-dont-see-the-expected-file-changes) if the result still differs from what you expect.
## Turn the review into a follow-up
For the greeting example, ask:
```text
The diff adds a fallback name. Show the checks for an empty string,
spaces only, and a nonblank name. Report which checks you ran.
```
For committed branch work with a usable review base, use [Smart Review](/tools/smart-review/) for another assessment. For the standalone practice repository, [finish the task](/guides/finish-a-task/) when the changes and checks meet your request.
---
# Find the right tool
Find the control you need for your next step. Firehose’s controls organize the work; the commands your agent can run also depend on its provider and permissions.
## New session: start work
**You provide:** a project, workspace, provider, model, and permission choices. **You get:** a session in the selected directory on your server.
Have a configured provider and a project ready. [Start your first session](/getting-started/first-session/) or [choose a workspace](/guides/workspaces/) for a separate task.
## Chat: give direction
**You provide:** a task, a follow-up, or an answer. **You get:** the agent’s response and activity.
Check the selected project and branch before sending. [Use Chat](/tools/chat/) to follow the work and understand delivery notices.
## Questions: clarify a decision
**You provide:** a topic through **tools → Ask me questions** on the prompt bar, an interview depth, and your answers in the **Ask me** tab. **You get:** a combined answer message for the selected session in that worktree.
Use a session where Chat input is available and check for an unfinished questionnaire first. [Answer clarifying questions](/tools/questions/).
## Diff: inspect what changed
**You choose:** a comparison and a file. **You get:** changed lines, file contents, or commit details.
Select the **Diff** tab at the top of a session associated with a Git repository. [Review with Diff](/tools/diff/) to distinguish working edits from branch commits.
## Smart Review: investigate and act
**You provide:** branch changes, optional focus areas, and decisions on findings. **You get:** an assessment and follow-up work after you dispatch your choices with **Act**.
Start one from **tools → Smart review** on the prompt bar, and read it in the **Smart Review** tab. It needs committed branch changes, an available agent, and a usable review base such as `origin/main`. For the standalone greeting sample, use Diff and its checks. [Use Smart Review](/tools/smart-review/), then [finish the task](/guides/finish-a-task/).
## Terminal: run an independent check
**You provide:** a server directory and a command. **You get:** live command output in a server shell, in the **Terminal** tab at the top of a session. [Run a terminal check](/tools/terminal/) and distinguish a separate shell from the agent's live terminal.
## Attachments: supply concrete evidence
**You provide:** a file or screenshot and a request explaining its relevance. **You get:** a staged copy available to the selected agent. [Attach evidence](/tools/attachments/) and check upload, delivery, and the response separately.
## Commit: record reviewed work
The prompt bar's **commit** button, shown when the branch has uncommitted changes, opens a list grouped as **Staged**, **Unstaged**, and **Untracked**. Selecting **Commit** requests agent work; the list is not a per-file selection interface. For mixed edits, give explicit scope in Chat and verify the resulting commit. Follow [the local commit walkthrough](/guides/project-workflow/#4-request-and-inspect-a-local-commit).
Team Chat, X-Ray, Timeline, voice, and issue workflows still need complete verified walkthroughs. Their presence in an installation does not mean this guide covers their prerequisites or outcomes.
---
# Ask clarifying questions
Use a questionnaire when a task needs decisions before implementation. Your answers become a message that tells the selected agent to continue the requested work.
## Before you begin
Open the intended session and confirm its project and branch. Use a session where chat input is available. If you can only read old history or the session cannot accept input, start a new session in the intended workspace before requesting questions.
**Example starting state:** the original `greeting.mjs` is committed, inputs are strings, and blank strings return `Hello, !`. Use this optional step before the change guide. If you already added the fallback, choose a new decision instead of asking questions whose answers are now in the code.
## 1. Request a questionnaire
1. On the prompt bar above the message box, select **tools**, then **Ask me questions**.
2. In **Ask me clarifying questions**, enter the topic below.
3. Choose an **Interview depth**, then select **Ask questions**.
The tools menu on the prompt bar. Smart review appears only on a branch other than main or master. Sample project.
```text
Improve greeting.mjs for empty and spaces-only strings.
Keep the input contract limited to strings.
Ask about fallback text and checks before editing.
After I submit answers, implement the agreed change and tests.
Do not commit or push.
```
If **ask me questions** shows a count, it opens the unfinished questionnaire instead of starting another. Only one questionnaire can be unfinished per worktree.
## 2. Choose how much to explore
| Interview depth | Requested questions | When it fits |
| --- | --- | --- |
| **Quick** | 3 | A small change with a few unresolved choices |
| **Standard** | 5 | Several related decisions |
| **Thorough** | 10 | Broad or ambiguous work with many consequences |
The agent is instructed to ask fewer if additional questions would be filler. Depth requests a question count; it does not change the model’s reasoning-effort setting or guarantee a response time.
For the greeting task, a short interview might cover fallback text, whitespace, and tests. A longer interview for an entire greeting screen might also cover localization, validation messages, and accessibility. These are illustrative scopes, not captured questionnaires or promises about the generated wording. Do not expand the small function task merely to fill ten questions.
## 3. Answer when it is your turn
Select the **Ask me** tab at the top of the session; it reads **Ask me (N)** when questions are waiting. **Queued** means the request is waiting behind the current turn. During generation, the panel says the agent is reading code and writing questions. **Your turn** indicates that answers are ready to complete. The panel also shows how many questions were requested and written.
Read each question and its option descriptions. Answer required questions; add text where the question offers a field. **Show captured context**, when present, displays the background saved with the request.
For example, a question could ask: “What should a blank name produce?” You might choose “Use guest” and add “Keep trimming nonblank strings; keep the inputs limited to strings.” This is a sample answer, not exact product-generated text.
## 4. Submit to the intended session
1. Check the selected session in the same worktree. Sessions sharing that worktree see the same unfinished questionnaire.
2. Confirm your answers and any remaining task constraints.
3. Select **Submit to** followed by the provider's name, such as **Submit to Claude Code** or **Submit to Codex**, when the set is ready and required answers are complete.
Submission tells the receiving agent to summarize its understanding and begin the requested work. There is no additional confirmation step in that instruction. If you only want a proposal, state that limited task in the original topic and your answers before submitting.
**Expected result:** after confirmed delivery, the questionnaire disappears. Open the receiving session’s conversation and look for `[Smart User Questions — answers]`. That message includes the original topic, captured background when available, questions, chosen options, and written answers.
In the example, check that the delivered answer includes `guest`, trimming, and the strings-only constraint. Then compare the agent’s continuation with those decisions. The message’s exact formatting includes question identifiers; you do not need to copy those identifiers to continue the task.
## If delivery or generation fails
A failed answer delivery leaves the questionnaire available. Read the error, confirm that the receiving session accepts input, and use [delivery troubleshooting](/troubleshooting/common-problems/#my-message-didnt-reach-the-agent) before retrying **Submit to** the provider.
**Failed** or **Cancelled** sets stay visible until you choose **Remove**. Removing a set deletes its questions and saved answers. Preserve information you still need first. If the set says **Expired**, its original session has changed; read the explanation rather than expecting the old request to continue.
For a small clarification, simply [send a chat message](/tools/chat/). After this example’s answers are delivered, use [the change guide’s checks](/guides/make-a-change/#2-check-the-behavior) to verify the work; do not send its implementation prompt again if the agent already began the same task.
---
# Use Smart Review
Get an agent’s assessment of branch changes, choose how to handle each finding, and send those decisions back for action.
## Before you begin
Select a session with branch changes you want reviewed. Confirm its project and branch. Review actions can request code changes or create a GitHub issue, so choose the session that should receive that work.
**Starting state:** use a task branch with committed changes and an available review base. Smart Review instructs the agent to start from the committed branch diff and then read full changed files. Uncommitted work alone is not that branch diff; inspect it in the **Diff** tab with **Compare** set to **Working changes**.
The default review base is `origin/main`, with `origin/master` used when it is found instead. Unlike Diff’s broader fallback behavior, a fresh practice repository with no remote references does not automatically get a usable Smart Review base. If neither exists, ask the project maintainer how reviews are configured. Do not add or publish a remote just to finish the greeting exercise.
For a configured project, follow its commit policy to record the changes before starting this branch review. A commit alone does not push them. The example below assumes a finding about spaces-only coverage; a real review can produce different findings or none.
## 1. Start a review
On the prompt bar above the message box, select **tools**, then **Smart review**, then **run review**. **Smart review** appears only on a branch other than `main` or `master`. In **Areas of Focus**, describe the concerns that matter, then select **Start Review**. Follow progress in the **Smart Review** tab at the top of the session, which says **No active review** until one exists. For the greeting example:
```text
Check blank-name handling and whether the tests cover spaces-only input.
Look for unintended changes to greetings for nonblank names.
```
**Expected result:** the review begins analyzing changes; findings may appear as it works. An empty panel alone does not establish a successful review. See [empty and unsuccessful reviews](#if-the-review-is-empty-or-unsuccessful) below.
## 2. Evaluate a finding
Select a finding and read **What**, **In practice**, **Impact**, and **Fix**. Check its file location against [Diff](/tools/diff/). A proposed fix still needs your judgment.
Use **Add comment**, then **Save note** to preserve relevant context. For example: “The input contract is strings only. Please investigate blank strings within that contract.”
## 3. Choose what should happen
Selecting an action records your choice. Selecting the same action again clears it. The choice alone does not dispatch the work.
| Action | What you ask for when you dispatch it |
| --- | --- |
| **Fix** | Implement a fix for the finding |
| **Explain** | Read the relevant code and expand the explanation |
| **Refine** | Investigate the finding and improve its assessment |
| **Rewrite** | Clarify the finding’s wording while preserving its meaning; this is not a code rewrite |
| **Issue** | Create a GitHub issue for follow-up; the agent needs the relevant GitHub access |
| **Won’t fix** | Close the finding during Act without sending it to an agent |
**Example:** if the reviewer finds missing spaces-only coverage, choose **Fix**. If you don’t yet understand why the case matters, choose **Explain** first. An explanation or refinement may leave a decision for you to make afterward.
### Choose between Explain, Refine, and Rewrite
Use the same hypothetical finding: “Spaces-only names may not use the fallback.”
- Choose **Explain** when you need to understand the finding: “Trace the spaces-only input through the function and explain the result.” Check the added explanation against the code.
- Choose **Refine** when you question its accuracy: “The function already trims before choosing the fallback. Recheck whether this defect exists.” The requested investigation may correct or invalidate the finding; it does not ask for a code fix.
- Choose **Rewrite** when you accept the finding but its wording is confusing: “Explain the same problem in plain language, preserving the conclusion.” This requests clearer finding text, not a different implementation.
After the response, decide whether a **Fix** is still needed. A clearer explanation is not itself a code change.
## 4. Dispatch your decisions
1. Confirm the selected session and your choices across the findings.
2. Use **Act** in the review header, which appears once a finding has an action chosen and shows a count such as **Act (1 fix)**, to dispatch eligible items. Its menu offers **Act on items** and **Clear context and act**.
3. Choose **Act on items** to send the work without requesting a context clear. **Clear context and act** requests a context reset before delivery; include necessary task constraints in finding comments if you use it.
4. Follow the review’s progress and the session’s conversation.
**Expected result:** eligible findings are queued for work after delivery succeeds. Items already queued, working, or done are not dispatched again by the same action. Pending **Won’t fix** items close without agent work.
If dispatch fails, inspect the error and current finding states before retrying. Some Won’t fix decisions may already have closed even if other work could not be sent. Do not treat a selected action or a queued item as proof that a fix succeeded.
### Choose whether to clear context
**Context** includes the conversation available to the agent for its next response. **Act on items** sends the review work without requesting a clear. Use it when earlier discussion still matters.
**Clear context and act** first requests a fresh conversation context. For managed agents, Firehose clears the conversation history after the provider clear succeeds; some providers require a replacement session. The Claude terminal path sends `/clear` before review work. This does not undo repository edits or delete the saved review findings.
The new review request is built from the actionable findings and their comments. Put necessary constraints there before clearing, such as “Strings only; keep existing nonblank greetings.” Do not assume unrelated earlier chat messages will accompany the new request. Nor should you treat this control as a guarantee that provider-side transcript records are erased.
If the clear fails, inspect the error before retrying: the normal path does not send the review work when clearing fails. Confirm the active session if a replacement was created.
## 5. Verify the result
After work completes, inspect the updated diff and run the relevant checks. For the greeting example, check both spaces-only and nonblank inputs.
Use **Check status** on a finding to request another assessment after a fix. Read its response alongside your own checks. Use **All findings** to return to the list; **Show all findings** removes a severity restriction when that control is available.
### Follow one finding through to evidence
For a finding about a missing spaces-only test, choose **Fix**, add the strings-only constraint, and use **Act on items**. After the work returns, open `greeting.test.mjs` in **Diff** and confirm it tests `" "` against `"Hello, guest!"`. Run `node --test` in that workspace and check all four greeting cases. Then request **Check status** and read the assessment. This is an illustrative sequence; inspect the actual result instead of expecting fixed agent wording.
## If the review is empty or unsuccessful
- **Analyzing branch changes…** means analysis is still in progress. Check the selected session’s Chat for activity or a reported problem.
- **No … findings** can be a severity filter result. Select **Show all findings** before deciding the review is empty.
- A failed review can show its error in the empty panel. Keep that error and check the session before starting another review.
- A completed review with no findings means none were reported. It does not establish that tests passed or every defect was ruled out. Verify the diff and checks anyway.
Finish with the [task handoff and cleanup checklist](/guides/finish-a-task/).
---
# Run a check in the terminal
Run a project command yourself and inspect its output in Firehose's **Terminal** tab or terminal drawer.
## Before you begin
Know the session's full server workspace path and the command you intend to run. Terminal access must be available on your installation. The terminal runs as the account running the server; an agent's approval settings do not limit commands you type into this shell.
## Open a shell in the right directory
1. Select the session whose folder you want, then select the **Terminal** tab at the top of the session.
2. The first time, **Live shell access** explains what the shell can do. Select **I understand** only when you intend to use that computer's shell.
3. The shell opens in the session's own folder. Run `pwd` and `git branch --show-current` to check the directory and branch before other commands.
### Open more shells in the terminal drawer
For extra shells or another directory, use the terminal drawer:
1. On web with a keyboard, press Control plus backtick, or Command plus backtick on macOS. If **Live shell access** appears, select **I understand — enable terminal**.
2. Select the arrow beside the plus button, labeled **New terminal (choose kind + cwd)**.
3. Set **Kind** to **Shell**. Choose the intended directory under **Cwd**, which means working directory. Add a useful **Label**, then select **Open**.
The plus button labeled **New shell** opens a shell directly; do not assume its initial directory matches the selected agent's worktree. If the directory you need is unavailable, use the [external terminal route](/getting-started/files-and-terminal/).
## Run and interpret a check
For the completed greeting example, run:
```sh
node --test greeting.test.mjs
```
Expect four passing cases. A missing file usually means you need to check the workspace or finish creating the tests. A failed test needs its input, expected result, and actual result sent back to the agent. For other projects, use their documented check command.
**Command** opens a terminal for a specified command. **Tmux** attaches to an existing terminal session. **Open Claude Code**, a button on some approval cards and delivery notices, and the **Claude Code** tab let you interact with the agent's terminal. Input there can answer or interrupt the agent; use a separate **Shell** for independent checks.
## Hide, close, and reconnect
**Close terminal drawer** hides the drawer. The close button on an individual terminal tab requests termination of that terminal; it is a different action. Keep output you need before closing it.
Disconnected terminals can be cleaned up by the server, so use the project's normal process management for work that must survive your departure. See [Leave and return](/guides/return-to-work/) before relying on a terminal command to keep running.
If **Terminal needs authorization** appears, read the error and select **Retry** after checking your connection. If it still fails, check that Firehose is running with `firehose status`. Use the manual **Authorize** field only with a terminal key from a source you trust; keep that key out of Chat and public reports.
---
# Get unstuck
Find the symptom you recognize and work through its checks in order. Keep the exact error text so you can report what failed.
## Firehose shows Activate Firehose
A new installation shows **Activate Firehose** until you activate it with a subscription. Nothing else works until then. Follow [Activate Firehose](/getting-started/activate/).
| What you see | What to do |
| --- | --- |
| **The code expired before it was approved.** | Codes last one hour. Select **Try again** and approve the new code. |
| **The activation was not approved.** | Select **Try again**. If it repeats, check your subscription at `agents.okthink.ai/account`. |
| **This account has no active subscription.** on the activation page | Subscribe on that page, then select **Approve this code** again. |
| **Reactivate Firehose** | The license could not be renewed. Read the reason shown, then select **Activate this server**. |
| **License agreement** | Read the agreement and select **I accept**. |
## I can’t connect to my server
On the Firehose computer:
1. Run `firehose status` to check that Firehose is running.
2. Open `http://localhost:4801`, or the port you chose with `--port`.
3. If it does not load, check the logs in `~/.firehose/logs`.
From your phone or another computer:
1. Check that the Firehose computer is awake and connected to Tailscale.
2. Open Tailscale on your device and check that you are signed in to the same Tailscale account that owns the Firehose computer.
3. Run `firehose tailnet status` on the Firehose computer. It shows `On:` with the address to open, or explains what is missing.
4. Open that exact address, including `https://` and the port.
| What you see | What to do |
| --- | --- |
| `This Firehose only answers its owner over the tailnet.` | You are signed in to Tailscale with a different account than the computer's owner. Sign in with the owner's account. Other people cannot connect to your Firehose. |
| **Enter the server address without a port. Port 4801 is added automatically.** | Remove the port from the hosted app's form. If you installed on another port, open the address shown under **Open from your other devices** in **Settings** directly instead of using agents.okthink.ai. |
| **Enter the full Tailscale MagicDNS hostname ending in .ts.net** | Use your computer's full Tailscale name, such as `your-computer.your-tailnet.ts.net`. Short names and IP addresses do not work in the hosted app. |
| `Tailscale only lets its operator publish services on this machine.` when running `firehose tailnet on` | Run `sudo tailscale set --operator=$USER` once, as the message says, then run `firehose tailnet on` again. |
| `HTTPS and Serve must be turned on for your tailnet first` | Follow the link in the message, or turn them on in the Tailscale admin console. Then run `firehose tailnet on` again. |
| **Restart Firehose to apply this.** in Settings | Select **Restart now**. |
If a version warning says the server is outdated, run `firehose update` on the Firehose computer. If it says the client is outdated, reload the app. These warnings are advisory; the warning alone does not refuse a connection.
Return to [Connect to Firehose](/getting-started/connect/) once the check passes.
## My project isn’t listed
1. Check that the repository exists on the server, not only on your browser device.
2. Open **Settings** (the gear icon at the bottom of the icon rail on the far left) and find **Project directories**. The parent directory containing the repository should be in the comma-separated list.
3. Preserve other entries, add the missing parent if needed, and select **Save**. Look for **Saved**.
4. Select **New session** (the **+** at the top of the **Sessions** sidebar) again and find the project at **Pick a project**.
If refresh reports an error, record it and check the server connection. If you need a new repository, use [New git project](/getting-started/first-session/#1-prepare-a-practice-project).
## Creating a project fails
If the error says the name already exists, select that existing project or choose a different name. Firehose does not overwrite an existing directory through Create.
If no project directories are configured, add a parent in **Settings → Project directories**, save it, and retry. **Location** must be one of those configured roots.
If the project was created without an initial commit, configure your normal Git identity in a terminal on the server, then commit the generated README. The repository still exists; you do not need to create it again.
## Start session is unavailable or fails
### The button says Loading models
While **Loading models** is visible, the selected provider’s list is still being requested. When it finishes, check for model choices or an unavailable-model explanation. Another provider’s slow discovery should not block this selection. If you cannot get a list, send the operator the provider name, displayed message, and whether other providers load. There is no universal wait time that proves failure.
### The selected model is unavailable
Read the explanation beside the model and choose an available option. The start button should become available once the project, workspace, and model are ready. Selecting a provider does not install or authenticate it.
### The workspace is incomplete or launch reports an error
For a new worktree, select **New worktree** at **Choose a workspace** and enter a **Task or branch name**. If the branch already exists, use **Existing branch** or choose a different name for new work.
After **Start session**, read the launch error. If it concerns installation, authentication, or model access, give the provider, model, and error text to the server operator. Ask the operator to confirm a successful launch with that provider/model on the server, then retry **Start session**. Success means the session opens in the intended workspace. If it still fails, include the new error and the operator’s last successful check in your report.
## My message didn’t reach the agent
1. Read the delivery notice and confirm the selected session.
2. Check the conversation for your message before resending.
3. If you chose **Queue after current turn**, wait for that turn to finish.
4. If delivery failed because an attachment is unavailable, [attach the file again](/tools/attachments/) before resending.
**Delivery could not be confirmed** means Firehose cannot establish whether the message arrived. Follow the notice’s terminal-opening control and check whether the message is still in the input box or already in the conversation. If you cannot check, ask the operator rather than repeatedly sending a potentially duplicated request.
If the notice reports that the agent exited or restarted, check whether the selected session still accepts input. If not, open a new session in the intended workspace and explain the unfinished task there. If it reports rejected or partial input, use the terminal-opening control to inspect that input before retrying. A network reconnection does not prove an earlier message was delivered.
### Example: delivery could not be confirmed
Suppose you sent “Run the greeting tests,” then saw **Delivery could not be confirmed**. This is an illustrative incident, not a guarantee of a particular provider response.
1. Look for that request and a response in the selected conversation. If a test result is already present, do not send the request again.
2. For a Claude session, select **Open Claude Code** when offered. If the request remains unsent in its input box, complete or correct that existing input there; do not also send a second copy from Firehose.
3. If the message is absent and you can establish it was not sent, resend it once. If you cannot determine the outcome, ask the operator to inspect it, including the notice text and task name.
4. Check the actual test output after delivery. A disappeared notice alone is not evidence that tests ran.
## The agent looks inactive
Read the latest response alongside the [session signals](/tools/chat/#read-the-session-signals). **Idle** is not proof the task succeeded. Answer an ordinary question in the message box, or use the **Ask me** tab for a questionnaire.
For **Stopping...**, check whether it changes to **Idle** and whether the latest response acknowledges interruption. If it remains unchanged and you cannot read progress, report that state instead of sending repeated interrupts. For **Transcript unavailable**, check the server connection and share the status with the operator if it persists. Repeated interruption does not repair unavailable conversation data.
## Questions are still waiting or won’t submit
A clarification request waits for the current turn to finish before delivery. Once questions appear, the set can still be generating. Look for **Your turn**, then complete the required answers before selecting **Submit to** the provider, such as **Submit to Codex**. **Queued** and the generation message describe earlier stages; see [Questions](/tools/questions/#3-answer-when-it-is-your-turn).
Only one unfinished questionnaire is allowed per worktree. Check the **Ask me** tab in the existing session before requesting another. If answer delivery fails, confirm the selected session accepts input and follow the delivery checks above before retrying the submit button. A failed delivery leaves the set available.
## I don’t see the expected file changes
1. Check the selected session’s project and branch.
2. Select the **Diff** tab, then **Changes**, then **Diff filters** (the **⋮** next to the search icon). Under **Compare**, select **All changes** for the broad comparison, **Working changes** for uncommitted edits, or **Branch changes** for branch commits.
3. Clear search, status, and annotation filters that could exclude the file. A new file may still be untracked.
4. Click or tap the branch name on the prompt bar to refresh Git status. Check for **Refreshing…**, then the updated list. If **Retry** appears after a loading error, select it once and read the resulting list or error.
A committed change no longer appears in Working changes unless it has further edits. If a file shows a size or format limitation, read that message; a missing text preview does not establish that the file is unchanged.
## The agent changed the wrong thing
Use [Recover from an unwanted change](/guides/recover-changes/) to stop additional edits, distinguish them from existing work, and request a targeted correction. If the changes belong to a session you left earlier, [check the saved workspace and latest result](/guides/return-to-work/) before restarting the task.
## I need to report a problem
Record the steps, expected result, actual result, exact error, browser, and whether you used desktop or mobile web. Remove credentials and private paths before sharing.
For server version information, open `http://localhost:4801/api/status` on the Firehose computer, using your port if you changed it. The JSON response includes `serverVersion` and `protocolVersion`; copy only those fields into the report. If this request fails, report that failure rather than guessing a version. This is the Firehose server address, not this documentation site or the hosted app’s address.
Send the report through your existing support channel. For a confusing instruction, see [documentation feedback](/feedback/).
---
# What you can do
Choose a workflow that matches the result you want, then use the linked guide to complete it.
## Understand a project
Ask an agent to explain a function, trace a user action through the code, or identify the files involved in a feature. Give it a specific question and request file references so you can check the answer.
Try: “Find where the greeting text is created. Explain how whitespace is handled and show the relevant file.” Follow the [code walkthrough guide](/guides/explain-code/).
## Make a focused change
Start a session in the intended directory, describe the expected behavior, and ask for relevant checks. Use a new worktree when you want a separate directory and branch for the task: in **New session**, choose **New worktree** at the **Choose a workspace** step. See [Choose a workspace](/guides/workspaces/).
Try: “Make blank names display Hello, guest! Keep the existing behavior for nonblank names.” Follow [make and review a change](/guides/make-a-change/).
## Work in an application
[Prepare the project](/guides/prepare-project/) by checking setup and existing failures. Then [complete a browser task](/guides/project-workflow/) from reproducing a visible problem through inspecting a local commit. Adapt the same sequence to your app's commands and acceptance checks.
## Clarify a task before starting
Select **tools** on the prompt bar above the message box, then **Ask me questions**, to have an agent inspect the project and prepare a questionnaire. Answer it in the **Ask me** tab at the top of the session, then send the answers to the session that should do the work. See [clarifying questions](/tools/questions/).
## Follow several sessions
Use the sidebar to move between projects and sessions. Read each conversation’s latest response and activity before deciding whether to answer, redirect, or review. [Coordinate several sessions](/guides/parallel-sessions/) explains how to divide work, respond to the right agent, and combine results.
## Review the result
Use the **Diff** tab at the top of a session to inspect changed files and commits. Use the **Smart Review** tab for agent-generated findings, then investigate the findings and verify any fixes. A completed response alone does not establish that the code is correct.
## Check in from another device
Turn on tailnet access to open Firehose from your phone or another computer over Tailscale. Only you can connect. Read progress and answer the agent from your phone using the [mobile web guide](/guides/mobile/).
Available models and provider options depend on your server’s configuration. Start with [the tools overview](/tools/overview/) to find the controls for each workflow.
---